When you’re working with spreadsheets, one of the most commonly performed tasks is applying formulas to your tables. This is also one of the most time-consuming operations, especially when dealing with large files. For instance, if you’re entering the formula in each cell one by one, it could take forever until you get your desired results on all the cells in a column.
Having said that, Excel veterans make use of unique ways to cut down this time to just a few seconds, no matter how big the spreadsheet is. This is done by applying a formula to an entire column in Excel. All you need to do is manually apply the formula to one cell, and you can fill the rest of the cells below it within seconds. The best part is that there are multiple options to go about this, so if you’re interested, read on to learn how to apply Excel formula to entire column.
Option 1. Apply Formula to Entire Column With Dragging AutoFill Handle
In this method, we’ll be using the Fill Handle to automatically get the results for all the cells below the one where you manually applied the formula. Here’s what you need to do:
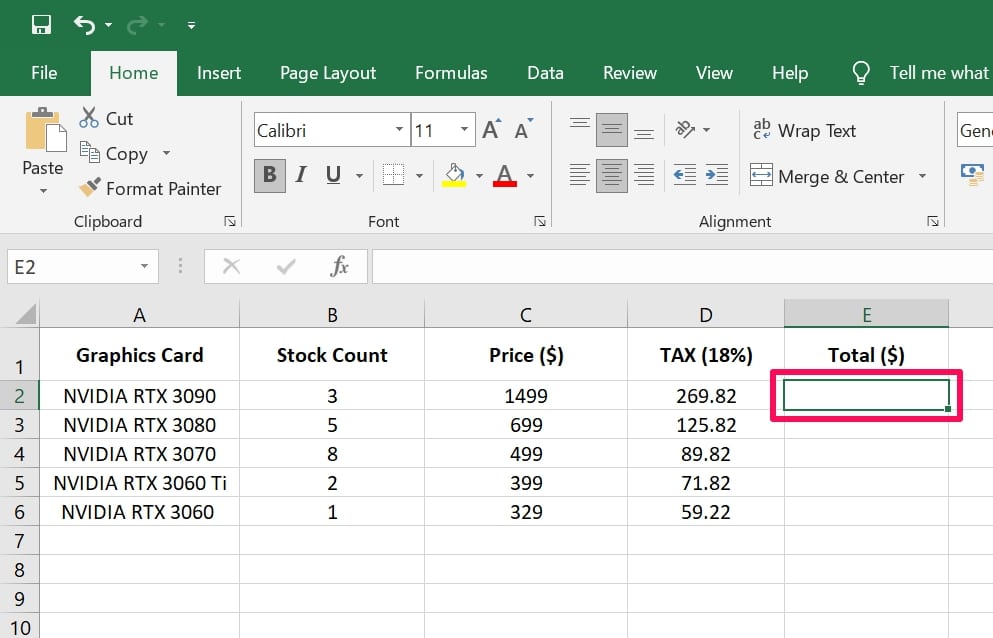
Step 1. First, you’ll need to manually apply the formula to the first cell in the column. If you’re not sure how to do this, click on the cell to select it.
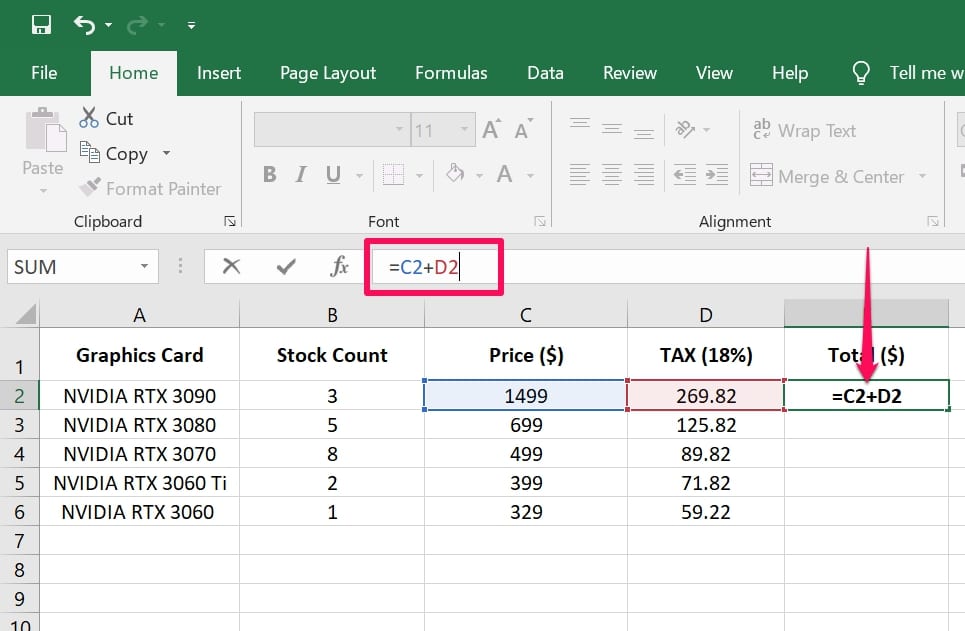
Step 2. Type the formula in the formula bar. You can select the function that you want to use by clicking on ‘fx.’ You don’t need to enter the values in the cell. All you need to do is type in the cell name, similar to what’s shown below.
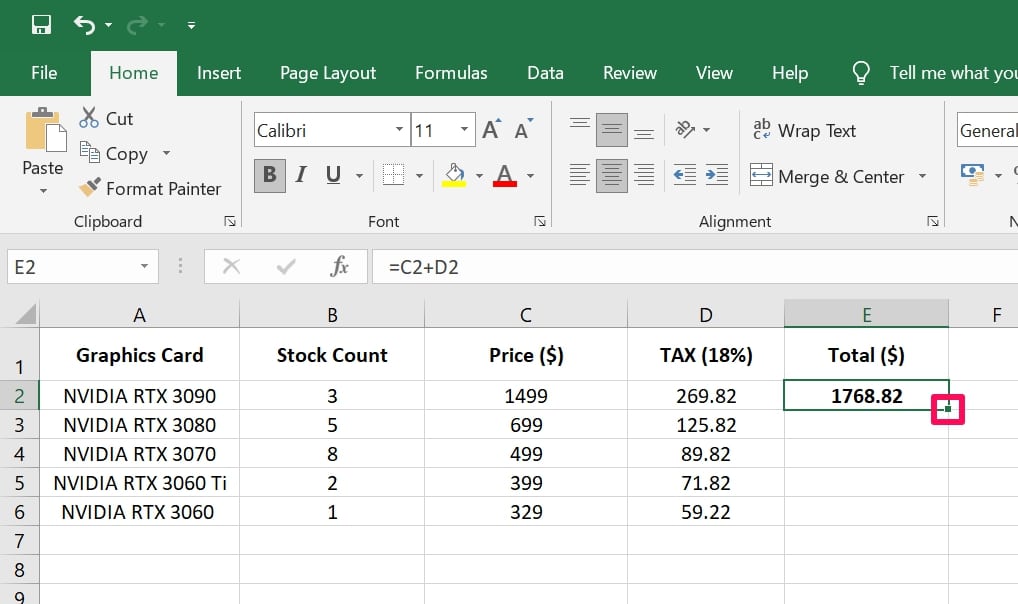
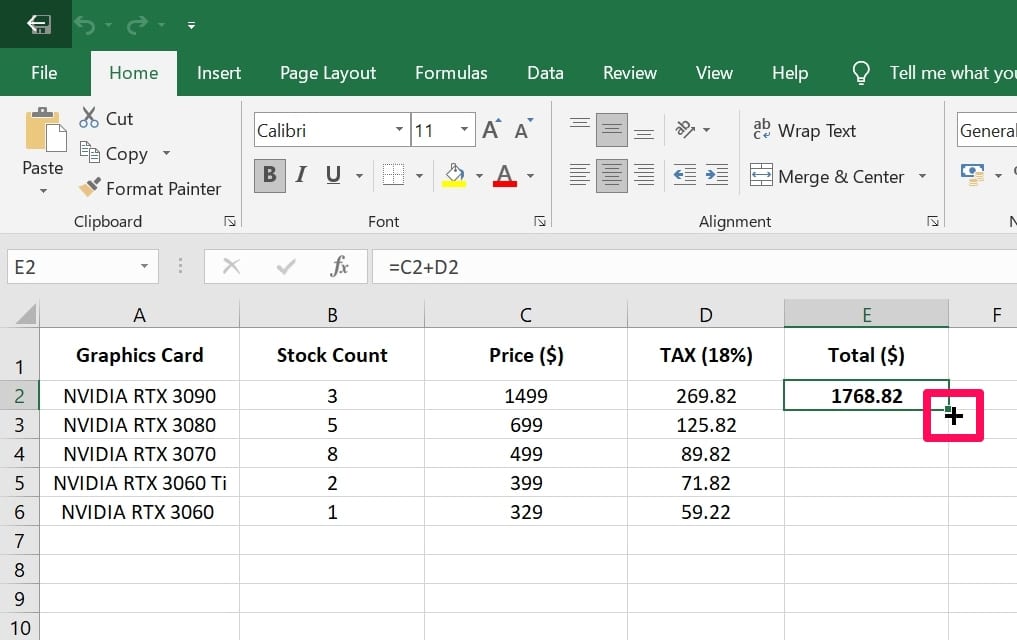
Step 3. The output result will show up in the cell that you initially selected. Now that you know how to apply the formula, let’s move on to the important part. To use the Fill Handle, simply move your cursor to the bottom-right corner of the selected cell, as indicated here.
Step 4. Now, click and drag the Fill Handle to the last cell in the column that you want to apply the formula to.
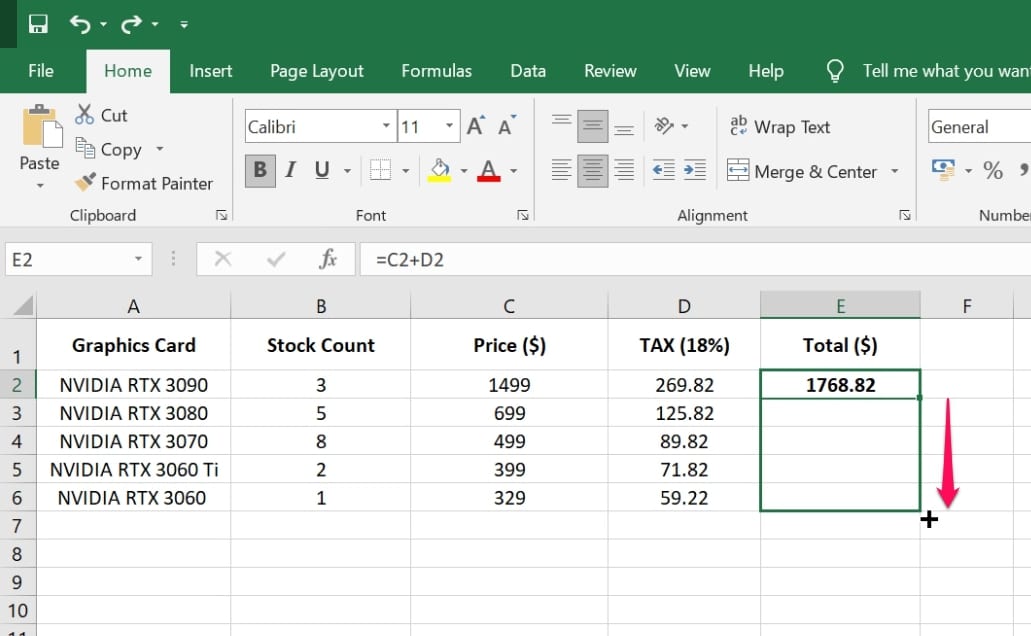
Step 5. Now, let go of your mouse, and all the output values should show up in the selected cells within a second or two.
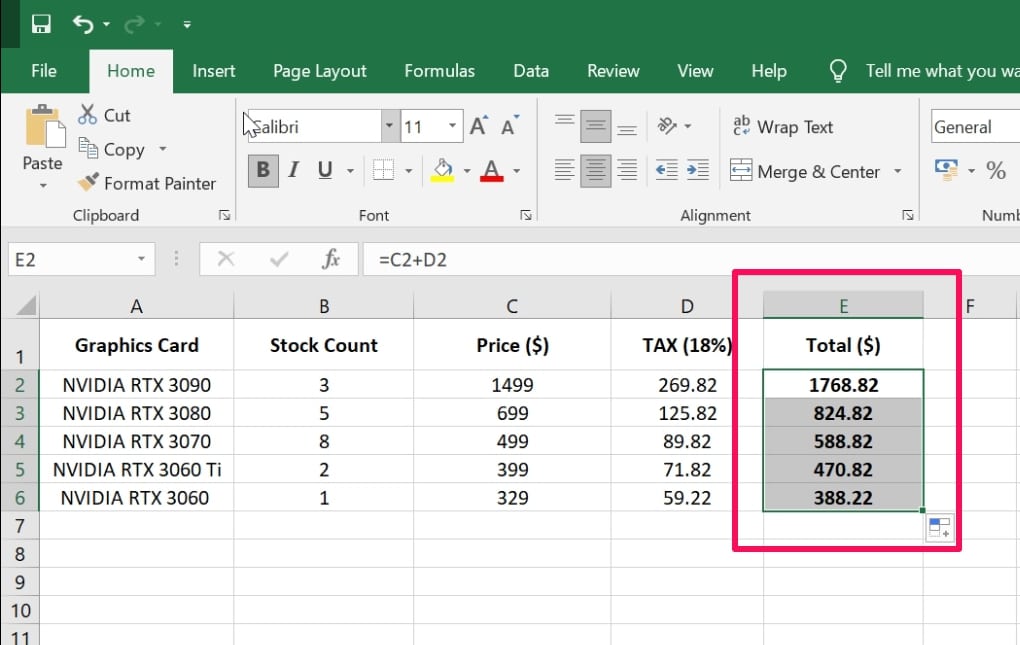
As you can see, this method goes a long way in cutting down the time you spend on a spreadsheet where you need to apply a lot of formulas. Having said that, for this technique to work, none of the adjacent columns in the spreadsheet should be empty. Otherwise, the results will only be filled up to the cell in the row above the empty cell.
Option 2. Apply Formula to Entire Column With Double-click Fill Handle
This particular method is very similar to the previous one, except for a slight change in what you need to do. Instead of dragging the Fill Handle, you need to double-click the handle instead. If you’re confused, follow the steps below:
Step 1. Once you’ve applied the formula to the first cell in the column, move the cursor to the bottom-right corner of this cell until it becomes a black cross.
Step 2. Now, double-click your mouse, and all the cells below will be automatically filled with the output values as shown here.

There you go. A lot of people may find this option to be slightly more convenient than the dragging Fill Handle method. Like dragging the Fill Handle technique, this will only work if there aren’t any empty cells in the adjacent columns.
Option 3. Apply Formula to Entire Column With Fill Feature
Alternatively, you can use Excel’s Fill tool to apply Excel formula to entire column. It’s pretty similar to the dragging method, except that you’ll be selecting the cells where you want to apply the formula first for slightly more control if there are empty cells in the adjacent columns. Let’s check it out:
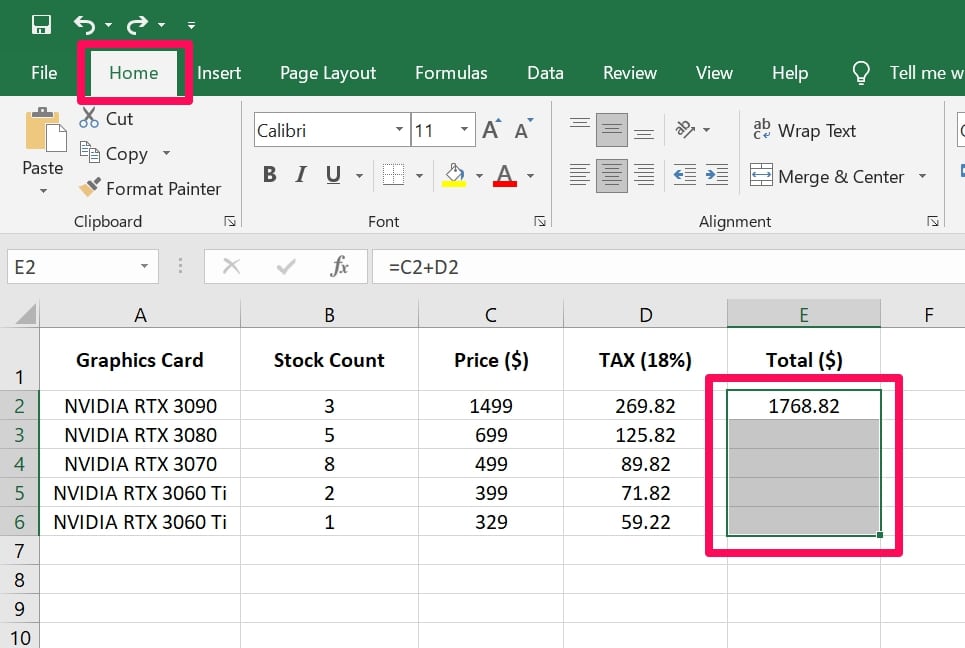
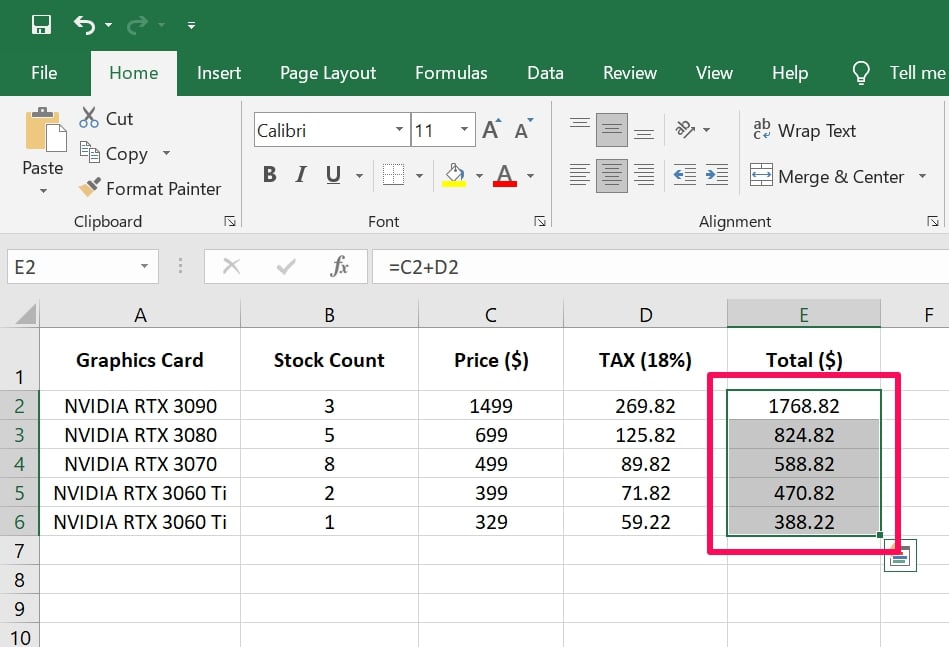
Step 1. Once you’ve manually applied the formula to the first cell, select all the cells below it by clicking and dragging your mouse. Then, head over to the ‘Home’ section in the menu bar.
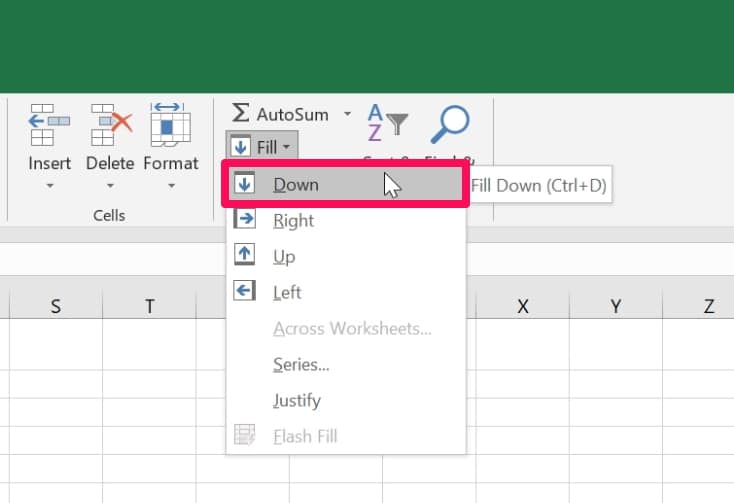
Step 2. On the right side of the toolbar next to the Format tool, you’ll find the option called ‘Fill.’ Click on it to access more options.
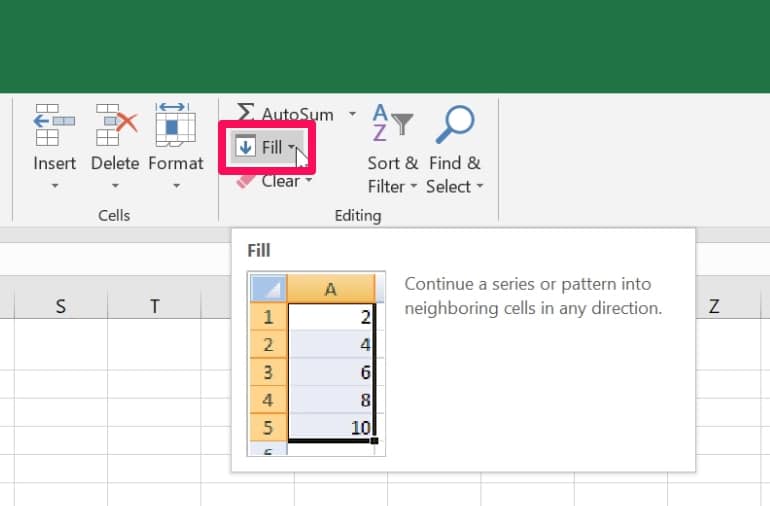
Step 3. Now, choose ‘Down’ from the dropdown menu. This is called the Fill Down tool.
Step 4. Clicking on the Fill Down tool will automatically apply the same formula to all the selected cells in the same column.
Step 5. To access this tool more easily, we have a neat trick for you as a bonus. Simply right-click on the Fill Down tool and choose ‘Add to Quick Access Toolbar.’

Step 6. This will add the Fill Down tool icon to the top of your Excel window next to the Undo/Redo options, as shown in the screenshot below.
![]()
Now, even if you’re not in the Home section of the toolbar, you’ll be able to quickly use the Fill Down tool. If you have any empty cells in the adjacent columns, you’ll need to manually apply the formula to the row below this empty cell again before you can repeat these steps to get the output values in the rest of the cells in the column.
Option 4. Apply Formula to Entire Column With Shortcut Keyboards
Using the Fill feature might not be the fastest way of Excel apply formula to entire column, even if you move the tool to the Quick Access Toolbar. However, this method could be made even faster by utilizing a handy keyboard shortcut. If you’re interested, the magic keys are Ctrl and D. Basically, you hold the Ctrl key on your keyboard and then press the D key after selecting the cell to apply the formula.

Once again, you will not be able to apply the formula, if the cell above is empty or if it’s just a random value instead of an output result.
Bottomline
As you can see, there are multiple options that you choose from whenever you want to apply Excel formula to entire column. Of course, some of these methods may be quicker than others, but it all boils down to personal preferences.
Yes, we were focusing on how to apply a formula to an entire column in Excel in this article, but you can use some of these options to apply a formula to an entire row. For example, you can use the dragging Fill handle technique or use the Fill Right tool to get formula-applied results on an entire row within seconds.
Hopefully, you could find a convenient method that you prefer for applying formula to an entire column. Do you know any additional methods that deserve mention? Feel free to share your valuable thoughts and ideas in the comments section down below.