Millions of people worldwide use Microsoft Excel as their default spreadsheet application for data entry, formulating tables, creating charts, tracking inventory, and so on. Although making checklists is not the most popular use of the software, there are still a fair number of users who manage their To-do lists with Excel and other similar spreadsheet applications rather than using pen and paper these days.
If you received a checklist from one of your colleagues and wish to change the format, you would want to remove the unwanted checkboxes first. This would be necessary if you’re trying to convert your checklist into a task list that uses a progress bar rather than checkboxes. Users who’re fairly new to Excel may not necessarily be familiar with deleting checkboxes.
In case you’re trying to figure this out by yourself, we’d like to inform you that you have multiple options. Here, we’ll be taking a look at some of the different methods to delete checkboxes in Excel:
Method 1. Delete Checkboxes in Excel with Go To Special
In the first method, we’ll be using Excel’s Go To Special tool to remove all the checkboxes in your worksheet. Assuming you already have your spreadsheet open, simply follow the steps below:
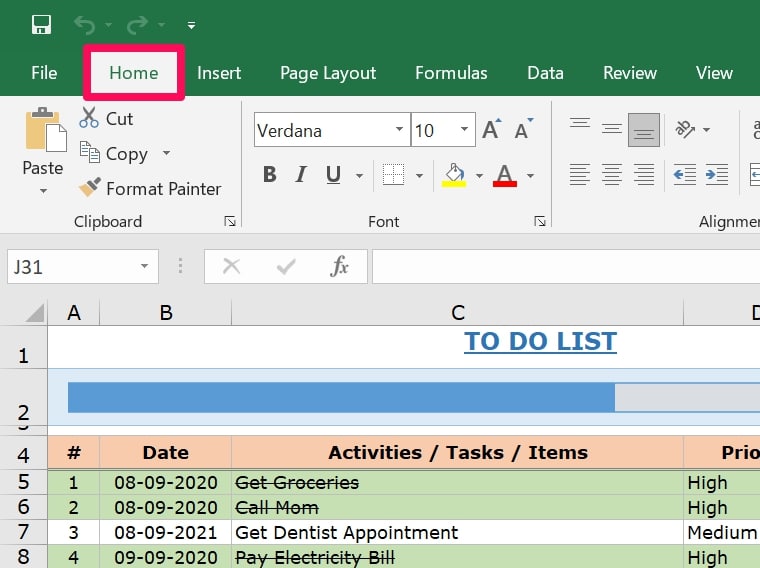
Step 1. Click on ‘Home’ from the menu bar in Microsoft Excel.
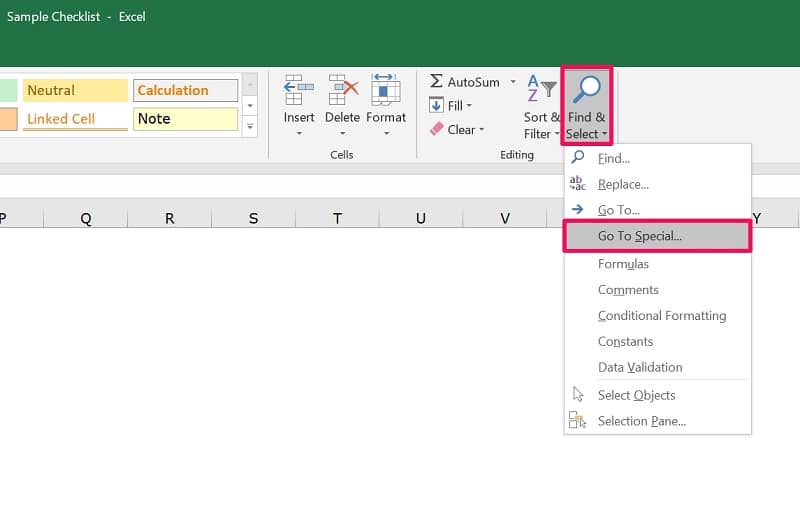
Step 2. You’ll find the ‘Find & Select’ tool on the extreme right side of the toolbar. Click on it and choose ‘Go To Special’ from the dropdown menu.
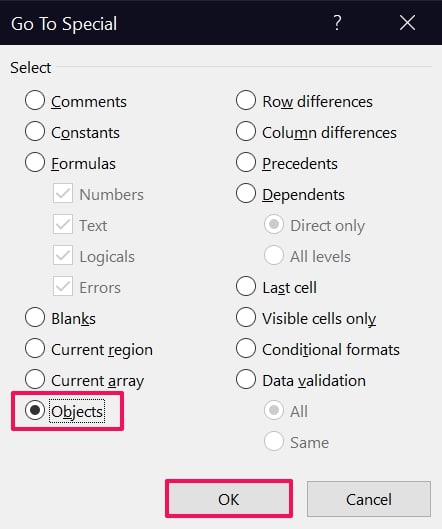
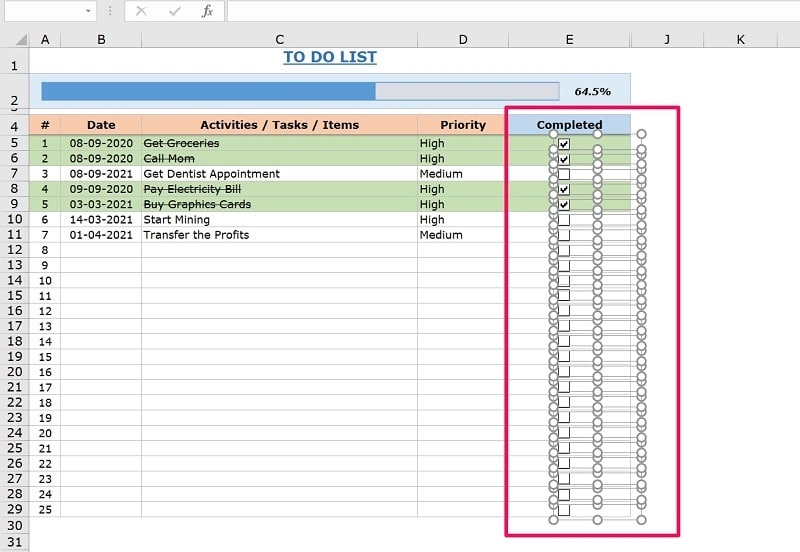
Step 3. This will bring up a new pop-up window in Excel. Here, select ‘Objects’ and make sure everything else is unchecked. Then, click OK to proceed.
Step 4. Now, all the objects in your document will be highlighted as shown in the screenshot below. At this point, all you need to do is press the ‘Delete’ key on your keyboard to remove all the checkboxes from the Excel document.

As convenient as this method may sound, it does have its downsides. For starters, if your worksheet contains objects other than just checkboxes, they will be removed too when you press the Delete key. Also, this method cannot be used if you’re not going to remove every single checkbox in the document.
Method 2. Delete Checkboxes in Excel with Select Objects
If the above method doesn’t suit your requirement, let’s say you don’t want to delete all the checkboxes in Excel, but only some of them, this is exactly the method that you may need. We’ll use the Select Objects function to manually select the cells that we want to remove the checkboxes from. So, without further ado, let’s get started:
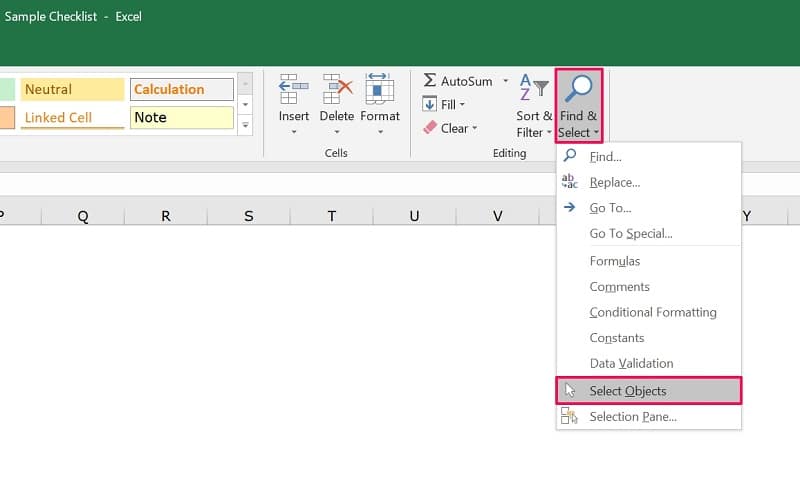
Step 1. Make sure you’re in the ‘Home’ section within Excel and head over to the ‘Find & Select’ option from the toolbar just like the previous method. Now, choose ‘Select Objects’ from the dropdown menu.
Step 2. Next, click and drag your mouse cursor to select the cells containing all the checkboxes you want to remove.
Step 3. Once selected, they will be highlighted as shown below. Now, press the ‘Delete’ key on your keyboard and you’re done.
This way, you have better control over the checkboxes you’re deleting in Excel, and you’re not forced to remove other objects in your spreadsheet.
Method 3. Delete Checkboxes in Excel with VBA Code
VBA stands for Visual Basic for Applications, a programming language of Excel and other Microsoft Office applications like Word and PowerPoint. In this procedure, we’ll be entering a VBA code in Excel to remove checkboxes. Before you can do that, you need to first enable the Developer tab in Excel, which is hidden by default. Here’s what you need to do:
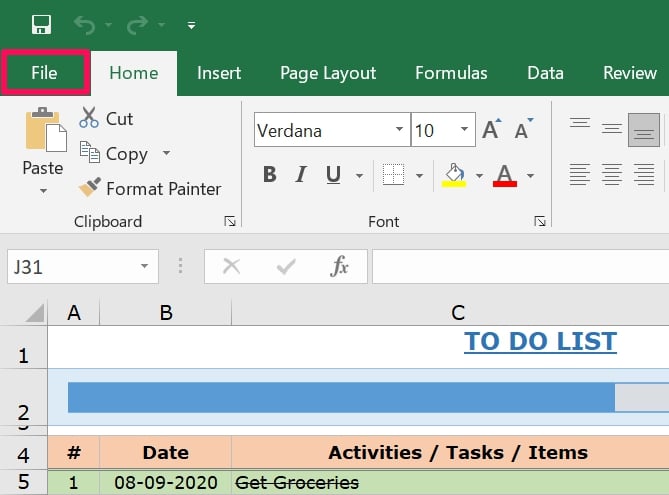
Step 1. Head over to the ‘File’ tab from the menu bar in Excel.
Step 2. You’ll be taken to the menu where all your recent documents are shown. Here, click on ‘Options’ located at the bottom-left corner of your Excel window.

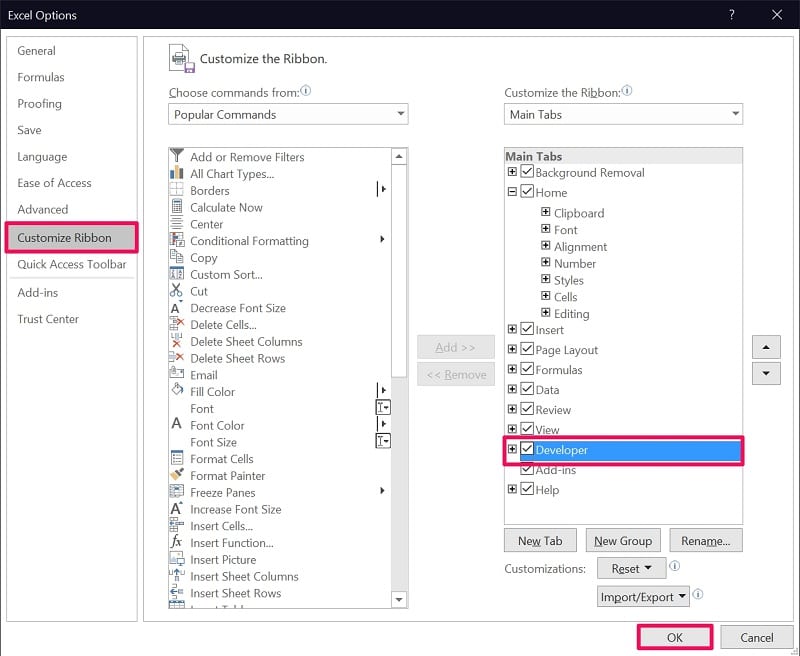
Step 3. This will bring up a new menu within Excel. Here, select ‘Customize Ribbon’ from the left pane, and under Main Tabs, check the box next to ‘Developer’ as shown below. Click OK to save your settings.
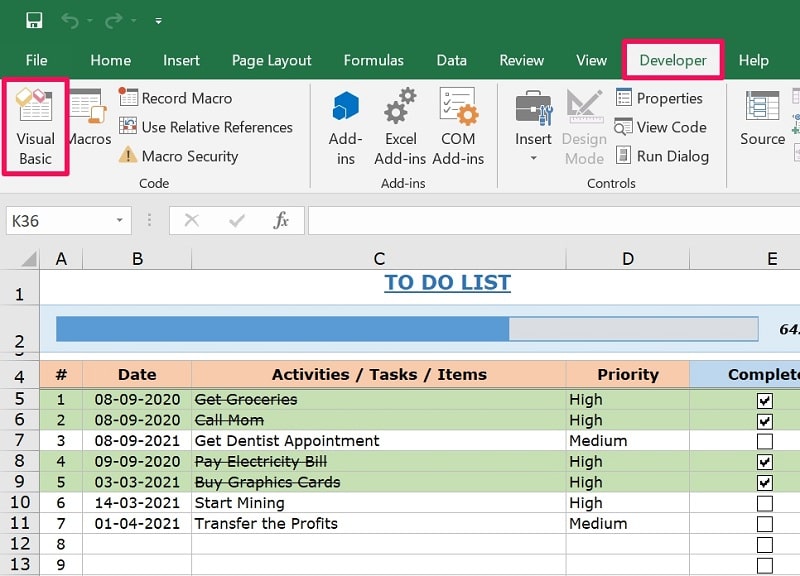
Step 4. Next, head over to the new Developer tab from the menu bar and click on ‘Visual Basic’ located right below in the toolbar.
Step 5. This will launch a Visual Basic window on your screen. Click on ‘Insert’ from the menu bar and choose ‘Module’ from the dropdown menu to proceed.

Step 6. A code window will now show up on the screen. Here, you’ll need to type in the code. We’ll make it easy for you. Just copy and paste the following line of code, and then click on the green play icon as indicated in the screenshot.
Sub RemoveCheckboxes()

On Error Resume Next

ActiveSheet.CheckBoxes.Delete

Selection.FormatConditions.Delete

End Sub
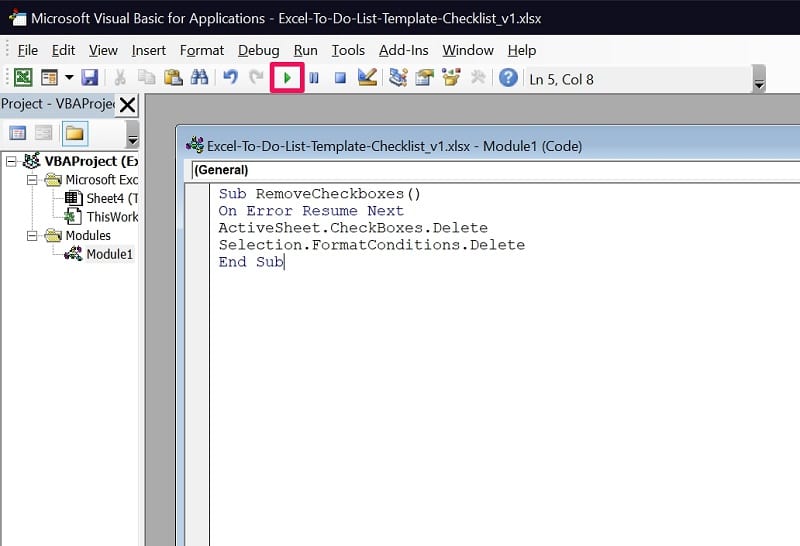
Once you’re done, you can exit the Visual Basic window and go back to your spreadsheet. You’ll see that all the checkboxes are gone confirming that your code worked. This will only remove checkboxes, and other objects will remain unaffected, unlike the first method.
Method 4. Delete Checkboxes in Excel with Design Mode
This method requires you to have the Developer Tab enabled as well, but you don’t have to type in any complicated code. Instead, you’ll be using a developer tool called Design Mode. Just follow these two steps.
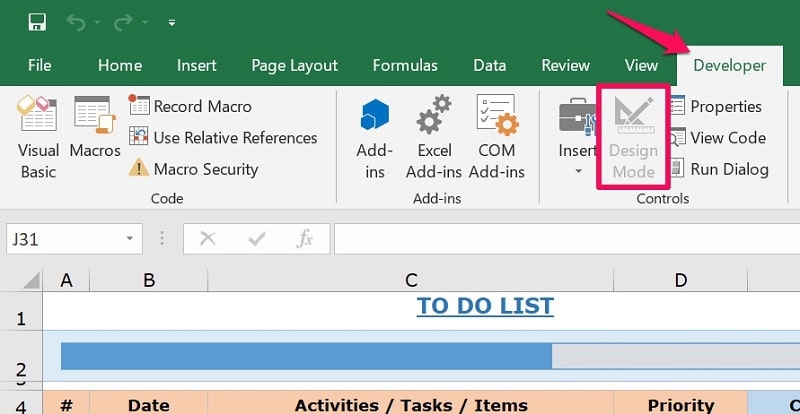
Step 1. Head over to the Developer tab from the menu bar and click on the ‘Design Mode’ option located right below in the toolbar.
Step 2. Now, just select the checkbox objects you wish to remove in Excel and then hit the ‘Delete’ key on your keyboard.

As you can see, it’s very simple. Note that the Design Mode option may sometimes be grayed out if there’s nothing in the spreadsheet that can utilize it. If that’s the case, you’ll need to use one of the other methods to delete the checkboxes in Excel.
Method 5. Delete Checkboxes in Excel with Kutools for Excel
Kutools is a third-party Excel add-on developed by ExtendOffice that can be used to unlock advanced functions that aren’t natively available in the software.
After installation, when you open your spreadsheet in Excel, you’ll find a new Kutools tab in the menu bar. Now, select all the cells that contain the checkboxes that you want to delete and click on the ‘Delete’ tool located under Kutools tab. Then, choose ‘Batch Delete Check Boxes’ from the dropdown menu.
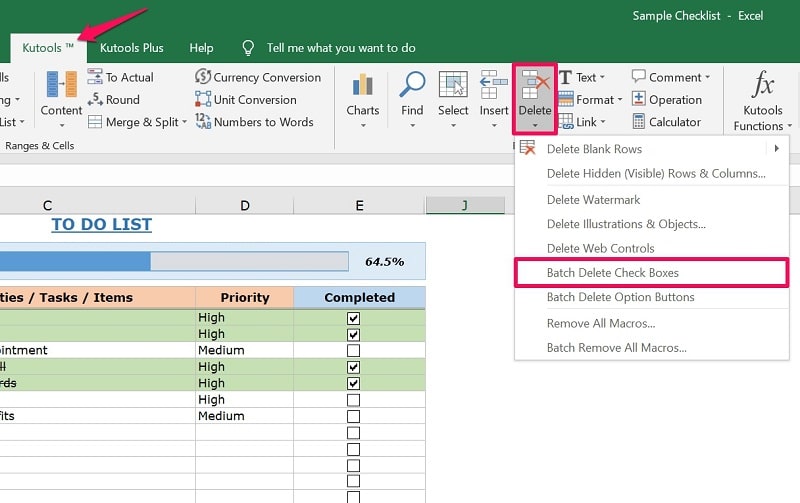
All the checkboxes in the cells you just selected will be removed instantly from your spreadsheet. This method might seem very similar to the Select Objects and Design Mode techniques, except that you don’t have to press the Delete key.
Conclusion
Depending on whether you want to remove all the checkboxes from your Excel or just a selected number, there are multiple ways to go about it. Some of them may have certain limitations, like the Go To Special method could remove objects other than checkboxes. Even the super-fast Select Objects method can potentially delete other objects if you’ve selected them. This is exactly where the optional Developer tab and third-party add-ons like Kutools come in handy, which prevents accidental deletion of other objects from your document.
We hope you could find a desirable method that fits the document you’re working on. Which of the methods that we covered here did you use to delete the checkboxes from your spreadsheet? Do you know any additional methods to remove checkboxes from Excel? Feel free to share your ideas and leave your valuable feedback in the comments section down below.