People who rely on Microsoft Office for work purposes often use Excel spreadsheets along with PowerPoint presentations to create business plans, financial budgets, employee schedules, and other things. However, switching to Office from other productivity suites like Apple iWork, Google Workspace, or Apache OpenOffice may not necessarily know how to add their spreadsheets to their presentations.
If you’re new to Office, you’ll be surprised to know that there are so many ways to convert Excel spreadsheets to PowerPoint slides. Even existing Office users, upon adequate search, may find a new method to add a spreadsheet to an existing presentation slide. From the typical copy-paste techniques to using a dedicated software for the file conversation, you have a lot of options to try. So, let’s take a look at some of these various methods that you can use to learn how to convert your Excel spreadsheets to PowerPoint presentation slides.
Method 1. Convert Excel Spreadsheet to PowerPoint Slides with an Excel to PPT Converter
The first method that we’re about to discuss is pretty straightforward. It might be the simplest method for most people who don’t want to go through a lot of steps. We’ll be making use of a third-party software to convert Excel to PPT. So, let’s see what you need to do:
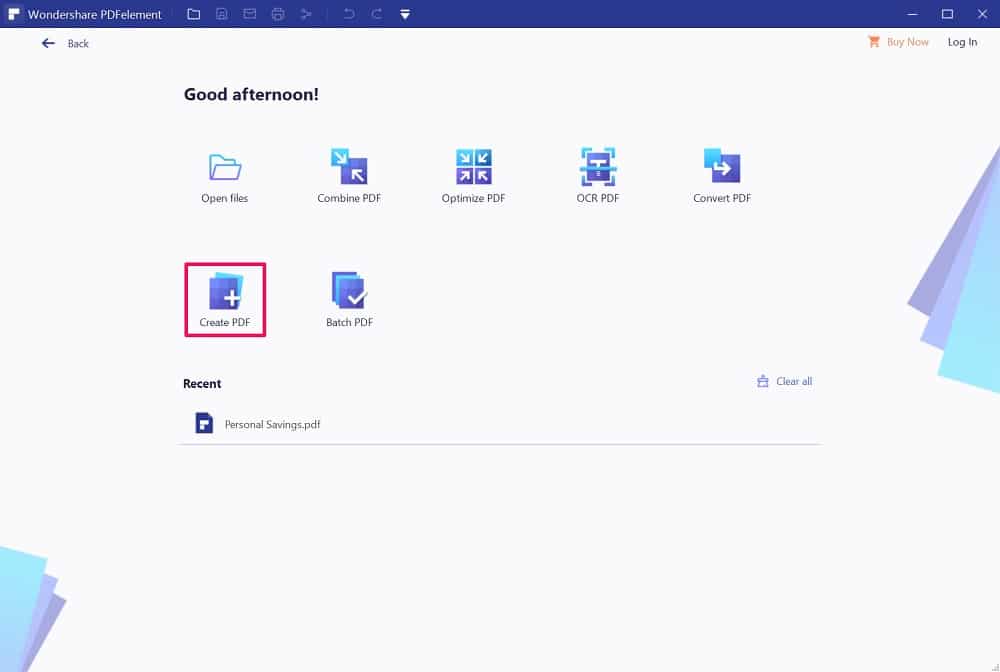
Step 1. Download and install PDFelement on your computer. Once you’re done, launch the application and click on ‘Create PDF’ as shown in the screenshot below.
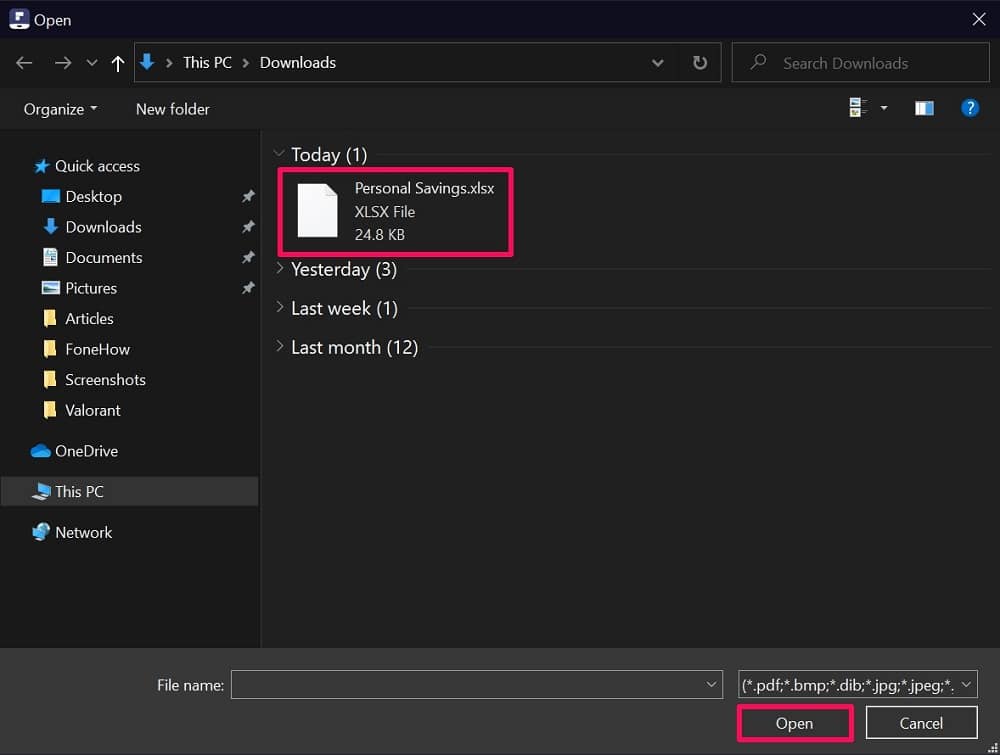
Step 2. This will bring up the File Explorer if you’re on Windows or Finder if you’re using a Mac. Select the Excel spreadsheet file that you want to convert and click on ‘Open.’
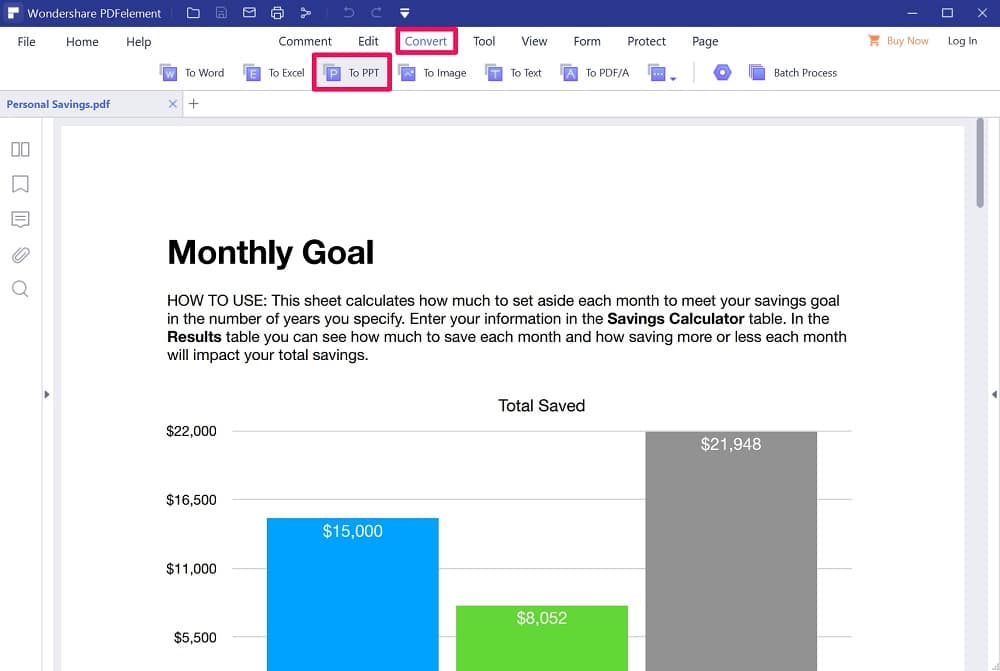
Step 3. PDFelement will now convert and automatically open the spreadsheet as a PDF file. Now, head over to the ‘Convert’ section from the menu bar and click on ‘To PPT’ (which stands for PowerPoint Presentation)
Step 4. This will launch the File Explorer again. Here, you’ll be able to see that the file type is set to .pptx, meaning it’s a PowerPoint presentation file. Click on ‘Save,’ and you’re done.
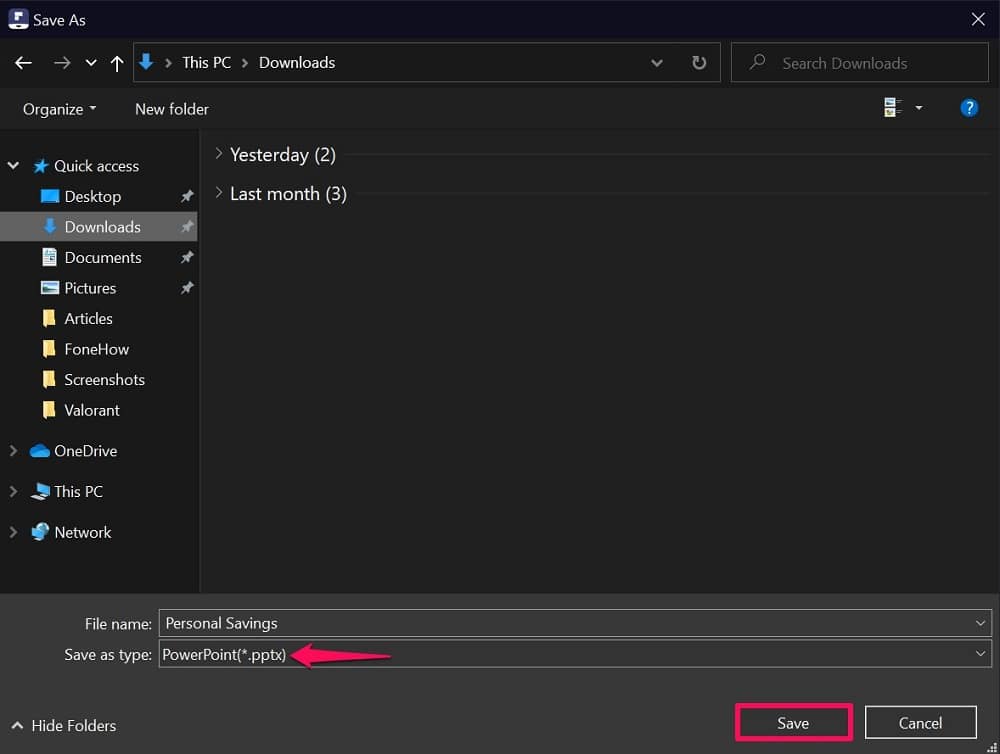
That’s all there is to it. You can now open your spreadsheet using Microsoft PowerPoint since the format is .pptx now. As you can see, PDFelement makes it very easy to convert XLS files to PPT.
Method 2. Copy and Paste Excel Data in PowerPoint
You may already be familiar with this method since it’s the old-school way of copy-pasting content from one document to another. This could arguably be the fastest way to convert your Excel spreadsheets. If you’re clueless about the copy-paste technique, just follow the steps below.
Step 1. Open the Excel document that you want to convert and then click & drag the cursor to select the spreadsheet. Once selected, right-click and choose ‘Copy.’ This will copy the selected content to your clipboard.

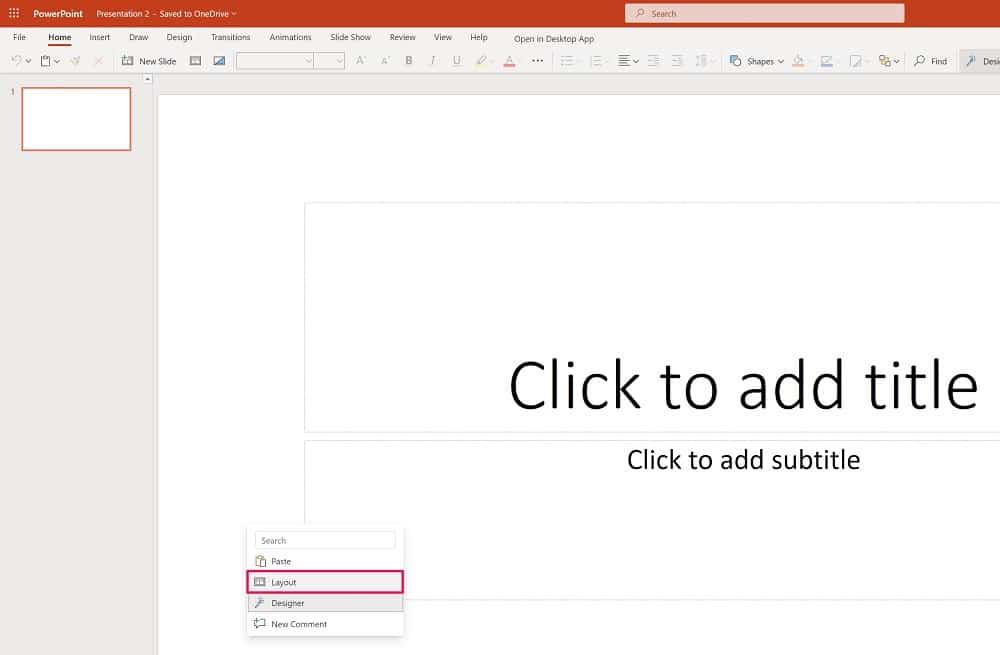
Step 2. Next, launch PowerPoint on your computer and open a new presentation. You’ll need to remove the Title and Subtitle boxes first. To do this, right-click on the blank space and choose ‘Layout.’
Step 3. This will bring up a Slide Layout menu where you can change your presentation’s layout. Double-click on ‘Blank’ to make the slide empty.

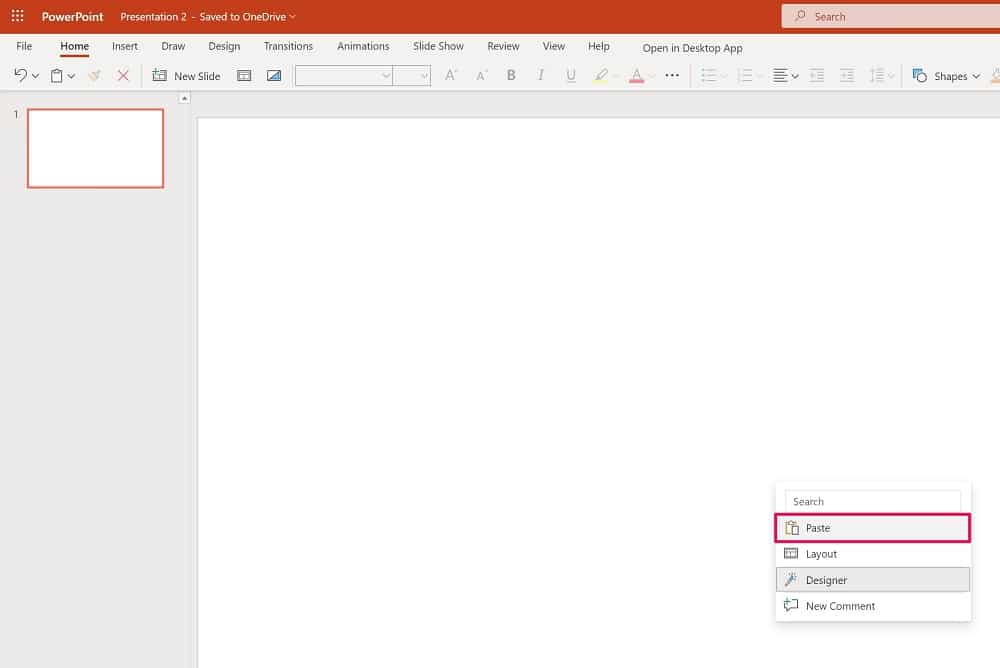
Step 4. Now, right-click anywhere on the slide and select ‘Paste.’
Step 5. The spreadsheet will be pasted but may sometimes appear zoomed in. To fix this, select a preferred design from the Designer panel located on the right.

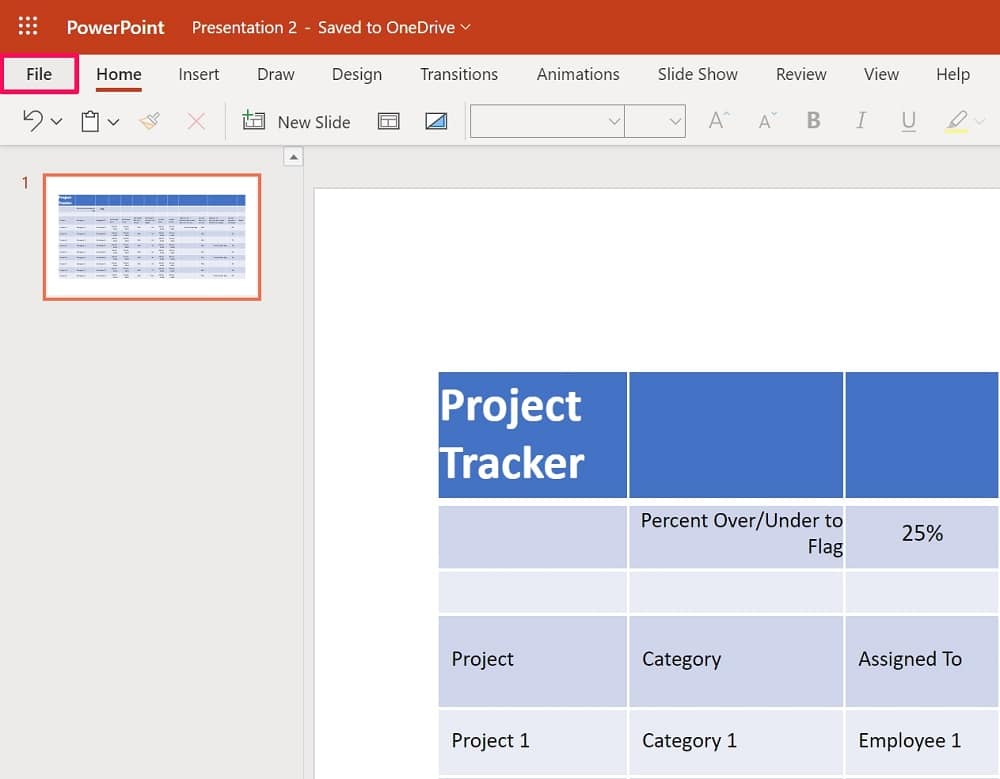
Step 6. At this point, you need to save your presentation. Click on ‘File’ from the menu bar.
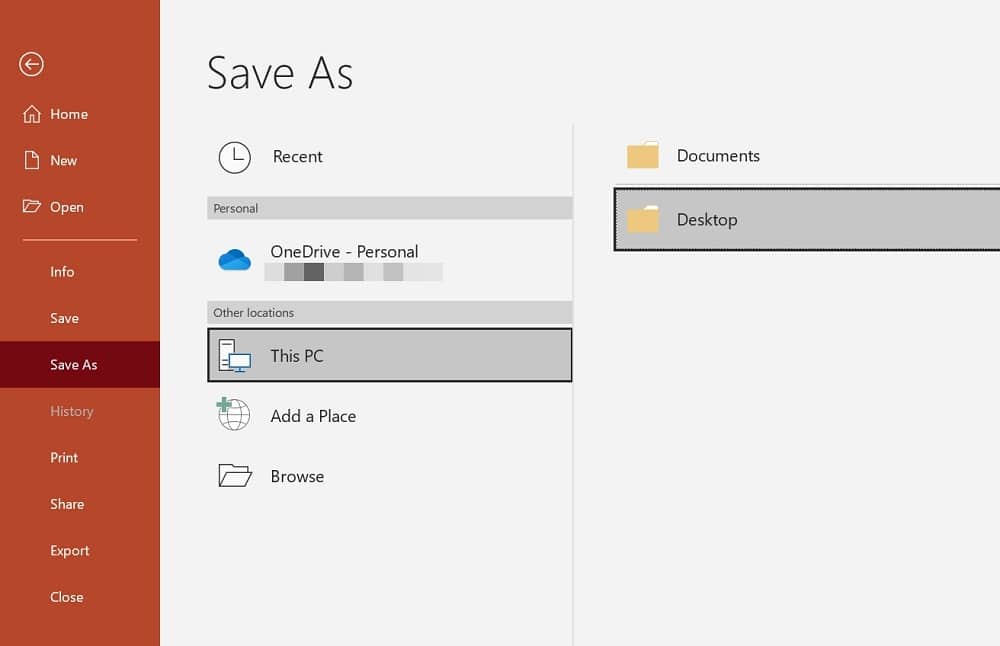
Step 7. Now, click on ‘Save As’ from the left pane and select the directory where you want to store your presentation file.
There you go. This method isn’t exactly file conversation, but moving your Excel spreadsheet data to a PowerPoint presentation slide natively without any additional software.
Method 3. Link an Excel Worksheet to PowerPoint
Linking an Excel spreadsheet to PowerPoint rather than simply copy-pasting the contents has its own advantages. Firstly, all the changes you make to your spreadsheet after linking it in your presentation slide will automatically be updated. Secondly, since the Excel data isn’t stored in the slides, the PowerPoint presentation’s file size isn’t inflated. Let’s check out the necessary steps to get this done:
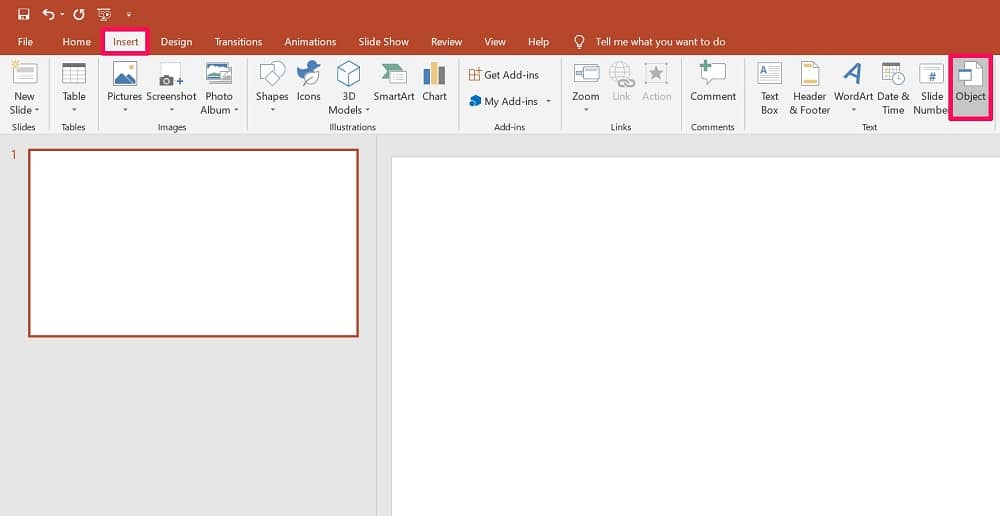
Step 1. Open PowerPoint and select ‘Insert’ from the menu bar. Now, click on ‘Object’ located in the Text category, as shown in the screenshot below.
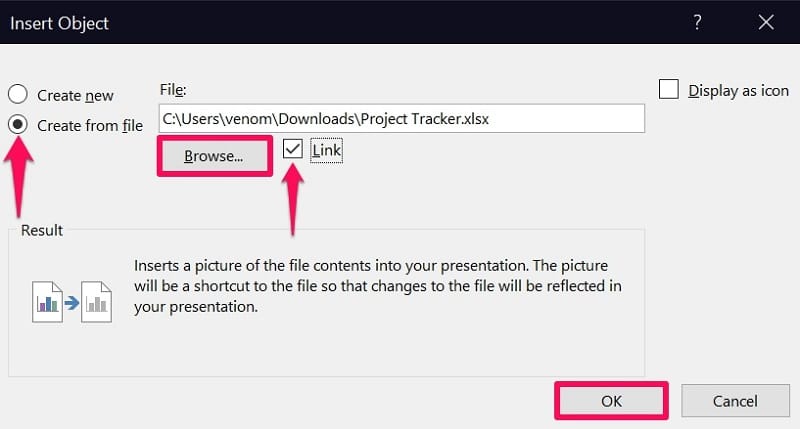
Step 2. This will launch a new window within PowerPoint. Select the option ‘Create from File’ and check the box next to ‘Link.’ Now, click on ‘Browse’ to select the Excel spreadsheet using File Explorer. When you’re done, click OK to continue.
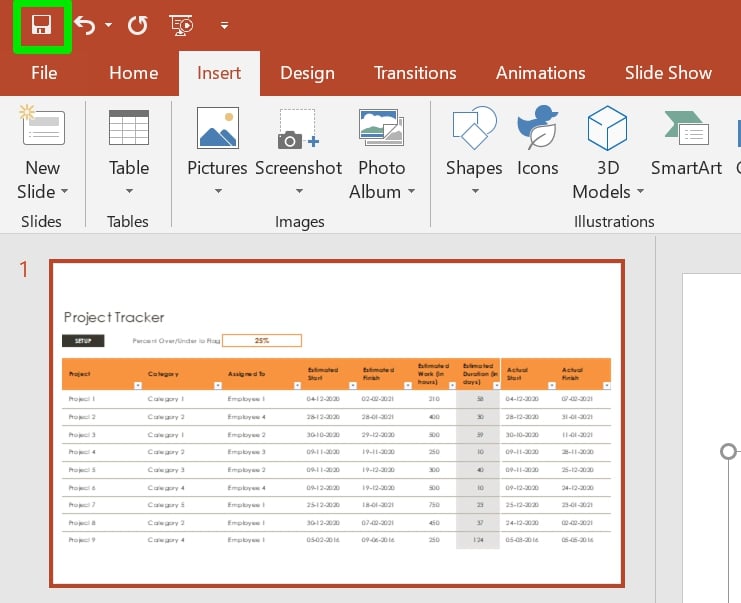
Step 3. You’ll be able to see a picture of the Excel file’s contents in your presentation slide. At this point, you can save your presentation by simply clicking on the save icon located at the top-left corner of the PowerPoint window.
Note that the picture of the spreadsheet in your presentation is nothing but a shortcut to your Excel file. Clicking on it will open the file in Microsoft Excel, where any further edits or changes can be made easily. When you’re making changes to a spreadsheet, PowerPoint must be open for automatically updating the linked file.
Method 4. Link a Section of Excel Data to PowerPoint
This method is sort of similar to the one we just discussed above in terms of how it works, but we’ll be copying only a portion of the spreadsheet data and paste it as a link in PowerPoint. So, without further ado, let’s get started:
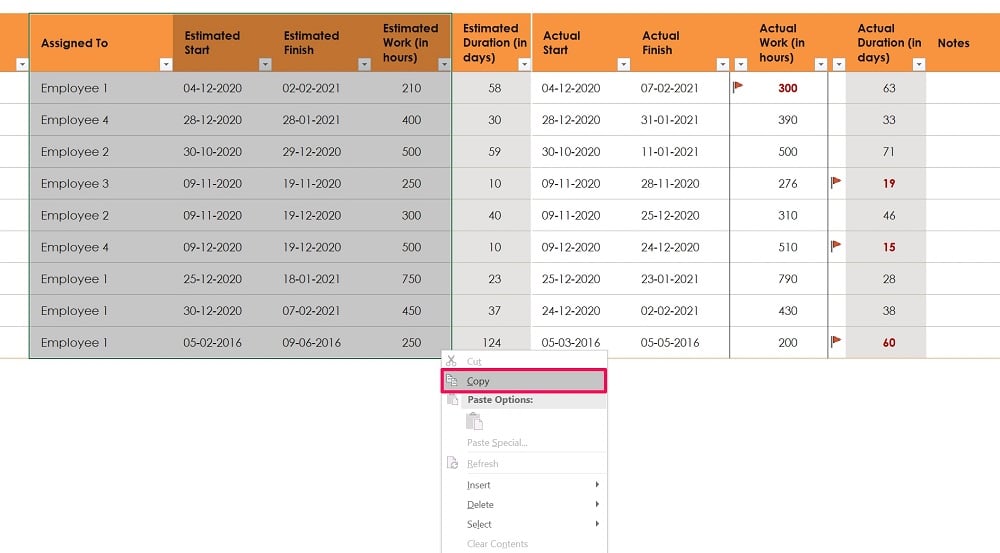
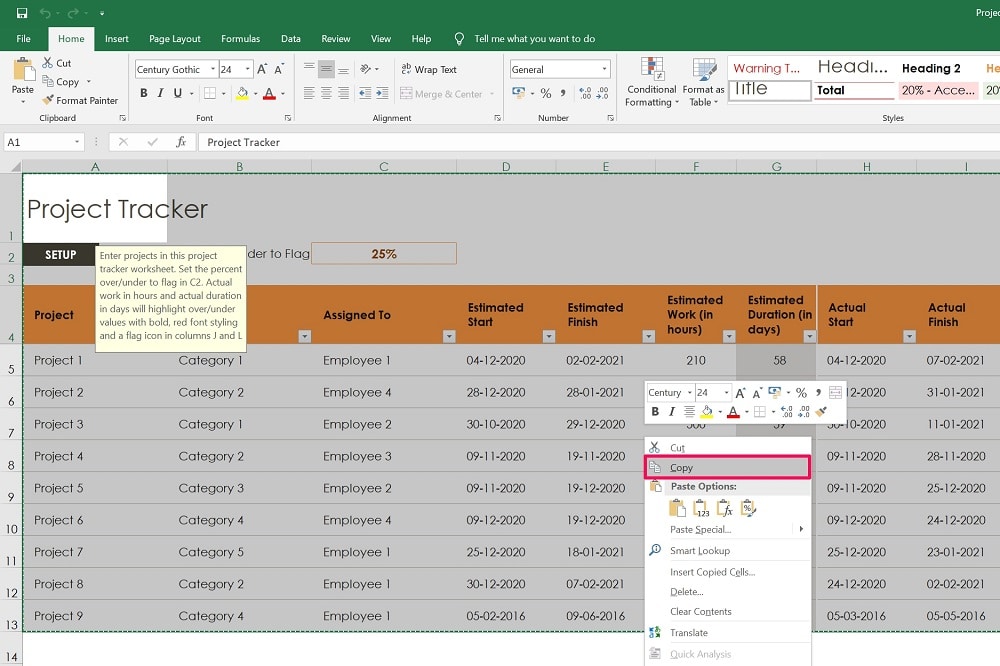
Step 1. First, open the Excel file on your computer and use your mouse to drag and select the portion of the spreadsheet that you want to link. Once selected, right-click and choose ‘Copy.’
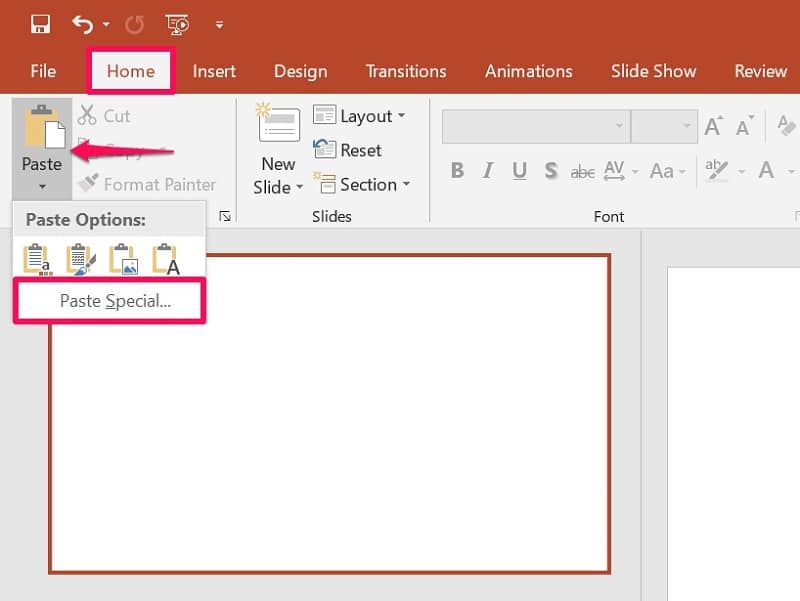
Step 2. Next, open a blank presentation in PowerPoint and head over to the ‘Home’ section from the menu bar. Here, you’ll find the ‘Paste’ tool. Click on it and then choose ‘Paste Special’ from the dropdown menu.
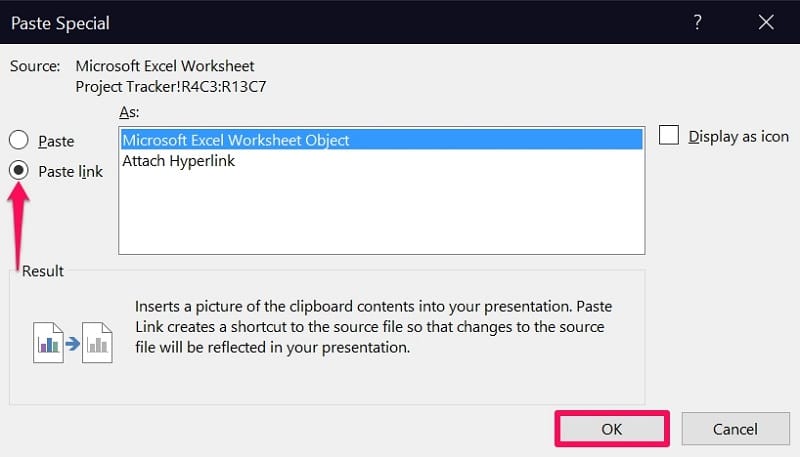
Step 3. A new dialog window will open with the Paste Special options. Here, select the ‘Paste link’ option and click on ‘Microsoft Excel Spreadsheet Object.’ Now, click OK to confirm.
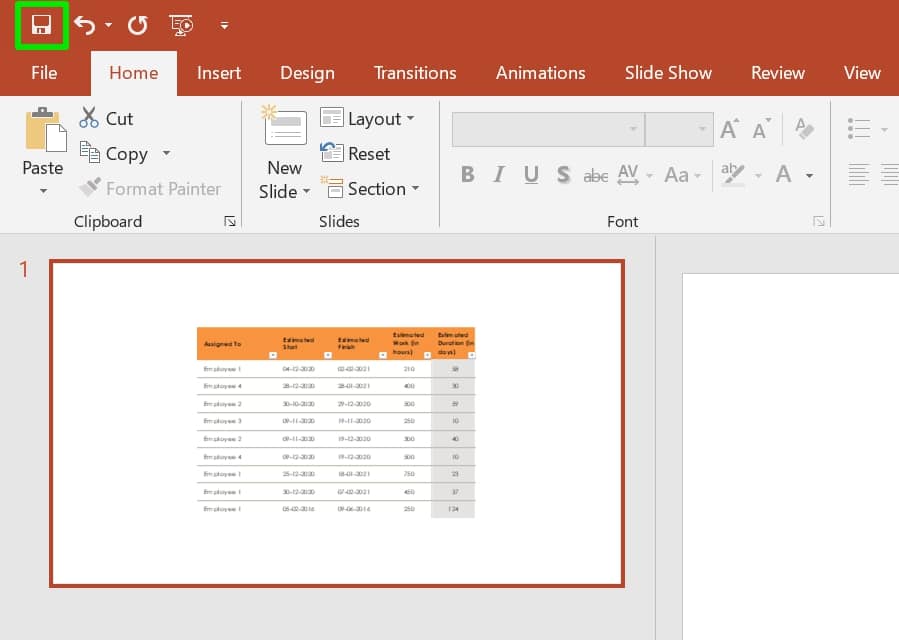
Step 4. The contents you copied to the clipboard from your Excel spreadsheet will be pasted into your presentation slide. Use the save option located at the top-left corner of the window to store the file on your computer.
Similar to Method 3, you can click on the picture within the presentation to open Microsoft Excel and make the necessary changes if required. The updates will show up in the presentation file almost immediately.
Method 5. Embed an Excel Worksheet into PowerPoint
Embedding an Excel spreadsheet differs from linking in multiple ways. For starters, any changes that you make to the Excel data stored in your presentation slide will not be updated in the original Excel file and vice versa. Unlike linking, the Excel data is stored locally in the PowerPoint file and can increase file size. Here’s what you need to do to embed a spreadsheet:
Step 1. You need to highlight and select the content that you want to embed from your Excel file first. Use either the keyboard shortcut Ctrl+C once selected or right-click and choose ‘Copy.’
Step 2. Next, launch PowerPoint and open a new blank presentation. Right-click anywhere on the empty slide to access Paste Options. Here, click on the middle icon as shown in the screenshot below. This is the embed tool.
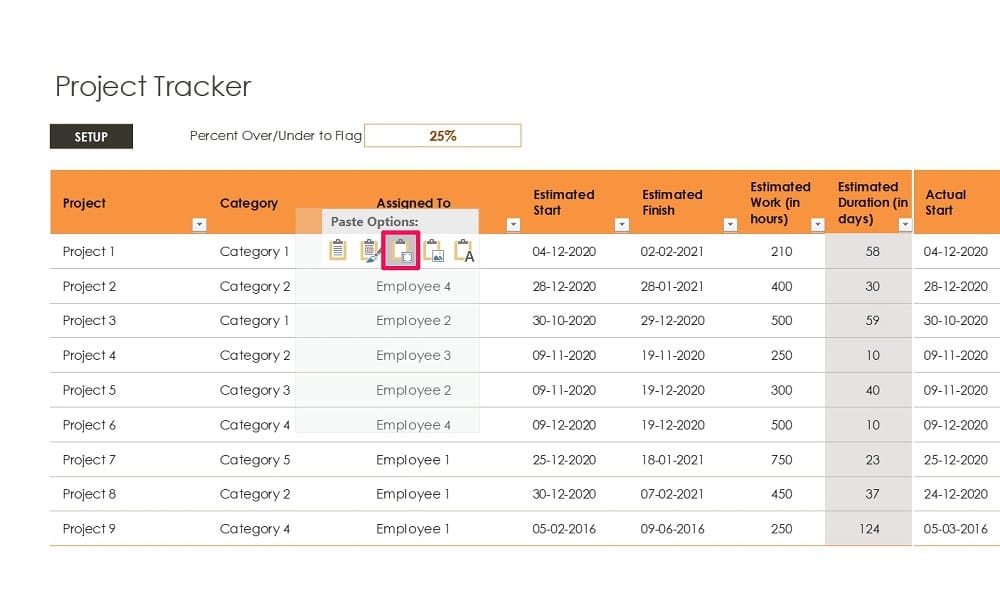
Hovering over the Paste Options will give you a preview of what the pasted content would look like. Clicking on it will paste the content. Once pasted, all you need to do is save the presentation file just like we did in the other methods.
Method 6. Export from Excel to PowerPoint as Images
Do you have a complex spreadsheet full of charts, tables, and other data? In that case, you may want to try this method out as it basically imports your Excel document into PowerPoint as an image file. Typically, when you try to export Excel spreadsheets with charts and tables, you could run into formatting issues within PowerPoint. This can be eliminated by using this image file export technique. Let’s see how it’s done:
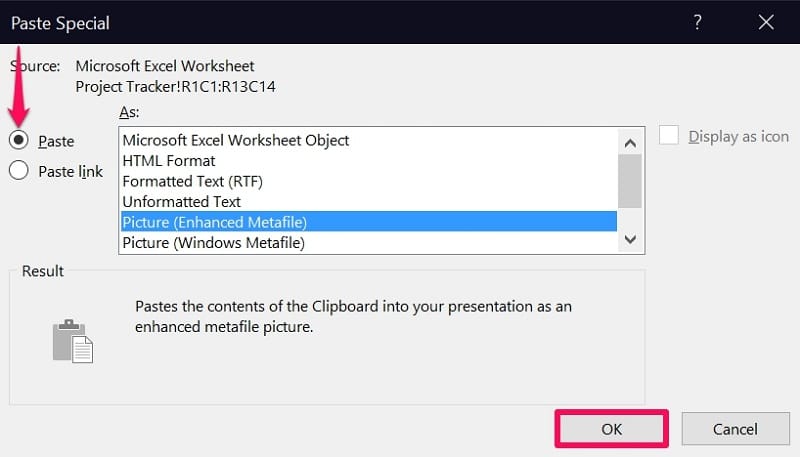
Step 1. Once you’ve copied the contents from your Excel file to the clipboard, open a blank presentation within PowerPoint and click on ‘Home’ from the menu bar. Next, click on ‘Paste’ and select ‘Paste Special.’
Step 2. This will open a new window within the application. Here, make sure ‘Paste’ is selected and choose the type as ‘Picture (Enhanced Metafile)’ for the highest quality. Click OK to paste the spreadsheet as an image in the slide.
You can move the image of the Excel spreadsheet around as you’d like, but you cannot change the values in it from PowerPoint since it’s just a picture and not the actual spreadsheet or link to it.
Method 7. Reproduce Charts and Tables in PowerPoint
This one is unlike the other methods that we just discussed since it’s not about exporting the Excel spreadsheet but rather reproducing the same charts and tables within PowerPoint. If you’re unable to export Excel data like tables and charts without formatting issues, you will have to manually reproduce them, especially if you don’t want to export the content as an image file that cannot be edited later on. Here’s what you’ll have to do:
Step 1. Launch a blank presentation in PowerPoint and select ‘Insert’ from the menu bar and choose ‘Table.’ Now, drag your mouse cursor to adjust how many rows & columns you need in the table and left-click to insert the table in the slide.

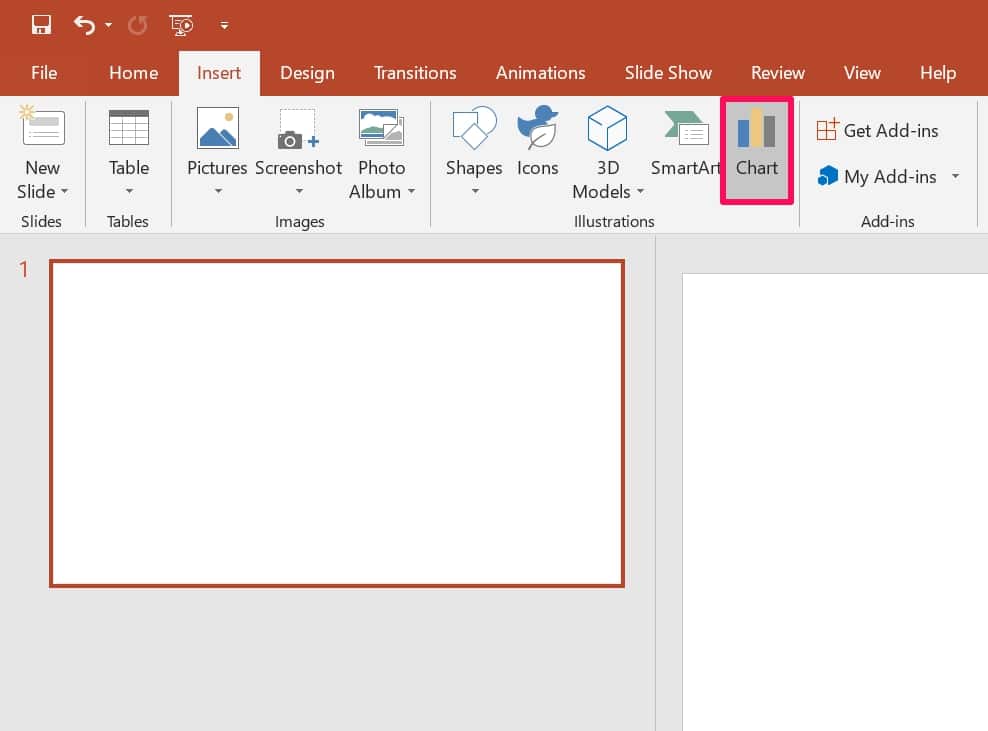
Step 2. To add a chart, select ‘Chart’ located along with other illustrations under the same ‘Insert’ menu.
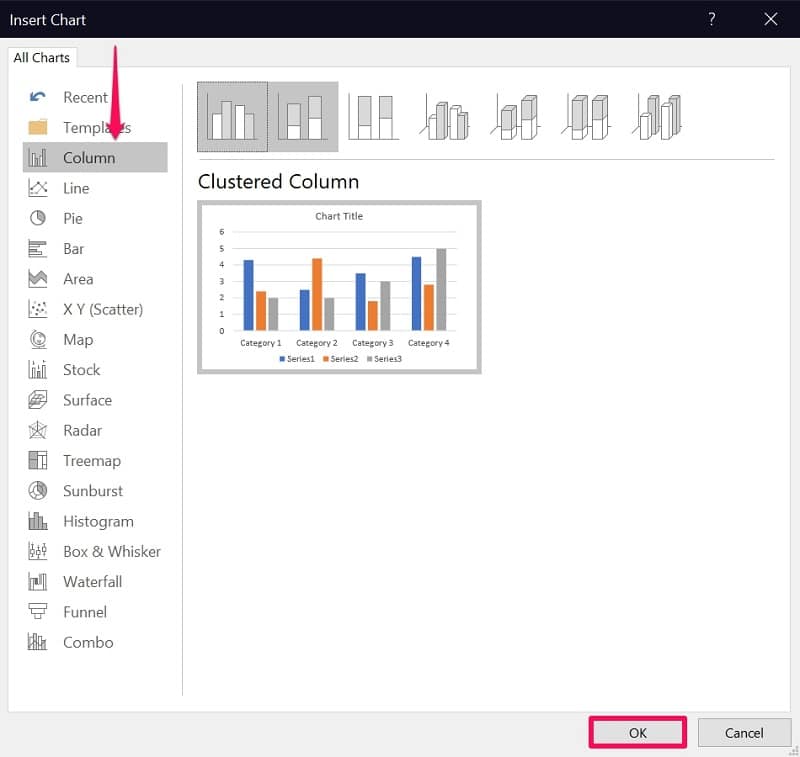
Step 3. This should bring up a dedicated window for chart selection. Here, select the type of chart you want to use that matches the chart in your Excel spreadsheet and click ‘OK.’
Step 4. Once the chart is inserted, you can input your Excel values by right-clicking on it and choosing ‘Edit Data.’

Once you add these values, you can import the rest of the spreadsheet data that you’re not having formatting issues with by using any other methods that we’ve covered above, whether it’s copy-pasting, linking, or embedding the Excel file.
Bottomline
From using a third-party Excel to PPT converter to embedding a complex spreadsheet within PowerPoint as a single image file, there are a lot of unique ways to add your Excel data to your presentation slides. However, you’ll be surprised to know that there are many more methods that can be used to convert Excel files to PowerPoint presentations. For instance, if you don’t want to install additional software on your device, you can use websites that offer online conversion of XLS to PPT.
Hopefully, you were able to export all the content from your Excel files to a PowerPoint presentation without any formatting issues. Did you try out all the methods? If so, which method worked best for you? Do you have any additional conversation or export techniques to share with us? Feel free to drop your interesting ideas and voice out your valuable opinions in the comments section below.