There are many reasons you might want to pay a visit to Windows 10’s Safe Mode. Sometimes it’s the only way to troubleshoot a misbehaving piece of hardware or software. Others, it can be the best way to remove files that insist on being locked. Those are only two examples of why you should know how to enter Safe Mode in Windows 10.
Still, even if you know how to restart into Windows 10 Safe Mode, that could not be enough. Suppose you’re troubleshooting a problem that prevents you from reaching the Windows 10 desktop itself. How can you enter Safe Mode if you can’t access the option to “restart into it”?
Thankfully, there are alternate routes you can take to start Windows 10 in Safe Mode while booting.
Shift + Restart Into Windows 10 Safe Mode
The easiest way to get into Windows 10’s Safe Mode is by keeping the Shift key pressed while clicking on Restart.
Step 1. Click on the Start button and then on the power menu there. However, don’t yet select any of the options in it.
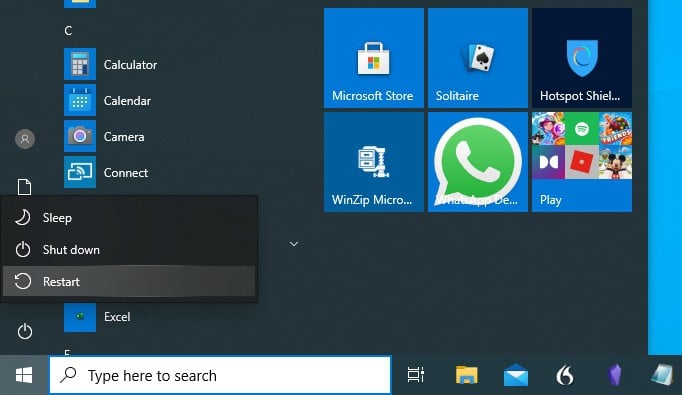
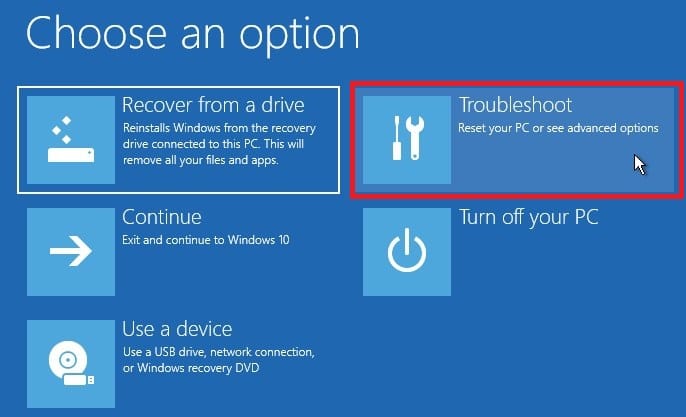
Step 2. Press and keep holding Shift down on your keyboard, and then click on Restart. As in, release Shift only after you’ve clicked on Restart. A new menu will appear. Choose “Troubleshoot.”
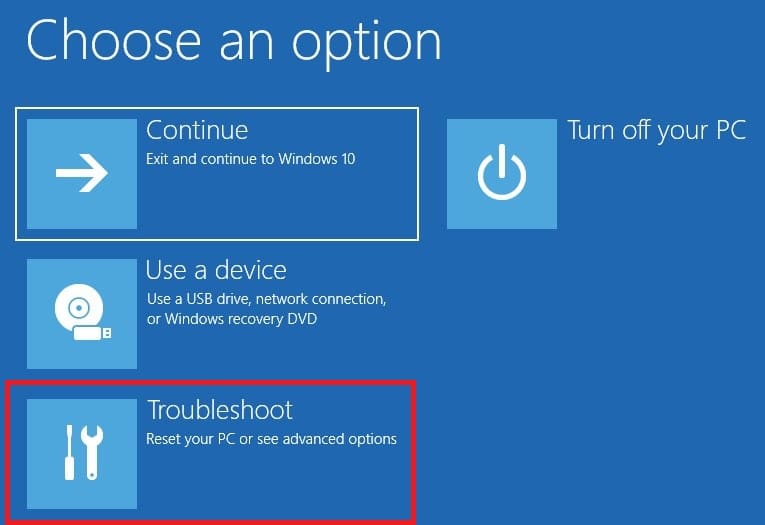
Step 3. Two choices will come up next. Avoid Reset this PC, which will reset all your settings and reinstall Windows 10 from scratch. Instead, go for Advanced options.
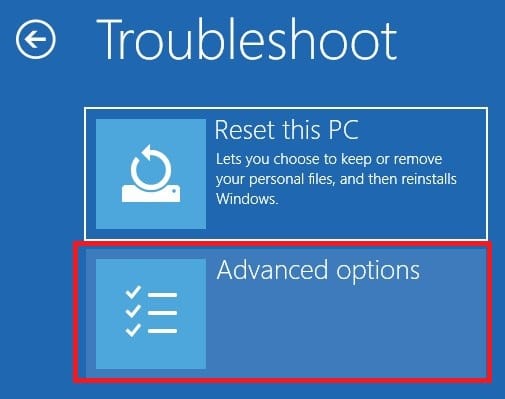
Step 4. A more complicated group of choices will show up. Out of all, choose Startup Settings.
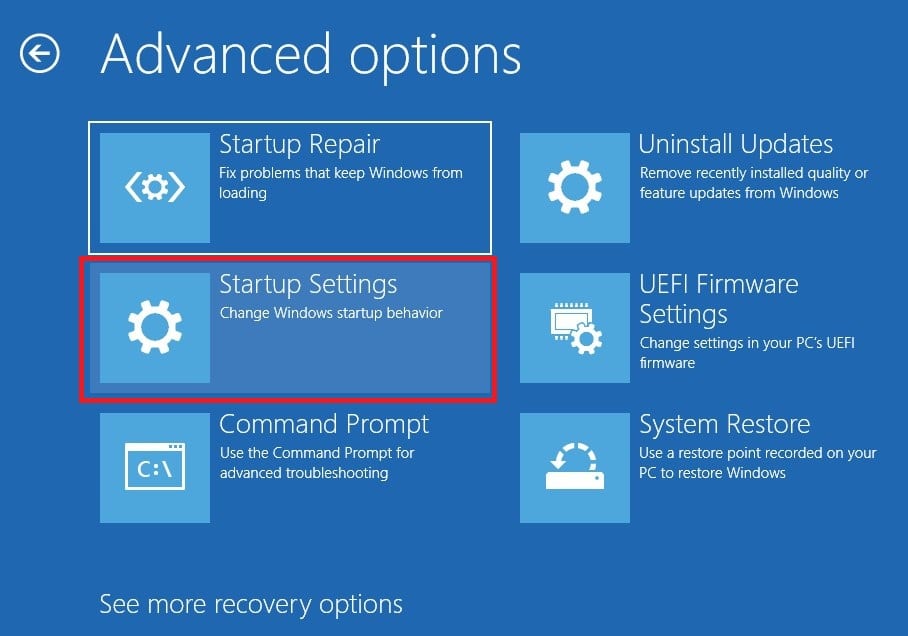
Step 5. Thankfully, this step’s easier: click on the single “Restart” button on the bottom right to do precisely that, and access a new set of Windows options.

Step 6. After your PC restarts, instead of Windows loading, as usual, you’ll be met with a menu offering more options. Press either 4 or 5 to enable Safe Mode or Safe Mode with Networking, respectively.

Step 7. After a while, you’ll be on Windows 10’s desktop in Safe Mode.

Although it includes more steps than other approaches, this is considered the most straightforward way to enter Safe Mode in Windows 10. Still, it’s far from the only one.
Boot in Windows 10 Safe Mode from Command Prompt
Is your desktop accessible, and you want an even easier and quicker way to start Windows 10 in Safe Mode while booting? Then, skip the previous approach. Instead, fire up either CMD or PowerShell with elevated privileges (launch either “…as Administrator”). Then, type the following precisely as you see it (notice the spaces):
bcdedit /set {default} safeboot minimal
This will set your Windows installation to enter Safe Mode while booting. To also have network access, use the following instead:
bcdedit /set {default} safeboot network
Note that both commands are a permanent change, which means your PC will always enter Safe Mode while booting. So, this will happen not only during the next reboot but on all subsequent reboots.
To stop that, disable Safe Mode and boot normally, you’ll have to remove this tweak with:
bcdedit /deletevalue {default} safeboot
After that, Windows 10 will return to its normal mode of operation.
Windows 10 Automatic Repair Mode to the Rescue!
Does your PC freeze before or right after entering your desktop, leaving you no time to choose to enter Safe Mode for troubleshooting? Don’t fret, for Windows 10 has a failsafe and an alternative mode built-in, precisely for such scenarios: the Automatic Repair mode. As a bonus, you can also access the full Safe Mode from Automatic Repair. However, the option isn’t as easy to locate.
Automatic Repair mode is enabled automatically when Windows fails to complete loading over three times in a row. Usually, when a problem appears where Automatic Repair is mandatory, you won’t have to do something to access it: your computer will fail to load Windows fully, so, inadvertently, after three failed attempts, Automatic Repair will show up.
Still, if you want for some reason to access it manually, you can exploit the way it’s enabled and force your computer to fail booting Windows.
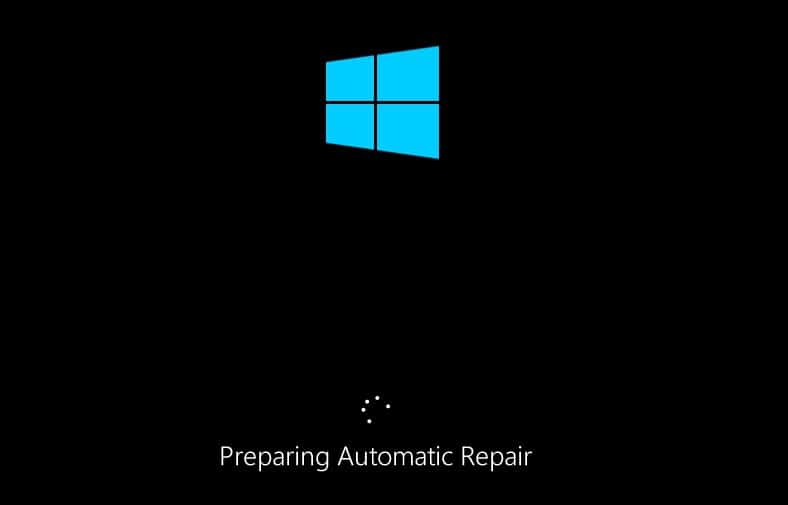
Step 1. Press the reset button while Windows 10 is loading before it reaches the login screen or your desktop. Then, repeat another two times. Eventually, Windows 10 will “notice” it can’t load properly and inform you that it’s “Preparing Automatic Repair.”
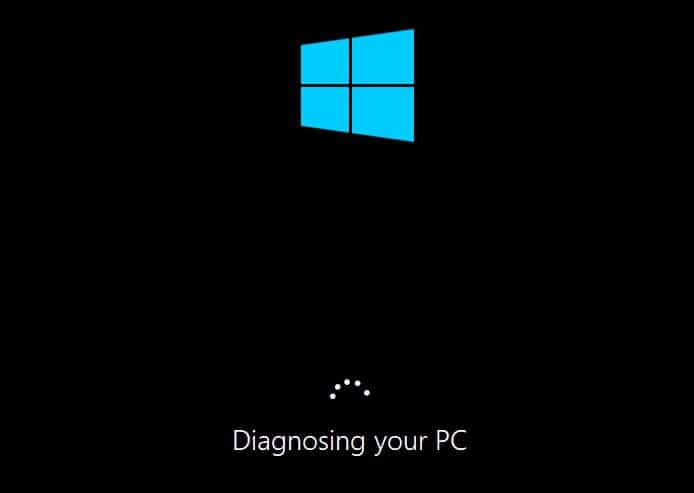
Step 2. Windows 10 will spend some time diagnosing your PC. Depending on if you’re dealing with a software or hardware fault, you might see different results.
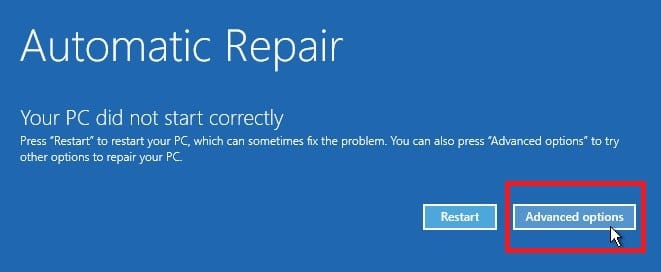
Step 3. Still, in most cases, after a while, Windows 10 will present you with choices to either “Restart your computer” or access a menu with “Advanced options.” Go for the latter.
Step 4. Choose “Troubleshoot” from the next page of options that will show up.
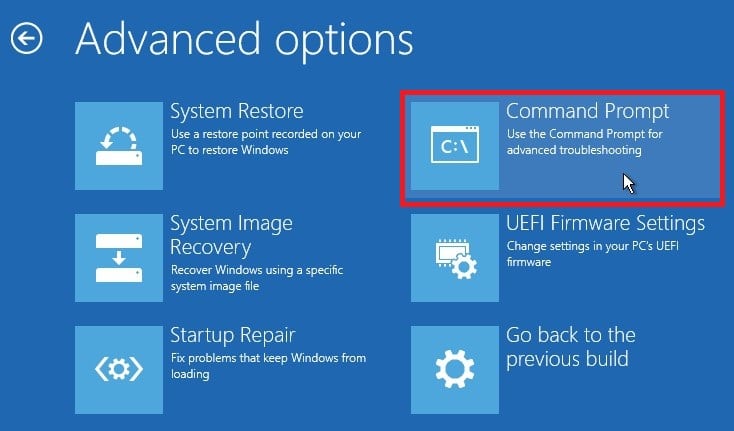
Step 5. Don’t click on “Reset this PC,” which will reinstall Windows to make your PC feel brand-new. Once more, go for “Advanced options” instead.
Step 6. Click on “Startup Settings” out of all the options you’ll meet next.
Step 7. Finally, click on the single “Restart” button on the bottom right to reboot your computer to Windows 10’s startup menu of Windows options. From there, you can then select Safe Mode (4 on the keyboard) or Safe Mode with networking (5 on the keyboard).
This way, there’s hope you’ll be able to enter Windows 10 Safe Mode while booting, even when you can’t reach the Windows 10 desktop.
From Installation To Windows 10 Safe Mode
Another way to start Windows 10 in Safe Mode while booting is by using its official Installation Media. That’s why you should never throw away your operating system’s installation DVD or USB Flash Drive. Still, if you don’t have them around, you can always create new installation media for Windows 10 from scratch.
The first step is booting your computer from that media. The process may vary from PC to PC, depending on your motherboard and its BIOS/UEFI, and you’ll probably have to check your motherboard’s manual for the specifics. However, we have a guide on how to do it on a classic BIOS that should give you an idea on how it’s done. Alternatively, check out our tutorial with even more ways to boot your PC from a USB Flash Drive.
You’ll have to either press a key while your computer is booting and choose your optical drive or USB Flash Drive as the primary device for this boot. Alternatively, you can enter your PC’s BIOS/UEFI menu, locate the related option, change it, and save the settings.
Note that the second approach is permanent – your computer will keep perpetually booting from that device as long as it’s still connected and accessible. To revert the change and stop booting from that media, you’ll have to re-enter your PC’s BIOS/UEFI menu and undo your last tweaks. You’ll have to place the storage device with your actual Windows 10 installation at the first spot again, as “the primary boot device.”
Step 1. When your PC recognizes the installation media and “sees” it can boot from there, it will prompt you to press a key if you want to boot from it. Do so – or, after a while, your computer will resume booting normally.

Step 2. The Windows 10 Setup installer will show up. Don’t worry; you won’t have to reinstall your OS from scratch. Choose your language, time and currency format, and keyboard layout, and click on Next.

Step 3. Don’t click on “Install now.” Doing so will start an actual OS re-installation, which could lead to a different set of problems. Instead, click on the small “Repair your computer” on the bottom left of that screen.

Step 4. You’ll meet a group of, by now, familiar-looking options. Click on Troubleshoot.
Step 5. From the next set of options, choose the “Advanced options” entry.
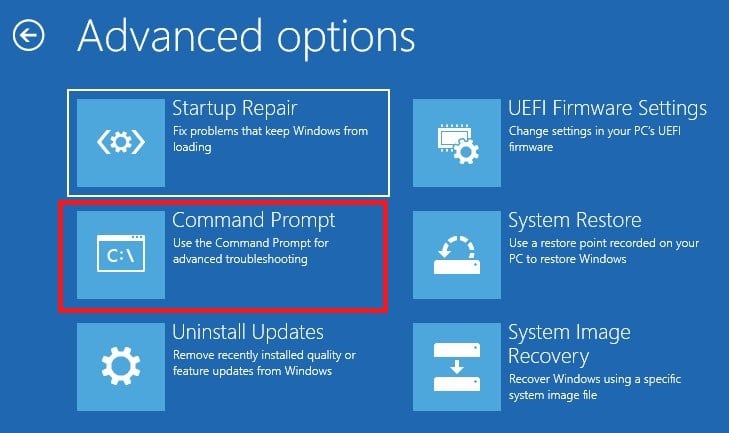
Step 6. Strangely, there isn’t an option to access Safe Mode hidden in those menus. However, there’s a way to still do it by using the command prompt solution we saw earlier. So, choose “Command Prompt” from the options that show up.
Step 7. Now, jump to our section above about how to access Safe Mode from the command prompt and follow the steps to enable it.
Just like with the “normal” command prompt approach, remember to revert your changes afterward, or you’ll be stuck in a loop, always booting into Safe Mode.
Recover Your Way To Windows 10 Safe Mode
Having a Recovery Drive available is proof of forward-thinking. Even if you don’t have Windows 10’s installation media handy, you can reinstall your operating system with a Recovery Drive as if you did. As a bonus, you have access to a similar suite of troubleshooting tools and an additional way to enter Safe Mode.
The Best of all is that you don’t have to re-purchase original installation media for Windows 10 or download and convert ISOs yourself. You can create a Recovery Drive from any working installation of Windows 10.
Step 1. Connect the USB Flash Drive that you want to use as a Recovery Drive. Note that its contents will be gone after the process completes, so ensure you don’t have any important files stored there. Press Windows Key or click on your Start menu and start typing “recovery drive.” Select the appropriate entry when it appears.
Step 2. Allow the Recovery Drive tool some time to scan your drives and locate those that are compatible with it.

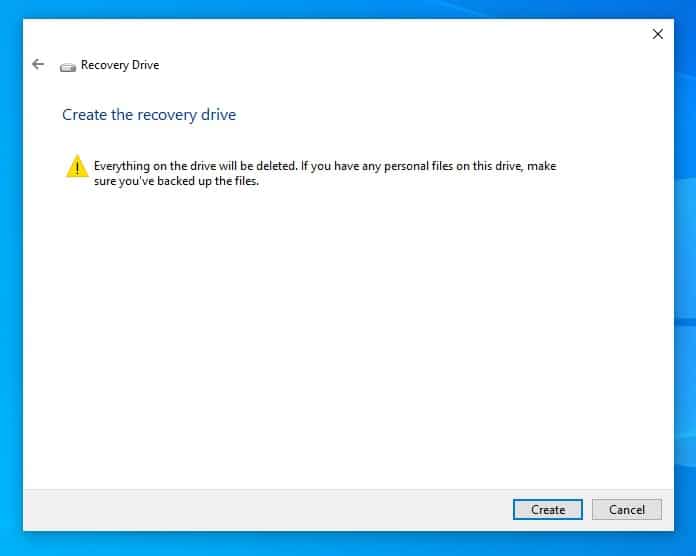
Step 3. After it completes its scan, the Recovery Drive tool will show you a list of compatible drives. In our case, as evident in our screenshot, we only had one such device connected, but you might see more. Choose the one to use as a Recovery Drive and click on “Next.”

The Recovery Drive tool will warn you about how all the selected Flash Drive’s contents will be gone when the process completes. Double-check you don’t mind everything in the drive being erased, and click on “Create.”
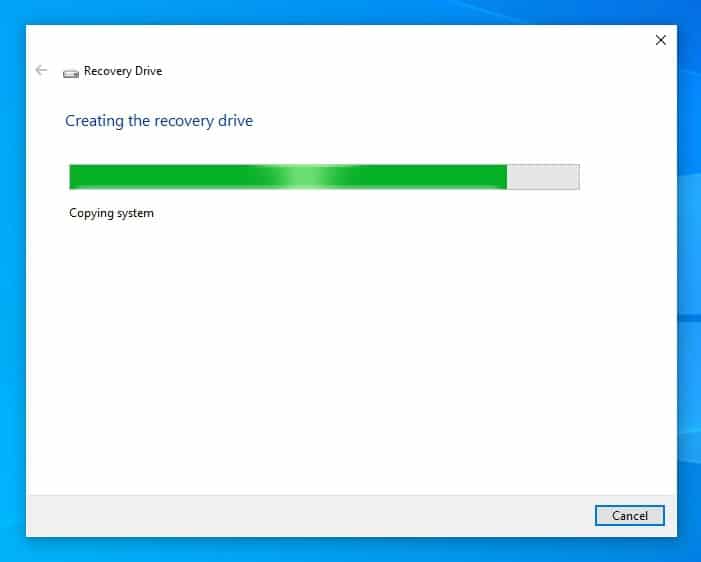
Step 4. Wait for the Recovery Drive tool to gather all needed files and settings, format your drive, and then set it up as a Recovery Drive from scratch. Depending on your computer’s speed, this process might take mere minutes or leave you enough time to prepare a cup of coffee (and some sandwiches).
Step 5. The Recovery Drive tool will inform you when your Recovery Drive is ready. You can then click on “Finish” to exit the tool. Then, disconnect your Recovery (Flash) Drive for when you need it.
Now, let’s say that you want to use this Recovery Drive to boot Windows 10 in Safe Mode. Although the Recovery Drive doesn’t directly offer that option, you can use the same method we saw for installation media:
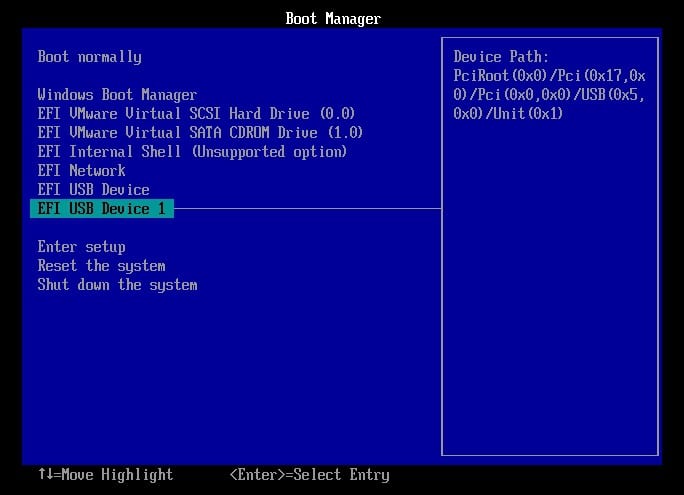
Step 1. Check your motherboard’s manual and set your computer to boot from your Recovery (Flash) Drive.
Step 2. Choose your keyboard layout.

Step 3. Ignore the primary option, “Recover from a drive,” as well as most of the rest. Click on “Troubleshoot” instead.
Step 4. When in “Advanced options,” choose “Command Prompt.”
Step 5. Proceed as we’ve explained above (in the section about enabling Safe Mode through the command prompt) to set Windows 10 to reboot into Safe Mode.
Once more, when you don’t need Safe Mode anymore, remember to “undo” enabling it from the command prompt. Otherwise, or your PC will keep booting into it.
Extra Tips
If those weren’t enough, you have (at least) two more ways you can use to reboot Windows 10 in Safe mode.
1. Boot In Safe Mode Windows 10 from Settings
Another way to access Windows 10’s typical Safe Mode boot menu is tucked away somewhere in the OS’s settings. But, where?
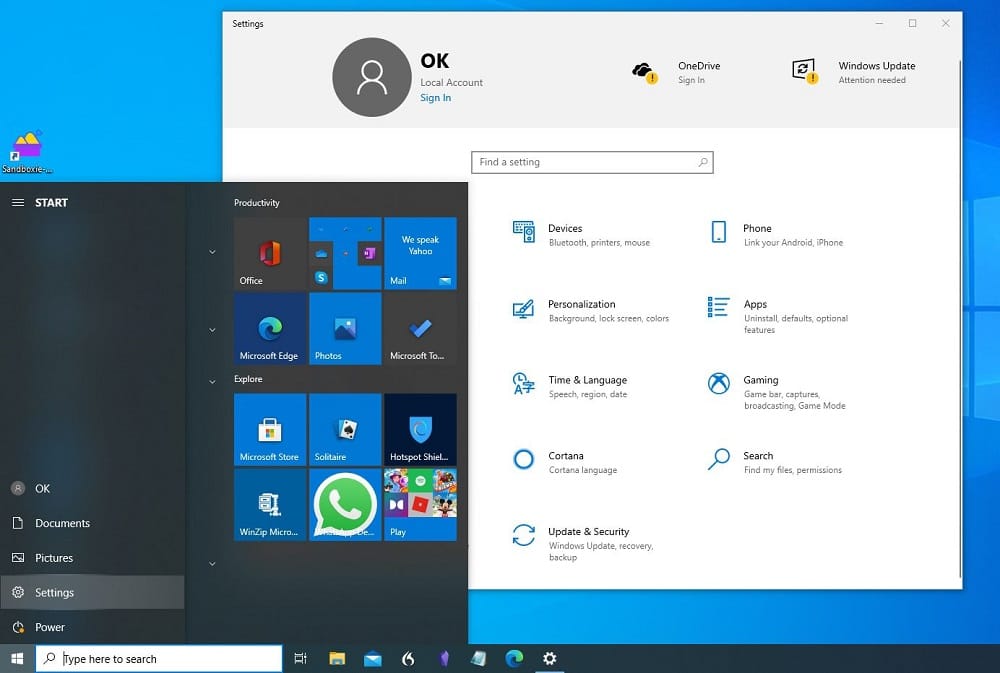
Step 1. Press the Windows Key or click on Start, then click on Settings.
Step 2. Select the “Recovery” settings page from the menu on the left. Then, click on “Restart now” under “Advanced startup.”
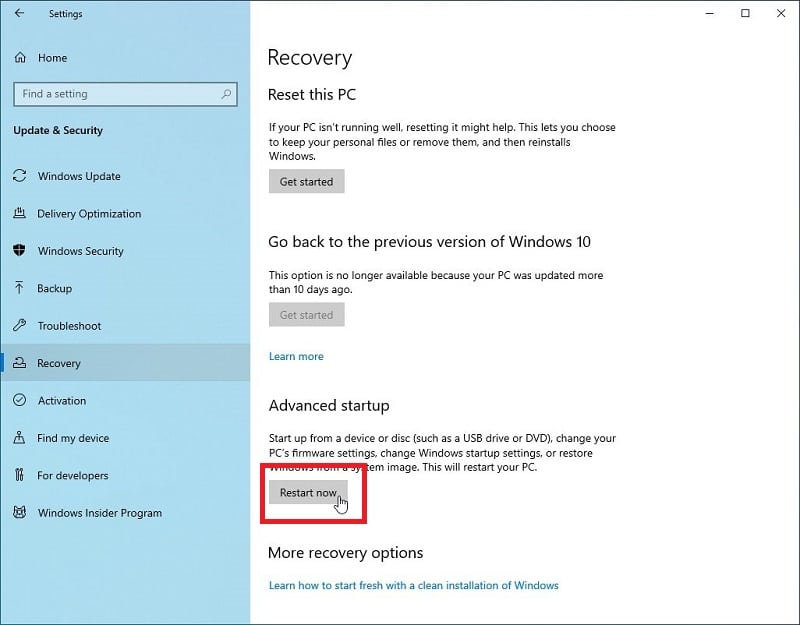
That’s all you have to do to visit Windows 10’s Safe Mode boot menu from the OS’s Settings.
2. Boot In Safe Mode Windows 10 via System Configuration
Many people forget about the following ultra-easy method to reboot Windows 10 in Safe Mode since it’s conveniently hidden in the System Configuration tool.
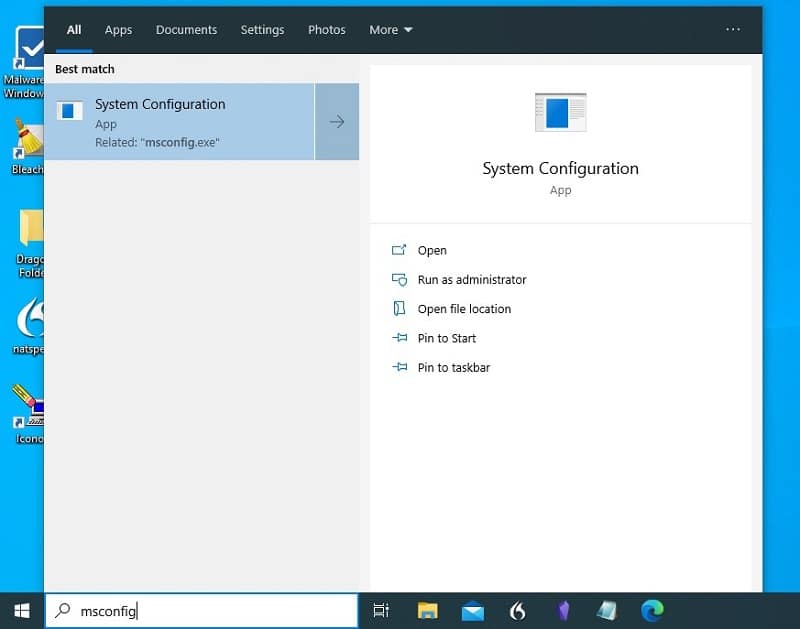
Step 1. Press the Windows Key or click on Start, and then start typing “msconfig.” Run the System Configuration app when it shows up.
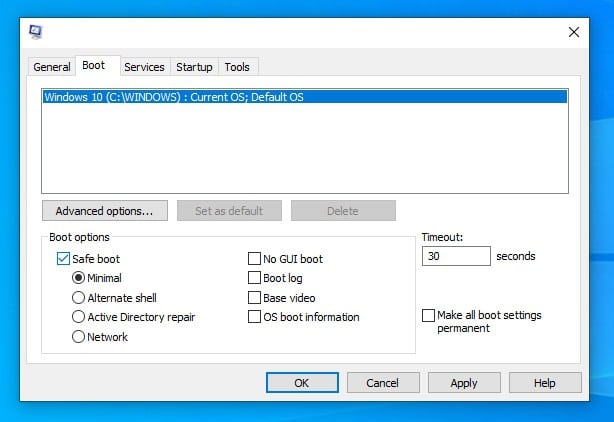
Step 2. When Configuration Tool’s window appears, move to the second tab, “Boot.” There, turn your attention to the “Boot options” on the bottom left. From there, you can enable booting Windows 10 into Safe Mode, but also choose what type of Safe Mode you wish to enter. You’ll see the typical options, Minimal (“normal” Safe Mode) and Network (Safe Mode with network access). In most cases, you’ll probably want to skip the other options sandwiched between them, “Alternate shell” and “Active Directory repair.”
After clicking on OK, you’ll also need to reboot to reach the Windows 10 Safe Mode boot menu.
FAQs About Safe Mode in Windows 10
Question: Which is the easiest way to boot Windows 10 in Safe Mode?
Answer: Sometimes it’s a matter of personal preference, others of necessity. Even if you prefer Shift + Left Clicking on Restart, it wouldn’t matter if the reason you need to enter Windows 10’s Safe Mode is that you can’t reach Windows 10’s desktop itself. Thus, you’d have to choose an alternative route to Safe Mode.
Still, when strictly talking about the straightforwardness of each approach, we’d have to go with either Shift + Restart or the MSConfig route.
Question: Are there other ways (than those listed) to enter Windows 10’s Safe Mode?
Answer: Probably, but the very fact we can’t recall them means that they’re probably much less straightforward or outright obscure. Do tell us if we missed the one you prefer in our comments section below.
Question: Is booting Windows 10 in Safe Mode dangerous in any way?
Answer: Booting Windows 10 in Safe Mode isn’t dangerous. Still, what you do while in Safe Mode is a different story.
In Safe Mode, you have even less restricted access to everything in the OS compared to when it’s running normally. That’s why entering Safe Mode is better when troubleshooting: less “automatic stuff” is working in the background, and you, the user, are more in control.
This control can be a double-edged knife since it’s much easier to destroy your Windows 10 installation while in Safe Mode if you’re not careful.
Question: Are those methods to boot Windows 10 in Safe Mode really safe?
Answer: We want to answer positively, but no, the truth is that one of them can have a negative impact on your Windows installation, or even your hardware: force-resetting your PC to, in turn, force Windows 10 to show its boot menu.
If Windows 10 was writing something to a storage media the moment you forced the PC to reboot, you’d have interrupted that process. Such an incomplete write may lead to filesystem corruption.
Thankfully, the situation’s not as dire as it sounds: Windows 10 comes with diagnostic tools for situations like these. Those tools run automatically after a restart, check the operating system’s files, and fix or replace them if corrupted.
Thus, we suggest you keep this particular method as your very last option.
Question: Can I boot Windows 10 in Safe Mode whenever I want?
Answer: Yes, but we wouldn’t suggest you do.
Safe Mode feels more restricted since it doesn’t load the software (and extra drivers) on which you’re used from the typical Windows 10 desktop experience.
Apart from a lackluster (or outright annoying) user experience, using the OS in Safe Mode can also be dangerous – for the OS itself, not you. Under regular operation, Windows 10 includes safeguards against the users themselves – for it’s easy with an absent-minded move to, for example, remove the drivers for an active piece of hardware. Some of those safeguards are gone in Safe Mode.
Primarily, though, you’ll want to avoid it because of the sub-par user experience it offers compared to the “normal” Windows 10 desktop.
Conclusion
If you feel a bit lost among the many ways you can boot Windows 10 in Safe Mode, don’t worry: you don’t have to remember all of them.
However, it would be best to memorize one or two that you prefer and find easier to recall based on how you’re using your PC.
There’s a reason Safe Mode exists, and it’s best to know how to reach it when needed than having to search for those methods then.