Computers and their operating systems are not infallible. This is never more evident than when you attempt to boot up your Windows 10 PC but can’t even get to the login screen. At times like these, it would have been beneficial to have created a Windows 10 bootable disk.
What Is A Windows 10 Bootable Disk?
A boot disk, also referred to as a startup disk, is a form of recovery media. On Windows 10, the term boot disk has generally been replaced with recovery disk or repair disk. Should your operating system ever fail or become corrupted, having a bootable disk for Windows 10 is a great investment.
Creating a Windows 10 boot disk is a simple process and doesn’t require much. All that’s needed is a computer connected to the internet with either a USB or CD/DVD burner and a USB flash drive with at least 8GB of storage or a blank DVD-R disk.
For those using the bootable disk in a Windows 10 clean install, a valid Windows 10 license is also necessary. The Windows 10 license will have to be retrieved from a version of Windows 10 you’ve purchased. This version will have to be separate from the one that may have come already installed on your computer.
There are a few methods you can use to create a bootable disk for Windows 10.
Method 1. Create A Windows 10 Bootable Disk With The Media Creation Tool
Microsoft has created its own program that will download all required files for a Windows 10 bootable disk and write them to a DVD or USB flash drive. The Media Creation Tool can be downloaded through Microsoft’s official website. Be warned; if using a USB drive to create a Windows 10 bootable disk, all current data will be overwritten and unrecoverable.
Step 1. Open your web browser and navigate to Microsoft’s Windows 10 software download page. Scroll down to the Create Windows 10 installation media section, and click the Download tool now button.

Step 2. Run the installer. Click Yes at the UAC prompt, and Accept at the Read the terms window.
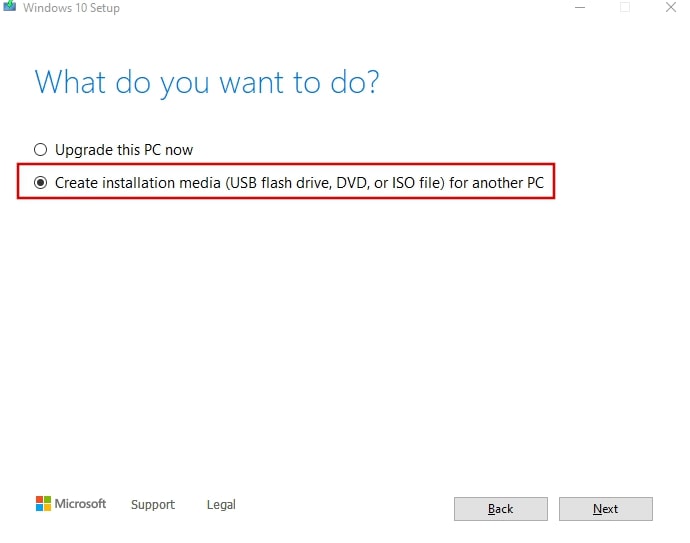
Step 3. Once on the What do you want to do? Prompt, select Create installation media (USB flash drive, DVD, ISO file) for another PC. Then click Next.
Step 4. For the next window, ensure that the box marked “Use the recommended options for this PC” is checked, and click Next.
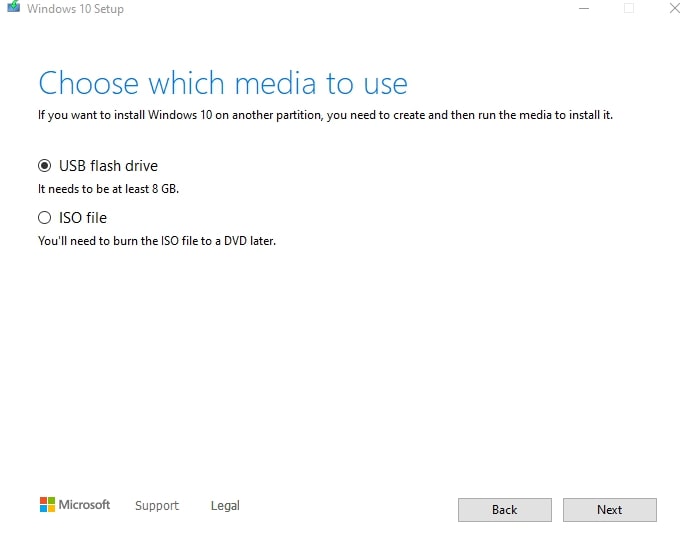
Step 5. The following screen will have you select which form of media you’ll be using to create a bootable disk for Windows 10. Choose whichever you plan to use and click Next. We’ll be selecting a USB drive for this example.
Step 6. You should now select your USB drive from the list shown. Make sure that it’s inserted into the PC. If you have not yet done so, do so now, and click Refresh drive list.
Step 7. Once selected, click Next. Windows will now write all required information and data to your USB flash drive. This process will take some time, and you can continue to use your PC as normal while the data is being written.
Upon completion, you will be able to remove the USB drive from your PC and use it as a Windows 10 bootable disk.
Method 2. Create A Windows 10 Bootable Disk With PassFab For ISO
During the Media Creation Tool method, if you select ISO at step 5, it will offer you the choice of burning the image to a DVD as soon as it’s downloaded. However, if you’d prefer an easier one-click solution to creating or burning a Windows 10 bootable disk, there is always the PassFab for ISO program.
Step 1. Download the PassFab for ISO program. You can purchase the full version or choose to use the free trial version. Either is fine for this method.
Step 2. Once installed, launch the program. It will open to the main interface, where you can select which ISO to download. Make sure to select the version of Windows 10 that you have an activation key for.
Step 3. It could take a while for PassFab to download an ISO file. If you have a copy of the ISO already on your computer, you can choose to import it to PassFab.
Step 4. Once the ISO has been downloaded (or imported), you’ll be asked which media you’d like to burn it on. Select either USB (ensure that it is already inserted into your PC) or CD/DVD. It’s recommended that you leave the Disk Partition Type as default.
Step 5. After you choose, click Burn. If you selected a USB, you’ll receive a pop-up warning that all data currently on the USB will be erased.
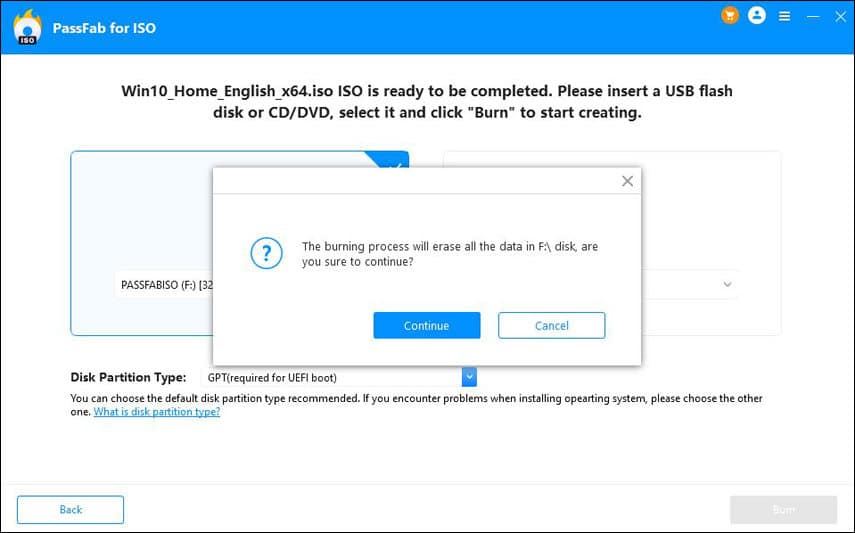
Step 6. Click Continue to proceed. The process will take a bit more time than it did to download ISO.
Once complete, PassFab will offer to reinstall Windows 10 if you wish to do so at this time. Regardless, you now have your Windows 10 bootable disk.
Method 3. Create A Windows 10 Bootable USB with Rufus
This method will require that you already have the ISO image file on your computer. The easiest way to do this is through the Media Creation Tool in the first method.
Similar to PassFab for ISO, Rufus is another program that can help you create a bootable disk from ISO for Windows 10. Just like all previous methods, writing to a USB will overwrite all data currently on the device.
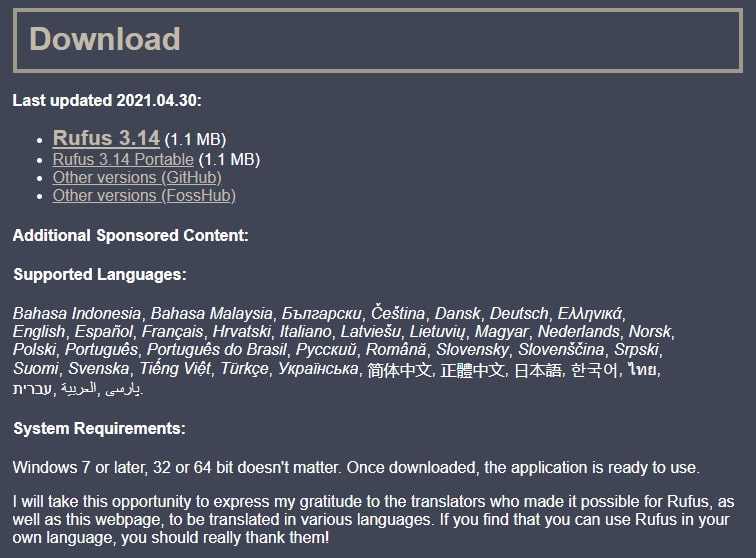
Step 1. Head to the Rufus website and download either Rufus or Rufus portable.
Step 2. After downloading, run the Rufus executable with a USB device already inserted into the PC. It should be immediately recognized. If you have multiple USB devices connected to your PC, just select the one you want to burn the bootable disk data on from the Device drop-down.
Step 3. Boot selection should already have “Disk or ISO image (Please select)” as default. You’ll need to click the SELECT button and navigate to the ISO image file.
Step 4. Most entries should be selected for you based on the device, but in case they’re not: Select MBR for the Partition scheme, Fat32 as the File system, and Cluster size as 4096. All of these are the default standard. In the Volume label box, you can choose a new name for your bootable disk. You shouldn’t have to mess with anything else. So long as the Status line still shows as READY, you can click the Start button.
Step 5. You’ll receive the standard warning of data being overwritten. Just click OK.
Step 6. It’ll take a few minutes for the ISO to be written to the USB drive. You can follow the green progress bar to know when it’s finished.
Step 7. Once it shows as READY again, the process is complete, and you can now exit from Rufus.
Method 4. Create A Windows 10 Bootable Disk Using Command Prompt
For those who don’t want to bother with third-party programs, Command Prompt can also be used to create a bootable disk for Windows 10.
Step 1. First, make sure your USB is already inserted into the PC. If you have anything on the USB drive, either move it to a safe location or you’ll have to write over it.
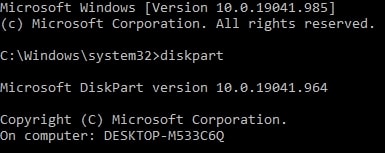
Step 2. Next, open Command Prompt as an administrator and type in the following command:
DISKPART
Step 3. Hit Enter to gather a bit of information on your USB drive.
Step 4. Follow this up by typing in the next command:
LIST DISK
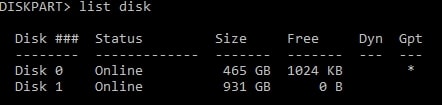
Step 5. Note which Disk number is the USB device you want to write the data to. It should be easily discernible by the size and amount of free space available.
Step 6. Once you know the Disk number, enter the following commands one after another, each followed by enter. Do not type in the information written in brackets:
SELECT DISK # (change the # to represent your Disk number)

CLEAN

CREATE PARTITION PRIMARY

SELECT PARTITION 1

ACTIVE

FORMAT FS=NTFS Quick (Replace NTFS with FAT32 if your system supports UEFI)

ASSIGN

EXIT
Step 7. At this point, minimize the Command Prompt (DO NOT CLOSE IT!) as we’ll come back to it later.
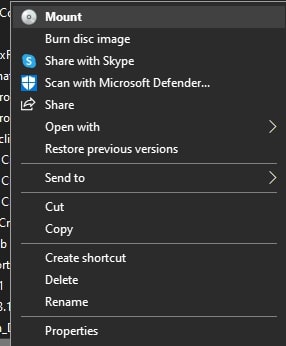
Step 8. Now, insert your Windows 10 DVD into the optical drive of your PC and look at the drive letter. If you do not have a Windows 10 DVD, you can mount the ISO file of Windows 10 by right-clicking it and selecting Mount.
Step 9. You’ll need the drive letter of both the Windows 10 DVD and the USB flash drive.
Step 10. Maximize Command Prompt once again and type in the following command:
D: CD BOOT (D is whichever drive letter your Windows DVD/Windows 10 ISO file is mounted)
Step 11. Press Enter. Follow this up with another command:
BOOTSECT.EXE /NT60 E: (E is replaced by the drive letter for your USB flash drive)
Step 12. This will update your USB drive letter with a bootcode.
Step 13. You can now copy the files from your Windows 10 CD/mounted Windows 10 ISO file to your USB device.
Your Windows 10 bootable USB device is now ready to go.
Frequently Asked Questions Of Windows 10 Bootable Disk
What Do I Do Now That I Have Created A Bootable Disk For Windows 10?
At this stage, should you need to use the bootable disk, you’ll want to verify that your computer’s BIOS is configured to boot from a removable disk. This will require accessing your BIOS during PC reboot and changing the boot sequence, if necessary. Once everything is set correctly, power down the PC and insert the bootable media. Power on the computer, and it should boot the Windows 10 installation from your removable disk.
What Other Operating Systems Can I Use a Boot Disk For?
All Windows OS from Windows 95 to Windows 10 can use boot disks. The same can be said for Windows Servers operating systems such as Windows Server 2016 Essentials, Windows Server 2012 R2 Essentials, and Windows 2012 Essentials. The use of a boot disk is also not limited to Windows. Utilizing the Rufus method, you can create a bootable disk for both the macOS and Linux systems.
Is There A Big Difference Between Burning A Bootable Disk To A USB Flash Drive Versus A CD/DVD?
Not especially. The biggest difference is access and convenience. Sure, there are some programs, like Rufus, that offer additional options for USB drives. However, ISO was never really meant for a USB. It’s more difficult for a USB to read an ISO file than a CD/DVD. This doesn’t mean that a USB is necessarily a worse option, just that an ISO file will be read differently on the boot loader based on which choice of media (USB or CD/DVD) is used. Rest assured that whichever media you choose, things should run smoothly. So choose which option is best for you.
Conclusion
Now that you have a Windows 10 bootable disk, you can use it to start the “Windows Setup” wizard, which will perform a clean installation of Windows 10 or an in-place upgrade if necessary.