An ISO file is a container, usually derived from a CD or DVD’s contents, that can hold a decent number of files. Though creating CD and DVD backups is its typical function, an ISO can also be created from files and folders already on your Windows computer.
Converting a file or folder to an ISO in Windows can be a painless procedure. So long as you utilize the correct app, of course. Thankfully, multiple apps are at your disposal that can convert a file or folder to an ISO for Windows 10 and 11 computers.
Best File/Folder to ISO Converter
Reasons for creating an ISO on your Windows 10 PC will vary. Keeping specific files and folders readily burnable tends to be a more common one. Regardless, your reasons are your own. We’ve figured out which ISO conversion app is the best available so that you can use it for whatever reason. We have five different File to ISO converter apps that we consider the best on the market today.
1. AnyBurn
Starting with a free app, we have AnyBurn. The app was intended to create an ISO using a CD, DVD, or BluRay player. However, it also has the option to create ISO files that can be placed anywhere on your computer.
Step 1. Navigate to the AnyBurn official website to download and install the application.
Step 2. Once installed, launch the app and locate the option to “Create image file from files/folders”, then click on it.
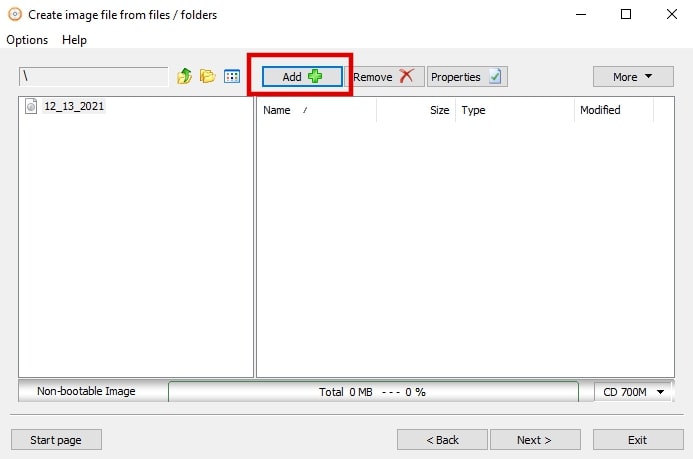
Step 3. In the next window, you’ll be able to select which folders you want to add to your ISO. Click the Add button at the top of the window and add all folders you want to convert.
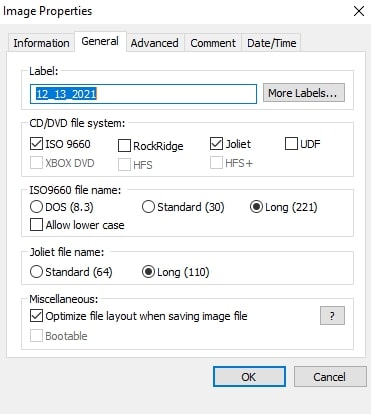
Step 4. Once files have been added, you can click Next to proceed. If you wish to customize the settings for your ISO file, you can modify them through the Properties button located toward the top-right of the window.
Step 5. The following window is for imaging your ISO. Click the folder icon and choose which folder location you wish to save your ISO.
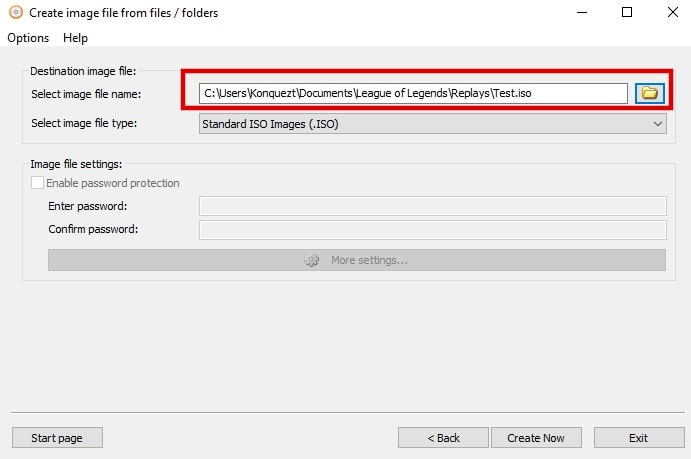
Step 6. Ensure that the file type is Standard ISO IMages (.ISO), and click Create Now.
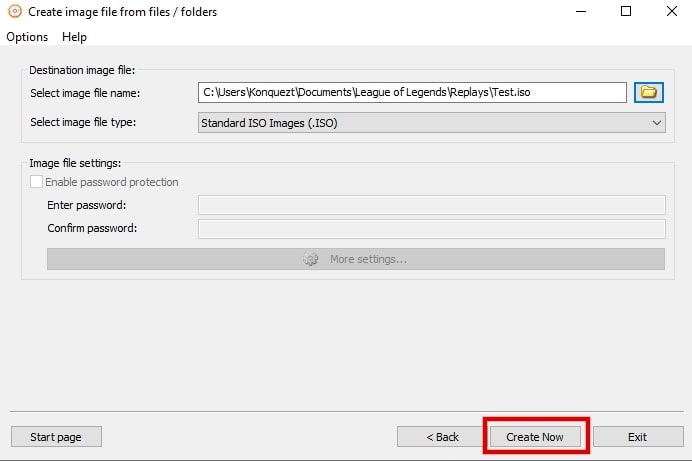
Step 7. Your ISO folder will now be created and saved in your selected location.
2. ImgBurn
One of the more popular and long-running ISO converter apps is ImgBurn. The chances are good that if you’ve ever burned an ISO to a CD or DVD in the past, the name will be recognizable. It’s incredibly lightweight and supports a wide range of file formats.
To create an ISO file or folder:
Step 1. Download, install, and launch the ImgBurn app.
Step 2. From the main window, select Create image file from files/folders.

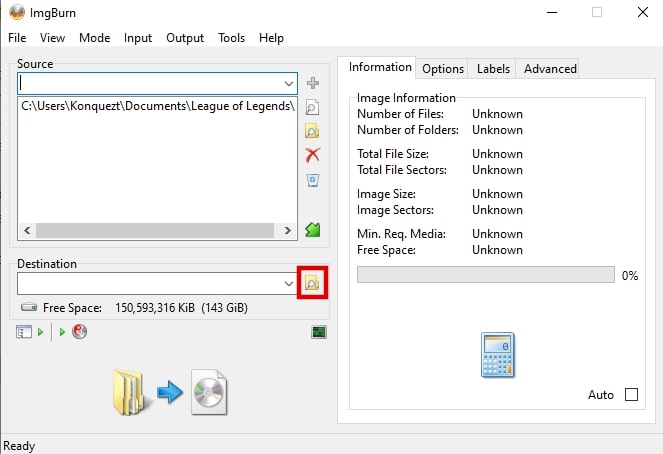
Step 3. In the new window, click the icon of a folder with a magnifying glass to the right of the “Source” box to add the files and folders you want to your ISO.

Step 4. Then, click the same icon to the right of “Destination” to select the folder where you’ll place your ISO on your computer.
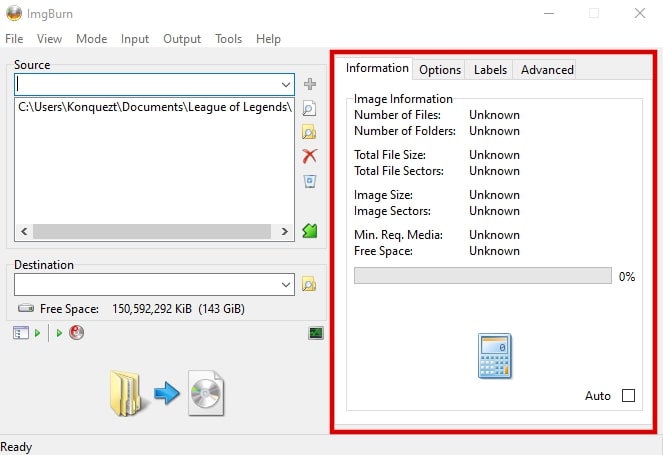
Step 5. On the pane to the right, there are various ISO configuration options should you need them.
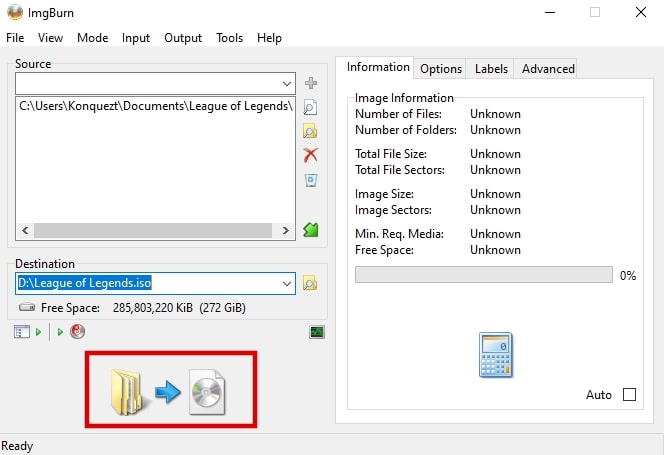
Step 6. Once all changes are complete and information entered, you can click on the Folder to CD icon toward the bottom. This will create the ISO from the files and folders you’ve selected.
3. Folder2ISO
If you’re looking to avoid the need to install any software, then Folder2ISO may be the folder for the ISO application you’ve been looking for. Folder2ISO is a free-to-use, portable ISO file creator that is great for single-use cases.
Step 1. Users need to download the Folder2Iso app and extract its contents by double-clicking on it.
Step 2. Follow this up by running the extracted executable file (.exe).

Step 3. Next, click “Select Folder” and choose the folder you want to be added to your ISO.
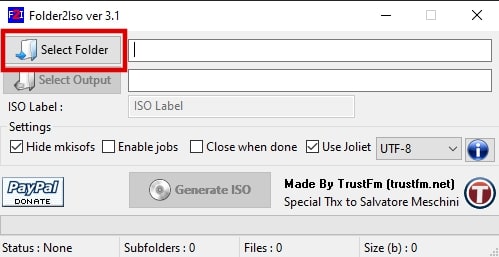
Step 4. Afterward, click “Select Output” and choose where the ISO will be saved on your PC.
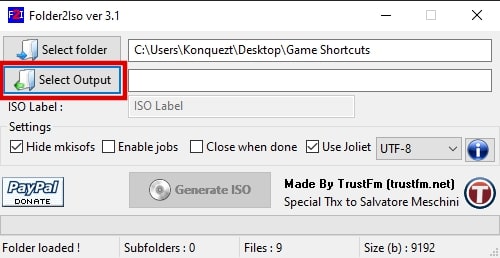
Step 5. Finally, click the Generate ISO button to create your ISO and have it saved to the chosen destination.

From this point, you need only wait until the progress bar has been filled with a green color. This will indicate that the ISO generation process has concluded.
4. WinCDEmu
The open-source option on this list belongs to WinCDEmu. With it, you can create virtual drives from various image file formats on your computer. WinCDEmu will also allow you to mount already created ISO files located on your computer so that you may view their contents.
WinCDEmu is one of the easier options for converting files and folders to ISO. Upon installation, you’ll have the option to generate ISO from folders directly from the context menu.
Step 1. Download and install the WinCDEmu app on your computer.
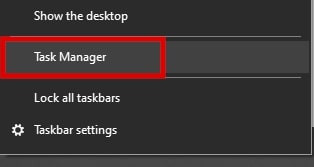
Step 2. Navigate to Task Manager by right-clicking your taskbar and selecting the Task Manager option from the list.
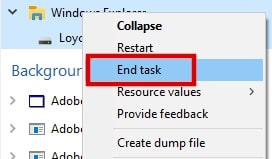
Step 3. Next, right-click the Windows Explorer process and select End Task. This is essential to ensure all newly added items appear within the context menu.
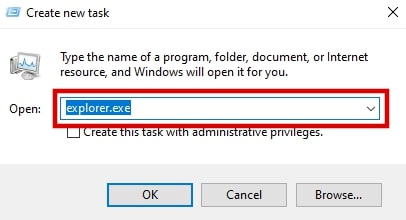
Step 4. Now, click the File tab in Task Manager and select Run new task.
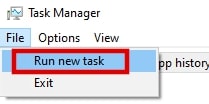
Step 5. Relaunch File Explorer by typing explorer.exe into the field and click OK.
Step 6. With Windows Explorer up and running again, locate the folder you want to convert into an ISO. Right-click the folder (or file), and you’ll notice that Build an ISO image is now an option.
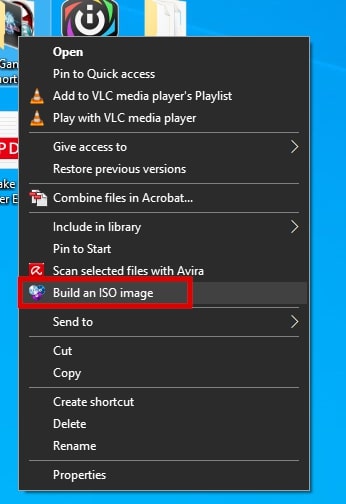
Step 7. Click Build an ISO image, enter a name for the ISO, and select a location where it will be stored.
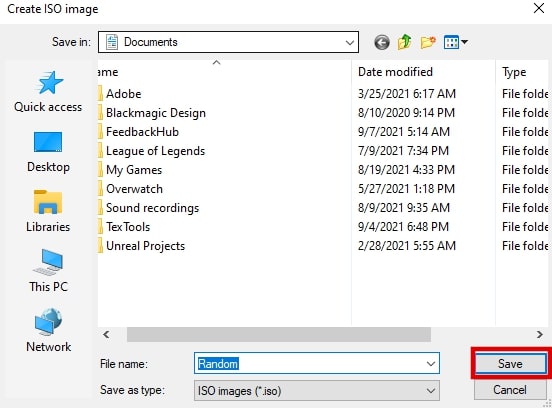
Complete this task by clicking Save. The ISO image will be created fairly quickly and prompt you once complete.
5. AnyToISO
Another simplistic file to ISO converter for both Windows and Mac is AnyToISO. AnyToISO supports a lengthy list of formats making extraction and conversion an easy task. The file or folder is not only convertible to CD, DVD, and Blu-ray, but can also be extracted and converted from your desktop.
Step 1. Download and install AnyToISO from the official website.
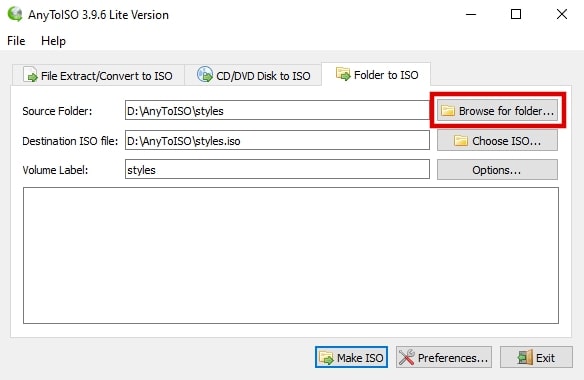
Step 2. Once installed, at the main screen, tab over Folder to ISO.
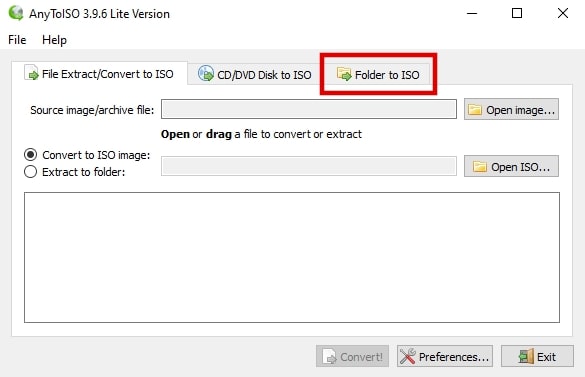
Step 3. Next, type the folder with the images you wish to convert into an ISO in the Source Folder area, or click the Browse for folder… button and select it.
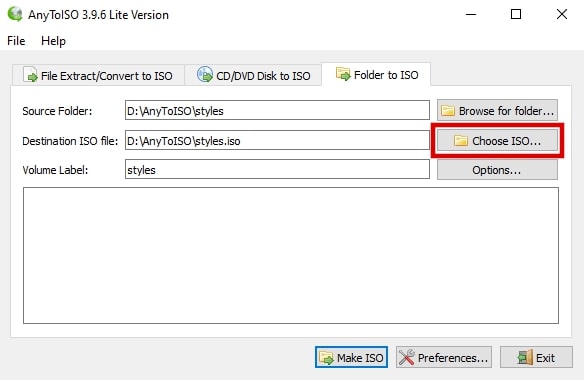
Step 4. Then, choose the destination folder for the converted ISO.
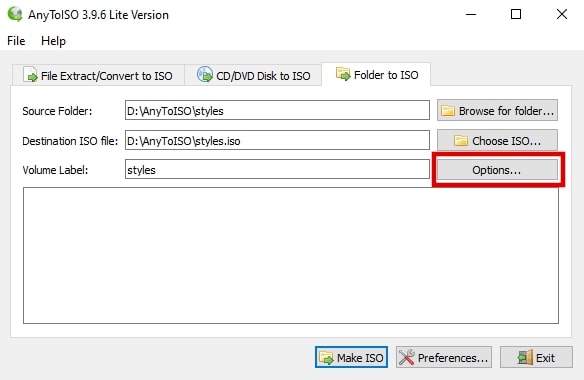
Step 5. It’s also recommended that you select the Volume Label, which can be accessed by clicking the Options… button.
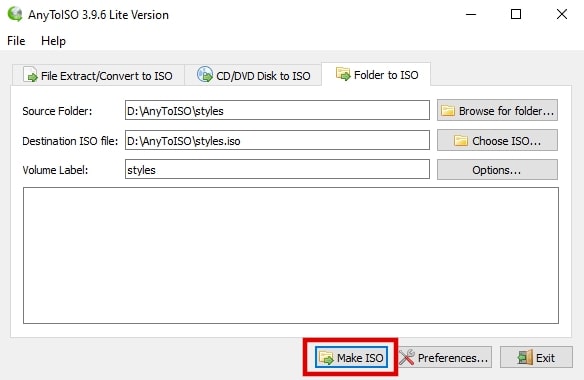
Step 6. Finally, you can click Make ISO. If Make ISO is still grayed out, it means that the above steps were not completed or done correctly.
FAQs
What is an ISO?
An ISO is a copy of a file, folder, or optical disk archived into a single file or folder. Ultimately, it is a compressed form of a larger set of data combined and saved in a singular space.
Why should I convert my file or folder to an ISO image?
Converting files or folders into an ISO image is great as it allows you to mount all combined files onto a single PC drive.
Are ISO converters for Windows 10/11 free?
Not all file and folder to ISO image converters are free; however, most will offer a free trial. All of those in the above list happen to be free for use.
The best app from the above list will depend on your needs. All of them are free and simple to use. Regardless of your choice, all will convert files or folders to ISO in Windows 10/11.