More often than not, when you’re working on Microsoft Word, whether it’s a Resume, Project Report, or any other kind of document, you’d want to enter the current date and time as a record. Of course, you can type it manually in the document, but that requires you to double-check the date and current time. If you’ve been entering it manually all this time, you’d be surprised to know that Microsoft offers multiple different ways to insert the date and time in a Word document quickly.
The best part about this feature is that depending on the method you go for, both the date and time get automatically updated as you open it to make any new changes, so you don’t have to bother with it once you add it. Also, you get to choose between various date and time formats as you please.
Many people who’re new to Word may not necessarily be familiar with these particular options, but we’re here to help. If you’re having trouble getting started, read on to learn the different methods on how to insert current date and time in a Microsoft Word Document:
1. Insert Date and Time in Word with Shortcut Keys
This might be the fastest way to insert the date and time in any Word document, but it has a limitation that we’ll get to in a second. First, move your cursor to the position where you want to enter the date/time and press the following keys:
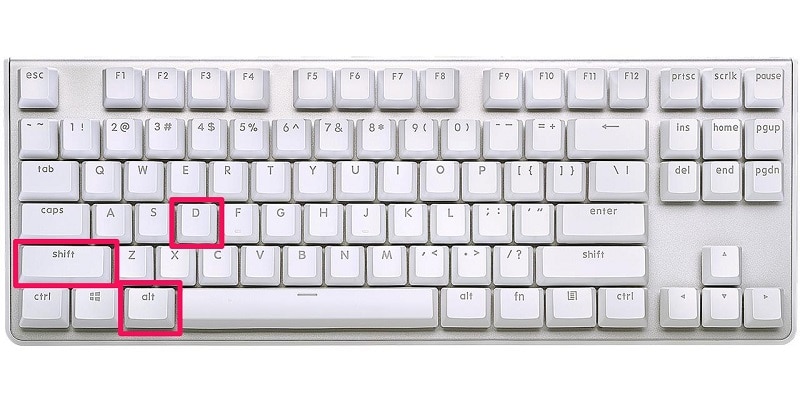
Alt + Shift + D: Pressing all three keys simultaneously will insert the current date in your Word document.
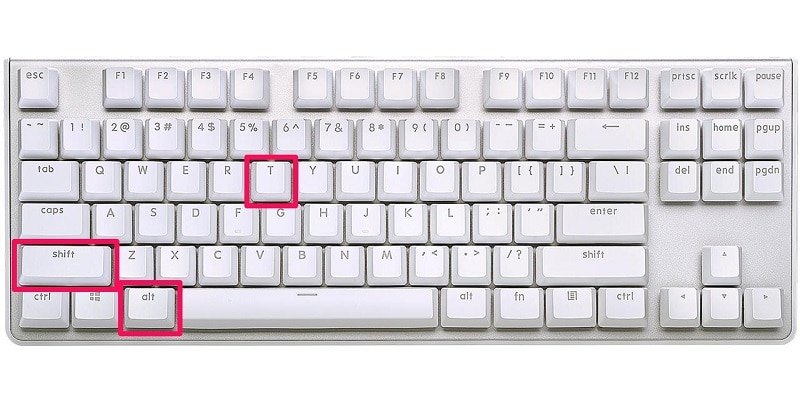
Alt + Shift + T: Pressing these three keys at the same time will insert the current time as a field in your document.
You can enter both of these shortcut key combinations one after the other to insert both the date and time in the same line. The one limitation of this method is that the date and time you enter do not update automatically whenever you open the document to make further edits. You’ll need to manually update it by right-clicking on the date/time field and choosing ‘Update Field’ from the context menu.
2. Insert Date and Time in Word with the Insert Tab
Do you want the date and time to update automatically as you continue to make changes to the document? In that case, this is exactly the method you may want to use to insert current date and time in Word. Here’s what you need to do:
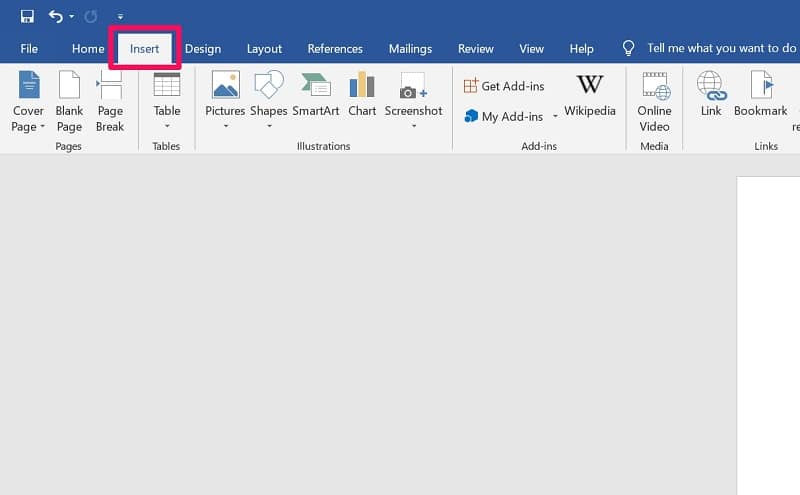
Step 1. Assuming you have your document open, head over to the ‘Insert’ tab from the menu bar.
Step 2. Next, click on the ‘Date & Time’ option, which is located on the right side of the toolbar.

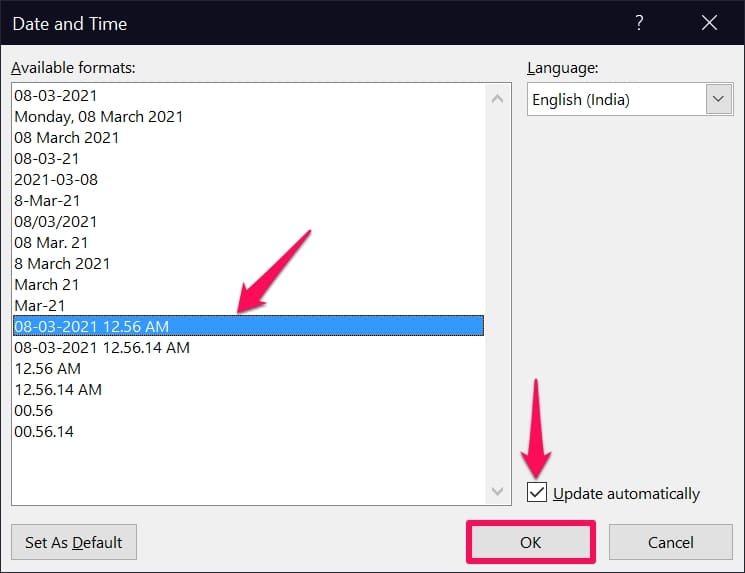
Step 3. This will launch a pop-up window within Microsoft Word. Here, you’ll be able to select your desired date and time format. No matter what format you choose, make sure you check the box next to ‘Update Automatically.’ Click OK to insert the date into the Word document.
Step 4. The date and time will be inserted as a field that automatically updates every time you open the document in Word.

This method may not be as convenient as the shortcut key technique, but you’ll eventually be saving some time in the long run since everything updates by itself. Of course, if needed, you can manually update it by clicking on the field too.
3. Insert Date and Time in Word with the Word PrintDate Field
In a way, this method is fairly similar to the one that we just discussed. However, using this method to insert the date lets people know the exact date and time the document was printed. So, without further ado, let’s take a look at the necessary steps:
Step 1. First, click on the ‘Insert’ tab from the menu bar to get started.
Step 2. Now, in the list of toolbars, you’ll find the option ‘Quick Parts’ next to WordArt. Click on it to proceed.
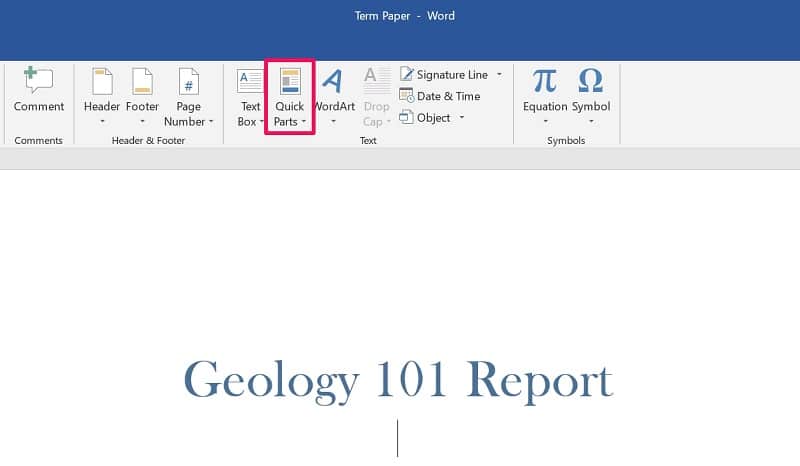
Step 3. Next, click on ‘Field’ from the dropdown menu.

Step 4. This will open a dedicated Field window within Microsoft Word. Here, select the ‘Date and Time’ category to narrow down the results and click on ‘PrintDate’ under field names. Once done, select the date and time format of your choice and click on ‘OK’ to insert the field in your Word document.
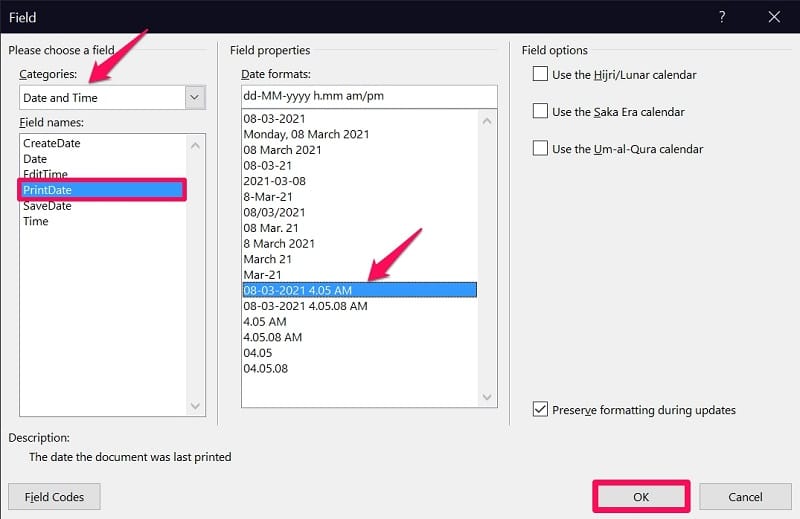
There you go. If the date does not update automatically, which is a rare instance, you may need to close and reopen the Word document or manually update the field by right-clicking on it. This method can be used to insert the date and time in either the body or header/footer of the Word document.
4. Insert Date and Time in Word with Header and Footer Ribbon
Unlike the previous method, this technique is used specifically to make the current date and time appear in the header or footer of the Word document. We’ll be making use of Microsoft Word’s Header and Footer tools to achieve this. Just follow these steps:
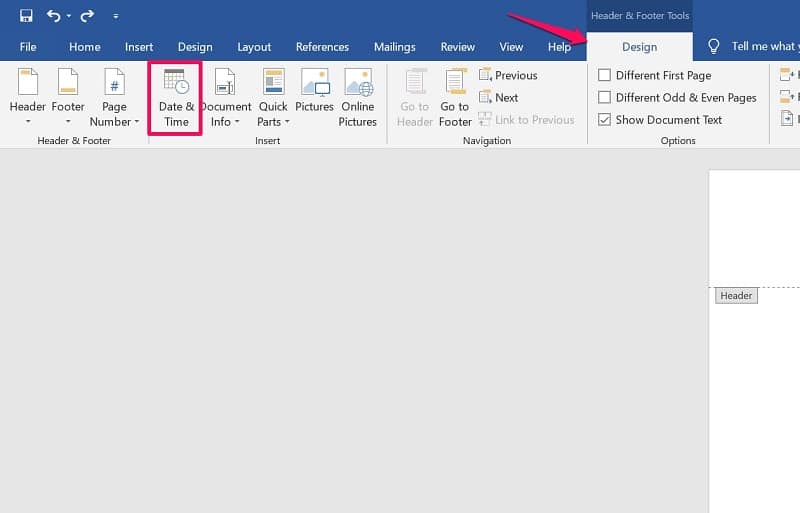
Step 1. To access the Header & Footer tools, you need to first double-click the header or footer of your document.

Step 2. This will take you to a new ‘Design’ tab in the menu bar, but make no mistake, this is completely different from the Design tab that’s already present. Now, click on the ‘Date & Time’ option from the toolbar.
Step 3. The Date and Time format selection menu will open within Word. At this point, select your preferred format, check the box next to ‘Update Automatically,’ and click on OK to insert the data.
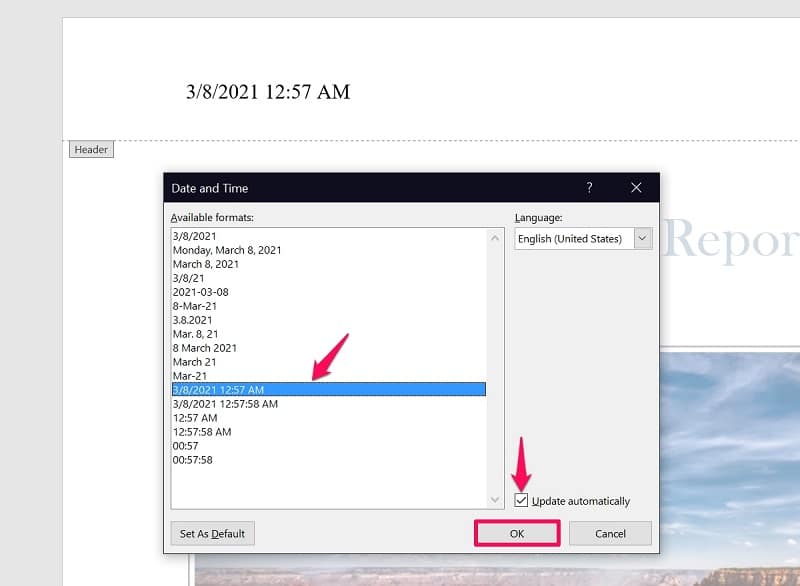
Don’t forget that if you leave the Update Automatically option unchecked, the date and time values will not change by themselves every time you reopen the document. You’ll need to manually update it by right-clicking on the field, just like the shortcut key technique.
Bottomline
You see how easier it is to use Microsoft Word’s built-in tools to insert the date or time that updates by itself? From now on, you no longer have to look at your watch or the calendar to input these values. It’s a one-time task, and you’d likely save a good couple of minutes on each Word document since you’re not manually changing the data.
Hopefully, you were able to find a method that fits your needs. Out of the four different ways that we covered, which one do you prefer using and why? Do you know any additional techniques for inserting current date and time in Word document? In that case, feel free to share your ideas and also make sure to leave your valuable feedback in the comments section down below.