While passwords come in handy for protecting sensitive information in Microsoft Word, they become your biggest regret if forgotten. Besides, Microsoft does not offer any services to retrieve protected Word documents. Be that as it may, you still can employ certain techniques to edit a locked Word document.
This guide will familiarize you with all the methods for editing a protected Word document without password.
Note: Make a copy of the locked Word document before editing via these methods.
Method 1: Edit A Protected Word Document by Saving as A New File
Saving the Word document as a New file might enable you to edit it without any restrictions. Follow these simple steps to learn how to edit a protected Word document by saving it as a new file:
Step 1: Open the locked Word document in read-only mode.
Step 2: Go to File -> Save as and change the file name.
Save the file in a .docx-type document — don’t change it.
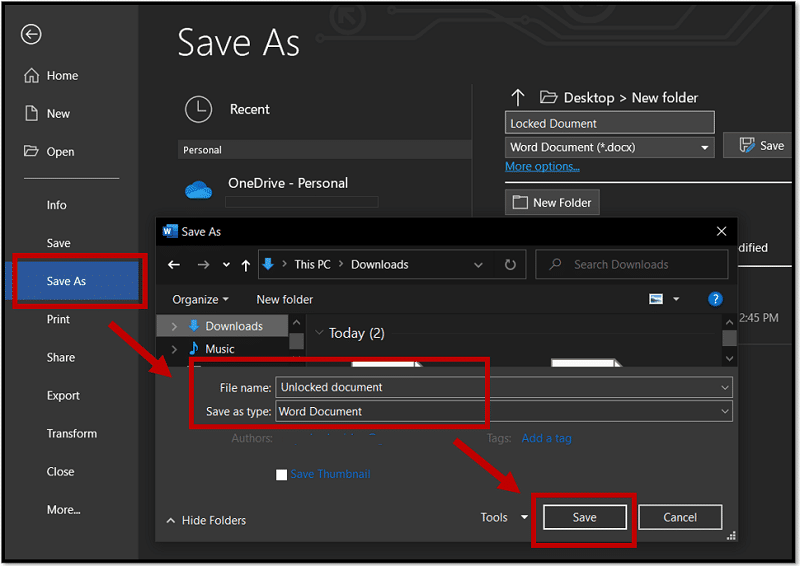
Hover to the saved destination and open the newly saved Word document. You will discover that the new file has no restrictions, and its content is editable.
Method 2: Edit A Locked Word Document by Using the Best Word Password Recovery Tool
Looking for the safest way to edit the locked Word document? PassFab for Word is the program for you.
Using the best Word password recovery tool like PassFab for Word lets you securely edit the password-protected Word document easily.
Follow these simple instructions to learn how to edit a protected Word document using PassFab for Word:
Step 1: Import the locked Word document:
- Visit PassFab’s official site and download the Word Password Recovery tool.
- Launch and install the software on your computer. Open the application.
- From the main interface, click on Add to select the locked Word document.
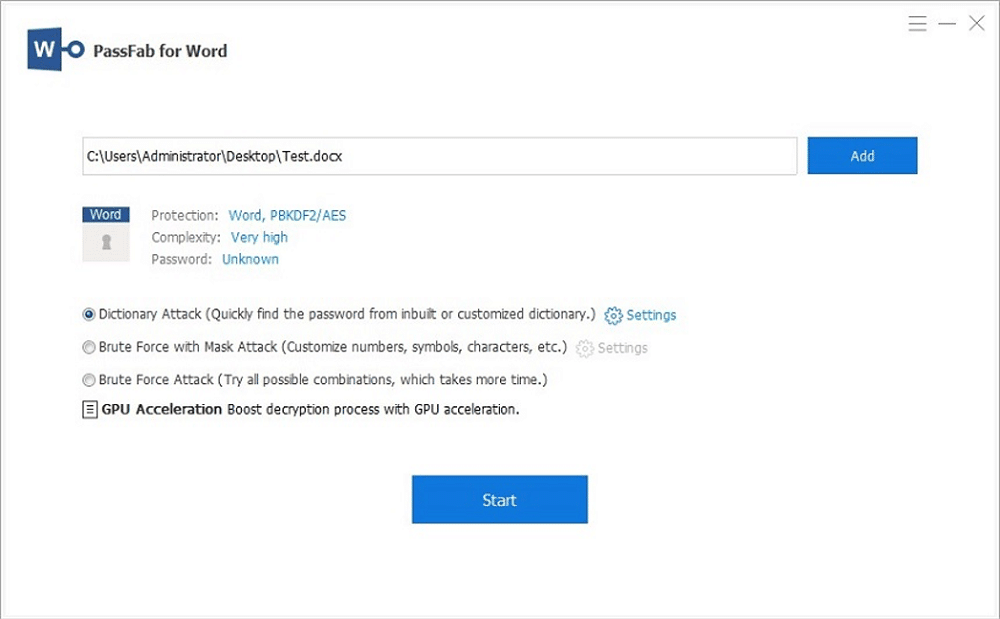
Step 2: Select the desired Attack type:
- Dictionary attack: PassFab will use its built-in dictionary to unlock the Word document.
- Brute-force with Mask Attack: You can use this if you remember any character of the password.
- Brute force Attack: PassFab will try out all the combinations and unlock the Word document; however, this takes time.
After selecting an appropriate Attack type;
- Click on the Start option.
- Wait till PassFab finds out the password.

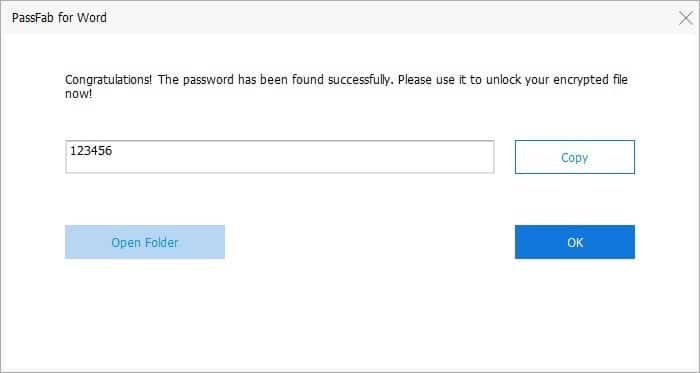
Step 3: Unlock the Word document using the found password:
Copy and use the found password to remove edit restrictions from the Word document.
Following these three simple steps will let you edit any .doc, or .docx locked files.
Method 3: Edit A Locked Word Document by Using WordPad
WordPad, incorporated in all Windows versions, is a simple text-editing processor that you can use to edit password-protected Word documents.
If you still haven’t made a copy, create one before proceeding with this method. This method isn’t as safe as editing a Word document using PassFab.
Follow these simple steps to learn how to edit a locked Word document using WordPad:
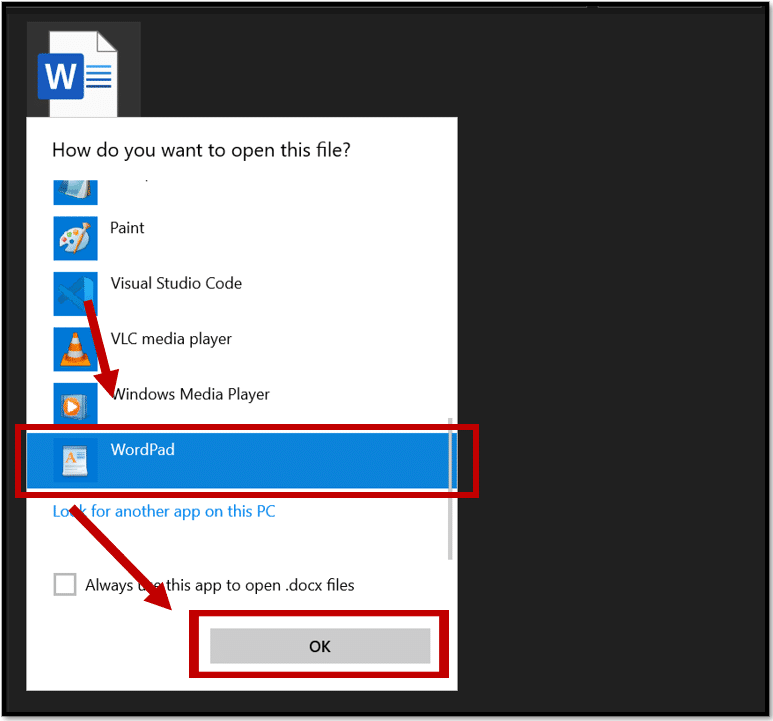
Step 1: Reach the locked Word document and right-click on it, then select the Open With option from the drop-down menu.
Choose the WordPad option for opening the Word document.
Step 2: Once unlocked, you can edit the password-protected Word document.
Step 3: After editing, Go to File -> Save to save the edited content.
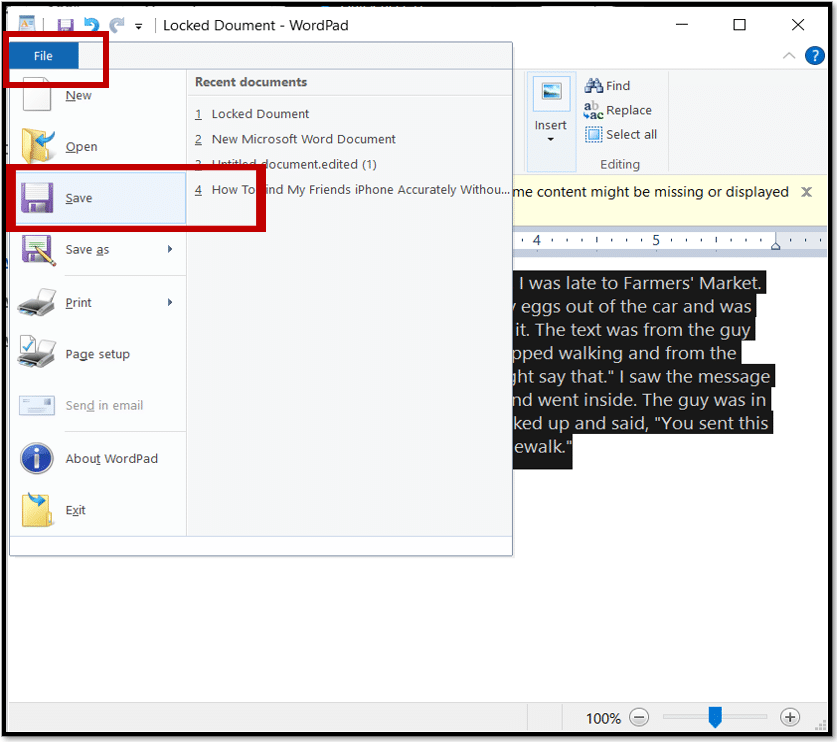
Note: WordPad will warn you, saying, “some content of the document might get lost.” Because WordPad doesn’t support all the features that Office holds.
If you cannot risk losing any critical data in the file, use PassFab for Word instead.
Method 4: Edit A Protected Word Document by Changing File Extension
Changing the file extension to edit a protected Word document is not as effective as using a professional recovery tool like PassFab for Word; it might very well be downright ineffective.
But as mentioned earlier, this guide presents a detailed answer to the query—how to edit a protected Word document; so, it’s only fair if we keep up to that promise. Here’s another way to edit a Word document that is password protected.
Follow these simple steps to learn how to edit a protected Word document by changing file extension:
Step 1: Start by making a copy of the original file. Hover to the duplicate file and Rename the file extension from .docx (or .doc) to .zip.
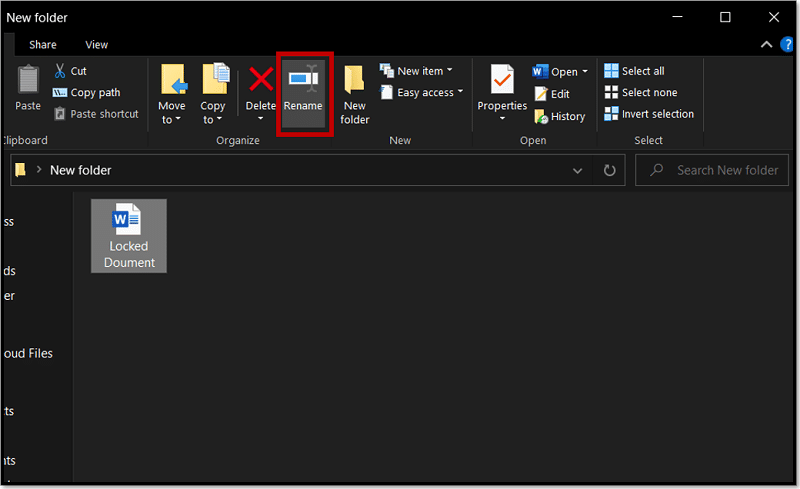
Windows will warn you that the “file might become unusable.” Select Yes to proceed.
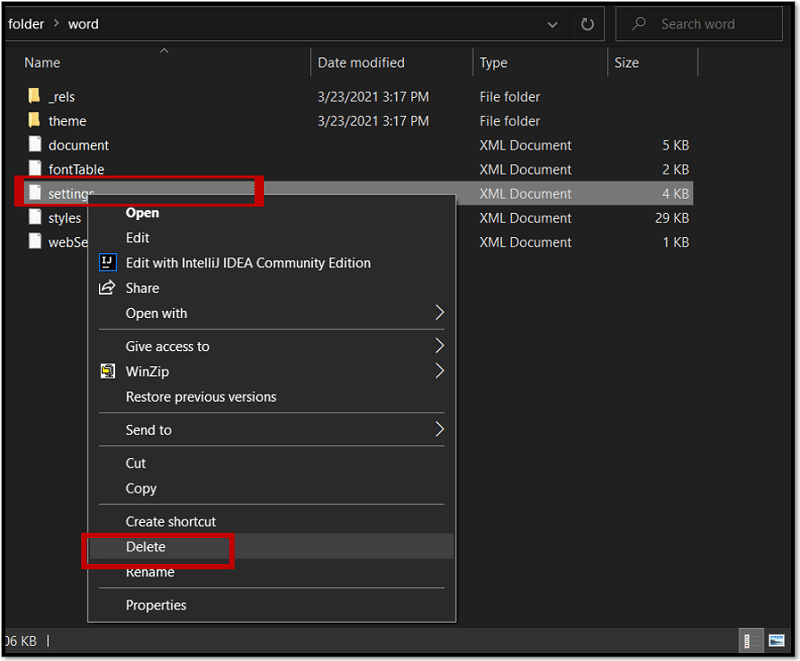
Step 2: Extract the .zip file and double-click on the Word folder.
Inside the Word folder, look for an XML document named settings.xml.
Select the settings.xml file and delete it.
Step 3: Now, rename the file back, i.e., from .zip to .docx; hopefully, you can now edit the password-protected Word document.
Rest easy if this method doesn’t work. Alternatively, you can utilize the subsequent (or earlier) ways to edit a password-protected document.
Method 5: Edit A Locked Word Document by Setting to Rich-Text-Format
You can also make use of the Rich-Text-Format, initially intended as a universal format by Microsoft, to edit a password-protected Word document.
Follow these simple steps to learn how to edit a locked Word document by setting it to an RTF file format:
Step 1: Open the locked Word document (in protected view).
From the top menu, select File and click on Save as.
In the Save as type, choose Rich Text Format (*.rtf).
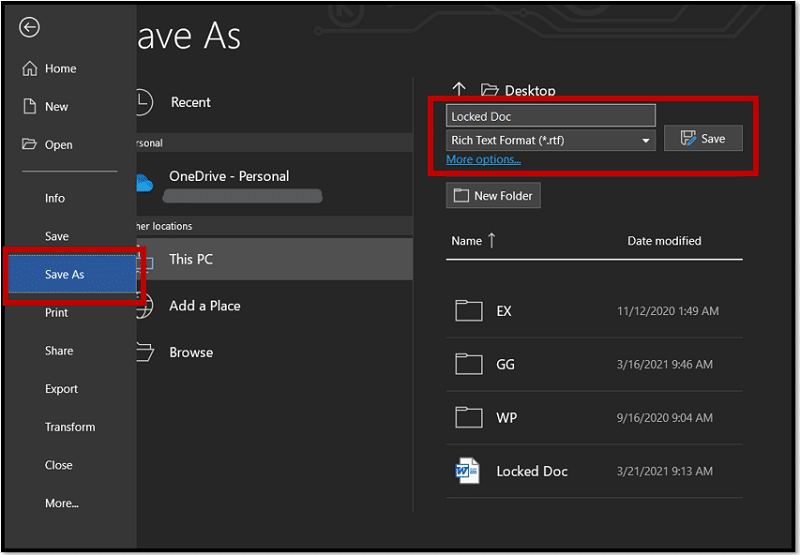
Then, click on Save.
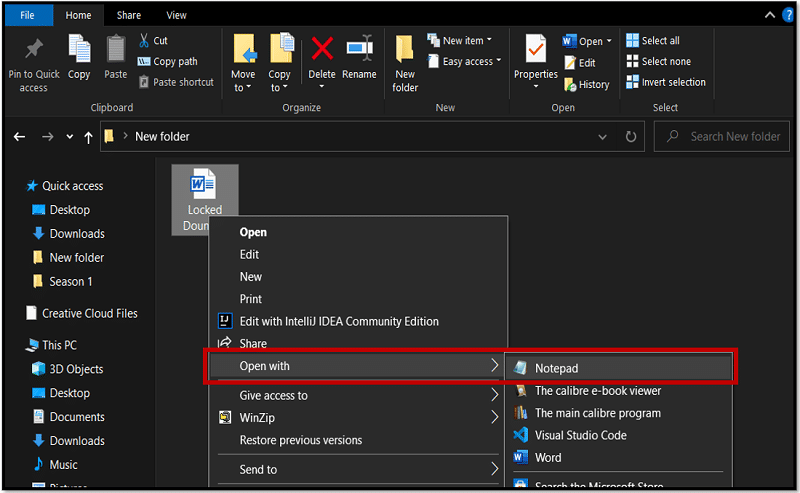
Step 2: Hover to the saved .rtf file and right-click on it.
Choose the Open with option and select NotePad (or any other text editor) for opening the file.
By using the Ctrl+F command, find the “passwordhash” string.
Then, choose this string (highlighted with blue color in the below image) and Delete it.
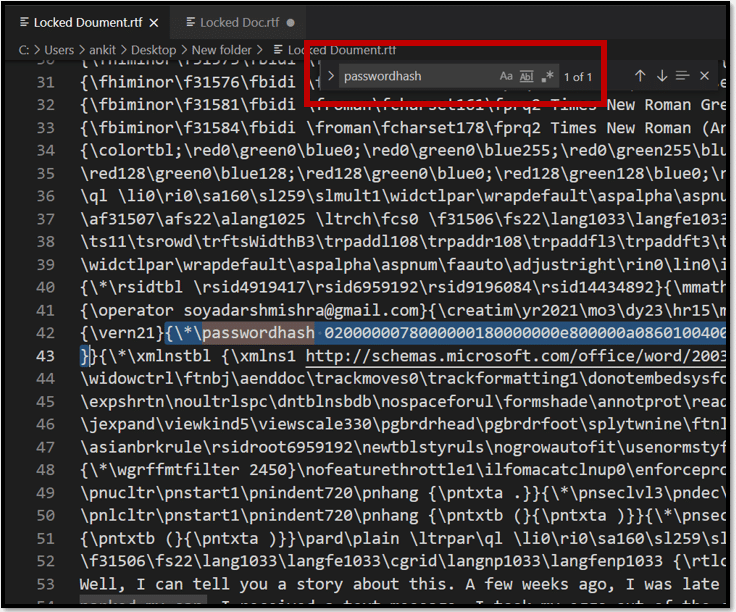
You can use backspace to delete the string altogether. Ensure that you don’t edit or delete anything else.
After deleting the string, Save the file.
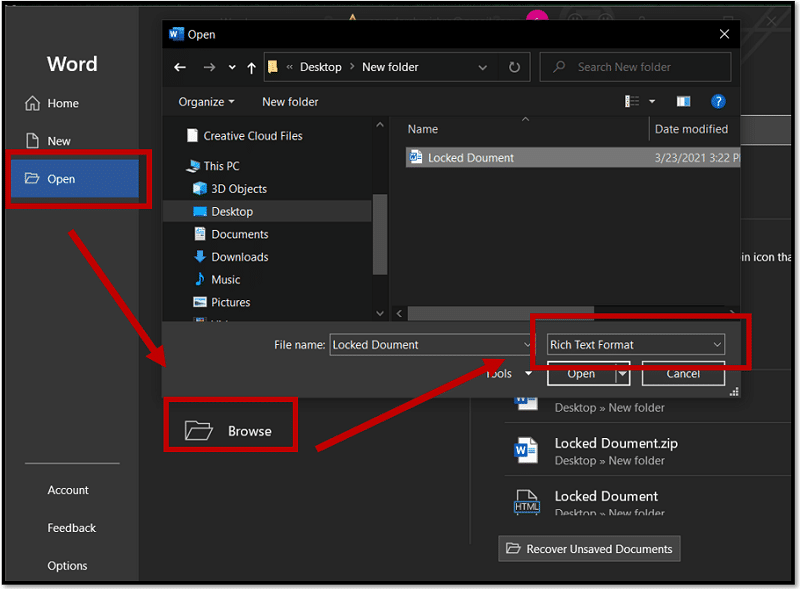
Step 3: Now, open Word from the Start menu. Open it, and click on the Browse option.
While searching for the saved file; make sure you’re searching for .rtf file type; not .doc or .docx type file.
After opening the file, go to the Developer menu, select Restrict Editing and from the bottom-right — choose Stop protection.
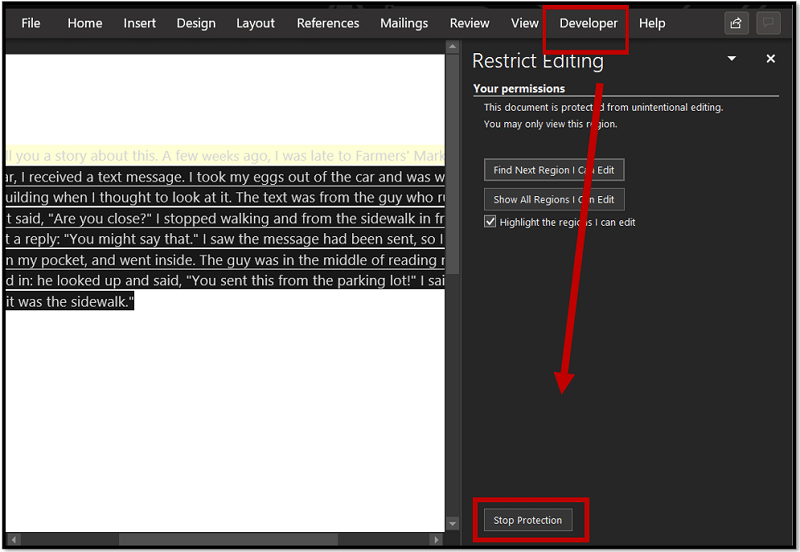
You must now be able to edit the password-protected Word document conveniently.
Conclusion
As you have discovered, there are numerous ways to edit a locked document, but not all are equally effective. Some work, some don’t, while some are downright disastrous (like WordPad).
Nonetheless, you can use these methods to edit the protected Word document (on the copied version).
However, if none of them work — you can utilize PassFab for Word and remove the restrictions easily and securely.