Microsoft Word is one of the biggest word processors in the world in terms of user base. Users love Word because it includes a plethora of formatting options for documents. Word is almost a desktop publisher as its users can set up flyers, brochures, newsletters, business, cards, calendars, and more besides with that application’s formatting options and tools. Users can also create documents that include checkbox lists within Word.
Forms and surveys are two types of documents that include multiple-choice questions. Many organizations need to set up and distribute paper or digital forms and surveys for registration and marketing purposes. Forms and surveys need to include small checkbox squares (or rectangles) that recipients can tick or cross to answer questions.
There are a few ways you can add checkboxes to your MS Word document. Word enables users to add both interactive checkboxes for digital documents and non-interactive checkbox symbols you can tick or cross on paper. This is how to insert checkboxes in Word for both digital and printed documents.
1. Insert Checkbox in Word with Word’s Developer Tools
If you need to set up a fillable form or survey with checkboxes for digital distribution, which doesn’t need printing, you can do so in MS Word. However, interactive checkbox options for fillable forms aren’t visible in Word by default. You’ll need to activate Word’s Developer tab to access the required settings as follows.
Step 1: First, open the MS Word window.
Step 2: Click Word’s File tab shown directly below.
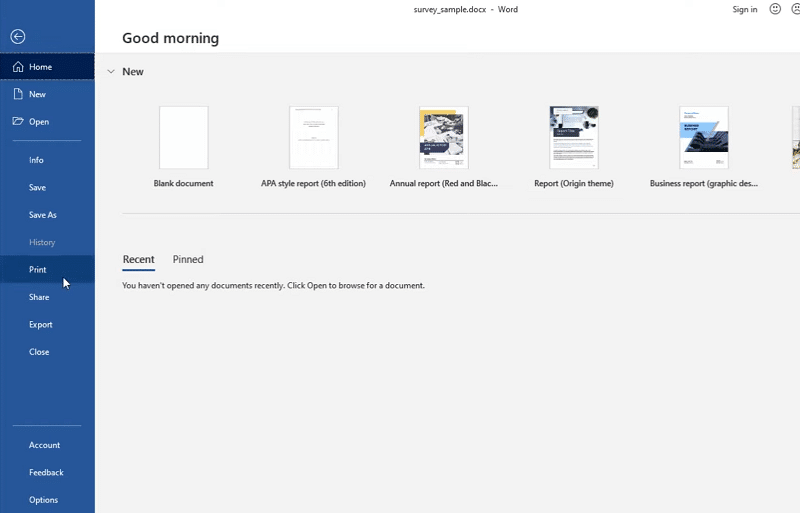
Step 3: Select “Options” on the File tab to open that window.
Step 4: Click “Customize Ribbon” on the left side of the Word Options window.
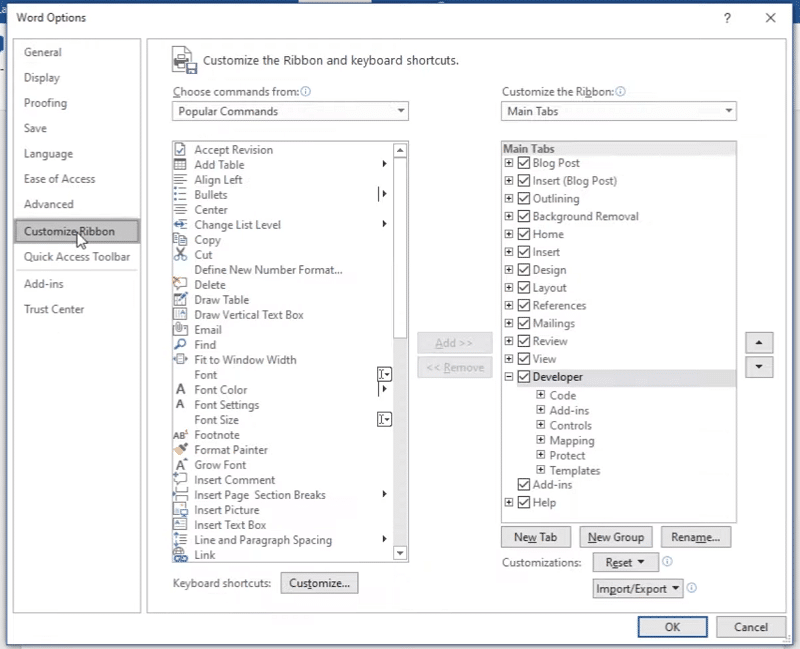
Step 5: Next, select “Main tabs” on the “Customize the Ribbon” drop-down menu.
Step 6: Then select the “Developer” checkbox on the Main tabs list.
Step 7: Click the “OK” button to save the settings.
Step 8: Now, you should be able to see a Developer tab in MS Word. Select the Developer tab shown in the screenshot directly below.
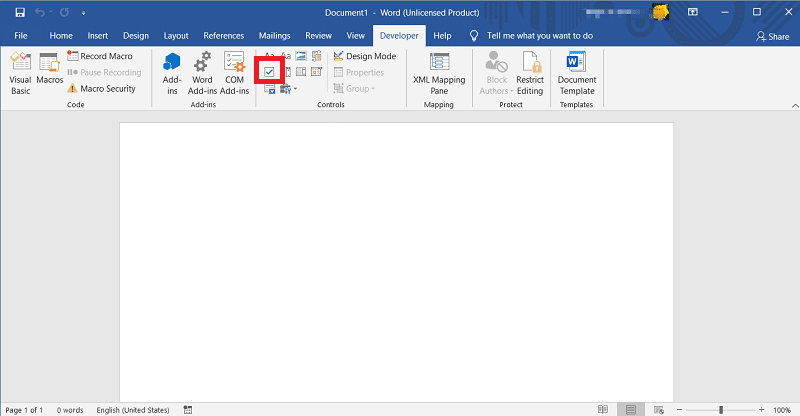
Step 9: Click a position in the document where you want the checkbox to appear.
Step 10: Then select the “Check Box Content Control” option on the Developer tab. A checkbox should appear in the document at the position of your cursor placement.
Step 11: Select the checkbox with your mouse cursor, and press the Ctrl + C keyboard shortcuts to copy it.
Step 12: Now, you can paste the checkbox onto other lines with the Ctrl + V hotkey.
Step 13: To modify a checkbox, select it and click “Properties” on the Developer tab. Clicking that button will open the window in the snapshot directly below.
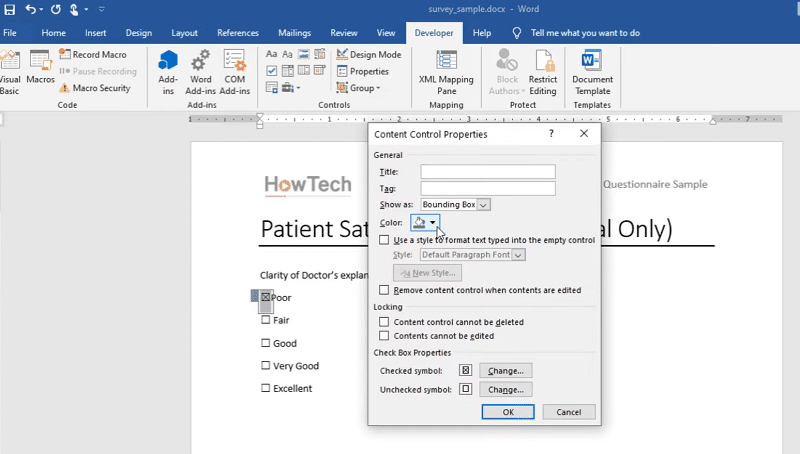
Step 14: You can change the check symbol by clicking “Change” for the “Checked symbol” option. Double-click an icon on the Symbol window that opens to select an alternative check symbol.
Step 15: To change the checkbox color, click the “Color” option. Then choose an alternative color on the palette that opens.
Step 16: Press the “OK” button to apply new checkbox settings and exit the Content Control Properties window. Now you can check and uncheck your document’s interactive checkboxes to your heart’s content!
Note that you can only add interactive checkboxes to documents within the Word desktop software. The Microsoft Word web app doesn’t include a Developer tab. However, the second method for adding checkboxes below applies to both the Word web app and desktop software.
2. Add Checkboxes for Printed Document
Users who need to set up documents with non-interactive checkboxes for printing can do so with MS Word’s bullet-point formatting options. However, the default bullet-point lists in Word don’t have suitable checkbox squares. As such, you’ll need to define a bullet list by selecting a checkbox symbol for it as outlined within the steps below.
Step 1: Select the Home tab in Word.
Step 2: Enter some lines for the bulleted list.
Step 3: Select the text you need to apply the bullet points to.
Step 4: Click the “Bullets” button to open the Bulletpoint Library menu.
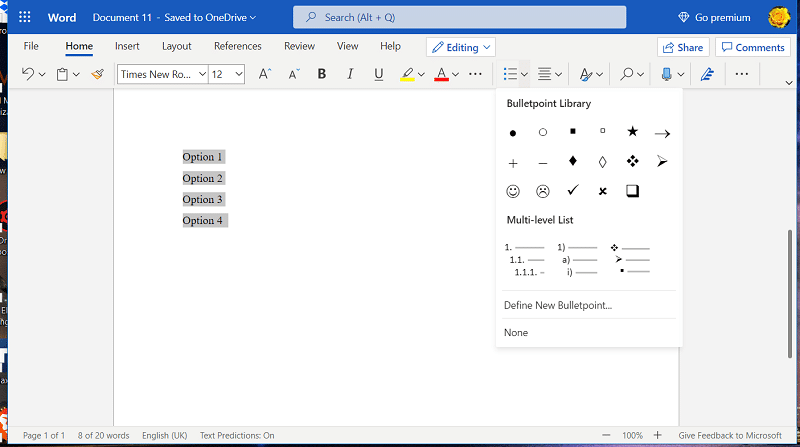
Step 5: Click the “Define New Bulletpoint” option to open the window in the snapshot directly below.
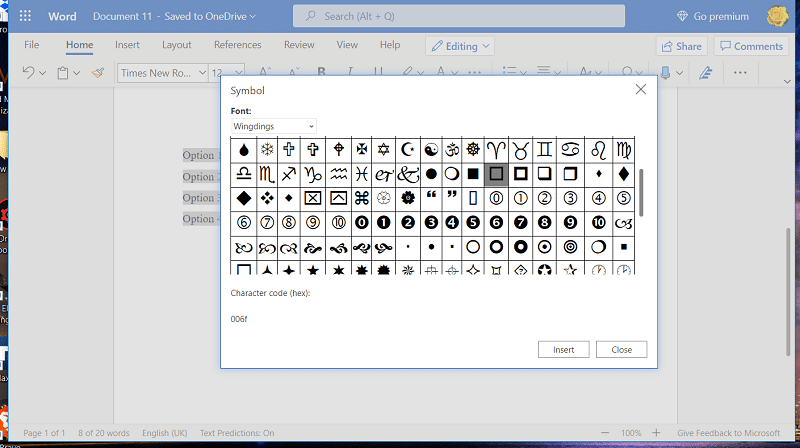
Step 6: Select “Wingdings” in the “Font” drop-down menu.
Step 7: Then choose a suitable checkbox symbol there.
Step 8: Press the “Insert” or “OK” button to add a checkbox bullet list to your selected text as in the shot directly below. The checkbox bullets aren’t interactive in any way, but they’ll be fine for printed form documents that recipients fill out with pens.

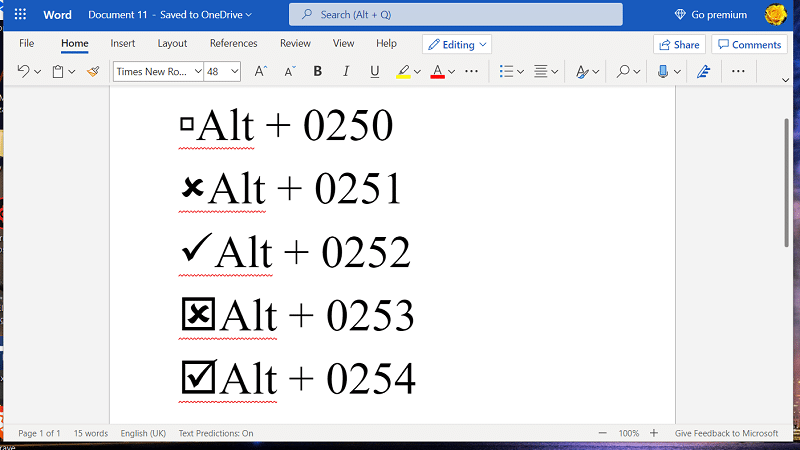
You can also add checkbox symbols to documents in Word, and other applications, by entering Alt codes for them. To do that, select “Wingdings” on Word’s font drop-down menu. Then press and hold the Alt key, and enter 0250 on your keyboard’s numeric keypad (the code won’t work with the standard number keys). Release the Alt key after entering the 0250 code.
When you’ve entered that code, an empty checkbox square will appear in the document. It might be a bit small, and you can expand the checkbox by selecting it with the cursor and choosing a larger font value. After adding the checkbox, you’ll need to revert to a standard font to enter some text. The screenshot below shows the Alt codes for five checkbox symbols.
If the Microsoft Word insert checkbox options aren’t enough for you, check out Kutools for Word. Kutools for Word is a handy add-on that’s retailing at $39. That add-on adds a whole new tab to Word from which you can select a variety of new tools. The Kutools tab includes new checkbox options.
When you’ve installed Kutools for Word, click the Kutools tab in Word. Then you can click the “Check Box” menu on that tab to open it. The “Check Box” menu includes 16 checkbox symbols for you to choose from. You can also select interactive checkbox settings there for digital forms.
Conclusion
So, you don’t need desktop publishing or dedicated form creation software to create forms and surveys that include checkboxes. It’s pretty straightforward to add checkboxes to documents with MS Word’s bullet-point formatting and developer checkbox options. Or you can even add checkboxes to Word documents with their Alt codes and the Kutools for Word app. With Word’s extensive formatting and page layout settings, you can create visually appealing digital and paper-based forms and surveys.