While the default white background and black text may be necessary for the official and formal documents, adding an image to the background is the way to go if it is a casual document. Not only does it looks appealing, but it also attracts readers’ attention.

In case you do not already know, here’s how to insert a background image in Word. You will find several ways to add a background image in Word, plus there are some FAQs that will help Format the added background image.
Method 1: Add a Background Image in Word Using the Insert option
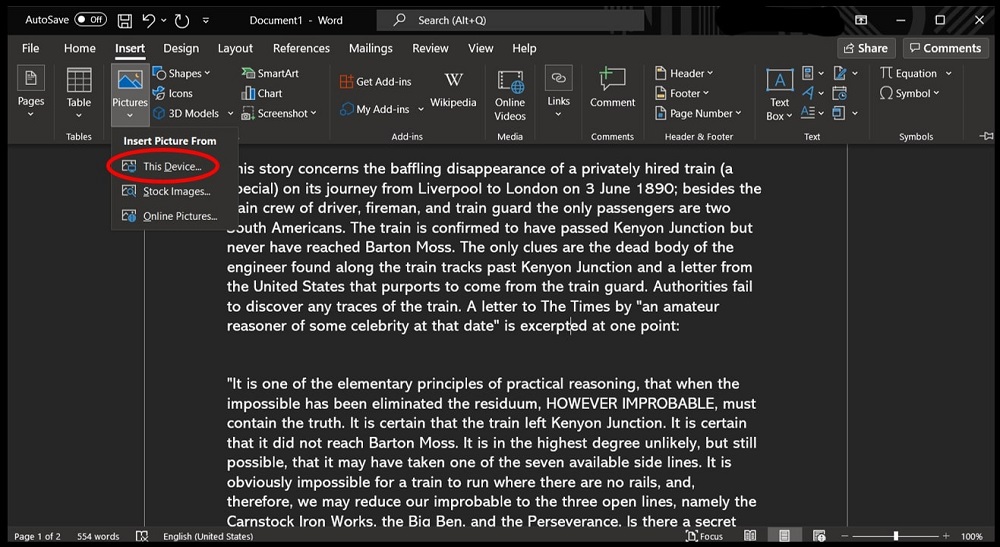
The most direct and convenient option to add an image in a word document is to drag the image from the Windows File Explorer, i.e., via the Insert tab. Here’s how to insert a background image via the Insert Pictures dialogue box:
Step 1. Open the desired Word document. From the ribbon, choose the Insert tab. Select Pictures. From the drop-down menu, choose This Device.
Note: To add Stock Image or Online Image to the word document — select either of the options instead of This Device.
- Select the desired image.
- Click Insert.
- And follow the below-mentioned steps
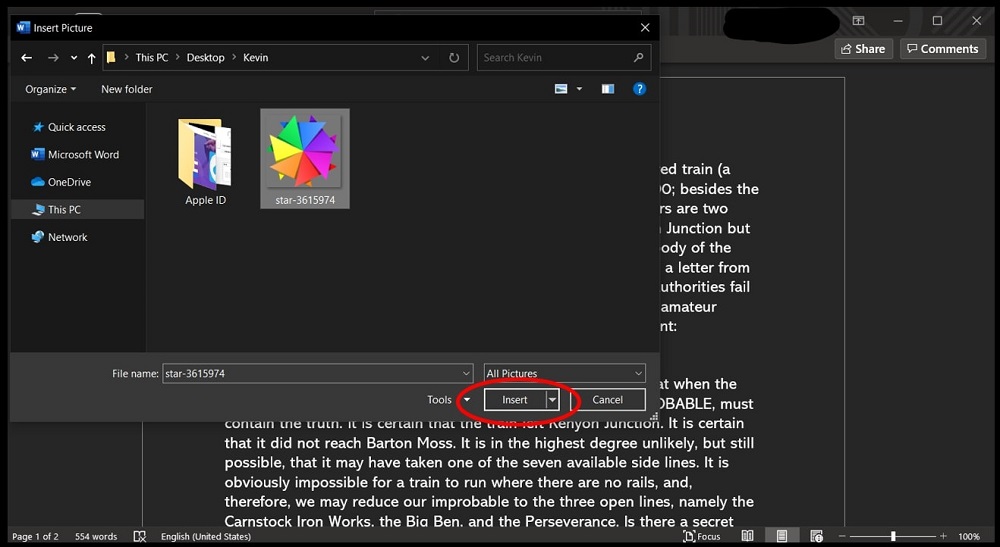
Step 2. From the pop-up windows, you can browse (any) image present on the computer.
Select the desired image and click Insert to add the image to the word document.
Step 3. Right-click on the added image. From the context menu, navigate to the Wrap Text. And from the drop-down menu, select Behind Text.
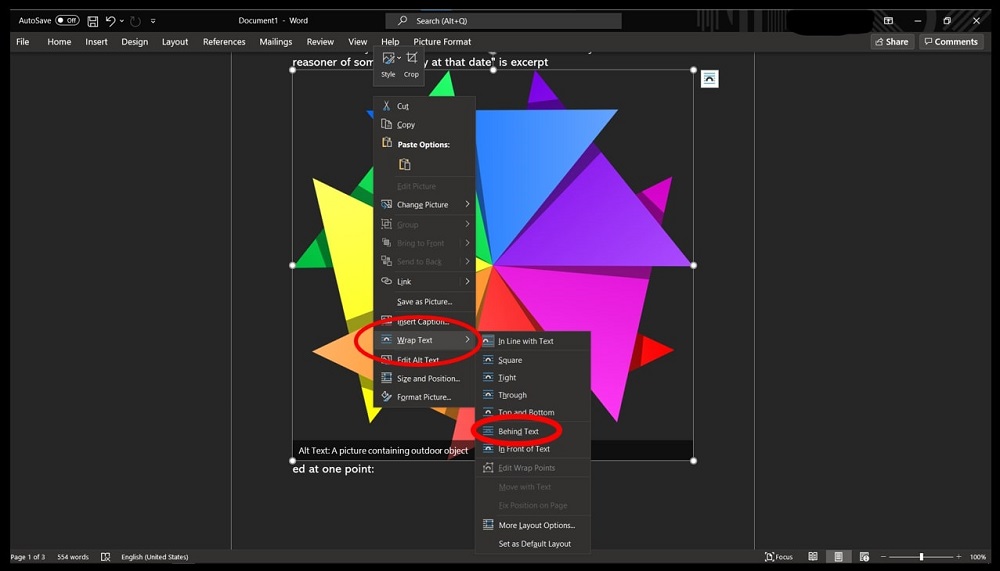
Selecting Behind Text will send the image to the background, meaning the image will be the background instead of the white color. Additionally, you can also select Format Picture from the context menu and apply effects if need be.
Method 2: Set an Image as Background in Word Using the Design Tab
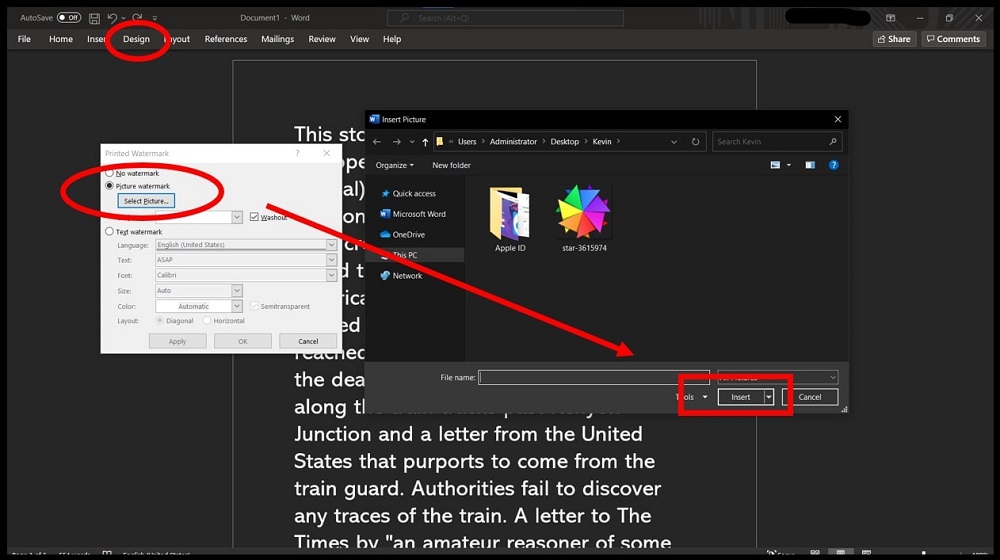
The design tab includes a ‘Custom Watermark’ option that lets you replace the white background with an image background. Here’s how to add a background to a Word document:
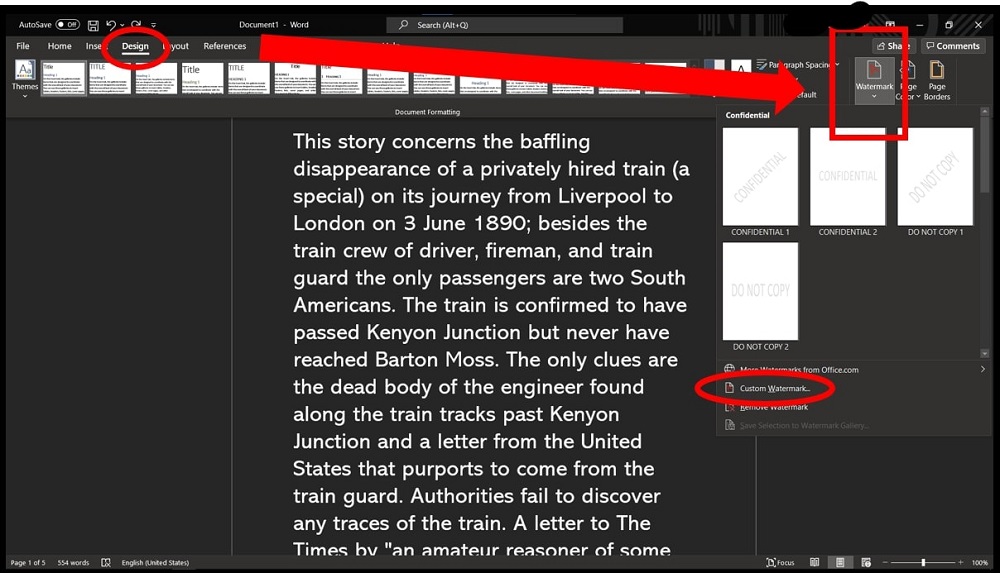
Step 1. Open the Word document to which you want to add a background, and from the ribbon — select the Design tab. (Older version of Word document will have Page Layout option instead of Design. So select Page Layout if you cannot find Design in the ribbon and continue with the following steps as it remains the same).
From the right side of the in-ribbon gallery, click the drop-down arrow assigned to Watermark. And choose Custom Watermark.
Step 2. On the pop-up window, choose the Picture Watermark toggle.
- And click on the Select Picture option to insert an image.
- Choose From a File on the pop-up window. (You can also choose Bing or One Drive if needed).
- Then, browse the desired image from your computer. And click on the Insert option to add the background image to the Word document.
- Select OK once you have added the image.
You can also select other options like Washout or not and the scale of the added image to set the image to your liking. Once added — the background will apply to all the pages in the document.
Note: To add a Text Watermark instead:
- Choose the default Text Watermark, i.e., CONFIDENTIAL 1, CONFIDENTIAL 2, DO NOT COPY 1, DO NOT COPY 2 samples.
- Or, you can use the same ‘Custom Watermark’ option and click on Text Watermark instead of the Picture Watermark shows above.
- From the Printed Watermark window, you can customize the watermark via the Language, Text (to be displayed), Font, Size, and color to your liking.
- Check or Uncheck the Semi-Transparent box as per preference.
- Next, select either the Diagnol or Horizontal option.
- And select OK to add the Text Watermark to the word document.
Read More: How to Remove Watermark in Word Document
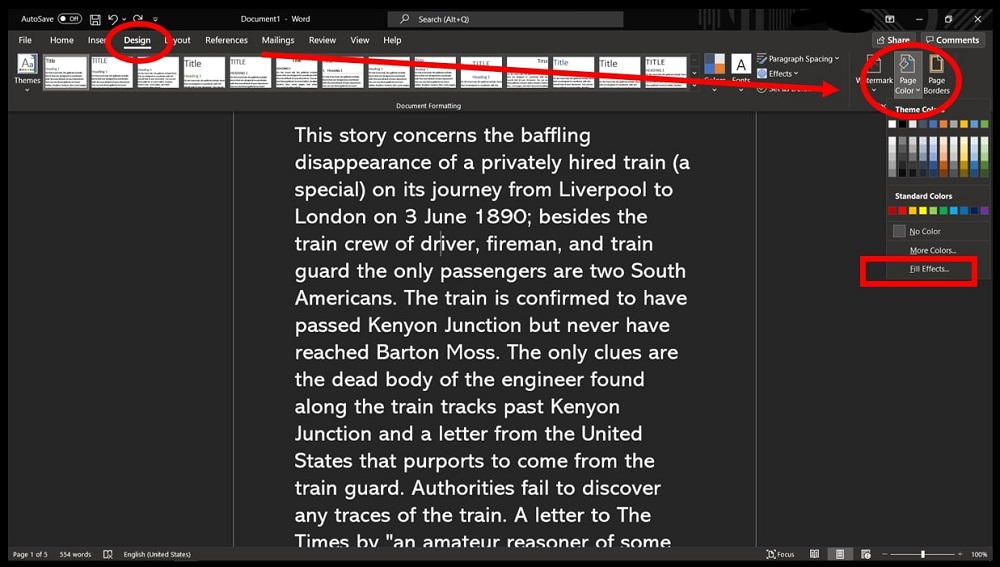
Method 3: Insert Background Image in Word document from the Fill Effects option
Similar to the above method, you can insert a background image in a Word document from the Fill Effects option under the same ‘Design’ tab discussed above. Here’s how to add background image in word via the Fill Effects option:
Step 1. Open the desired Word document. And choose the Design tab.
Hover to the right pane of the in-ribbon gallery and select Page Color. Opt for Fill Effects from the drop-down values.
Step 2. On the Fill Effects window, choose the Picture tab.
- Click on Select Picture.
- On the pop-up window, choose From a File option.
- Browse the desired image from the computer and click on Insert after clicking on the image (once to select it).
- And click on OK on the Fill Effects window to add the image to the word document.
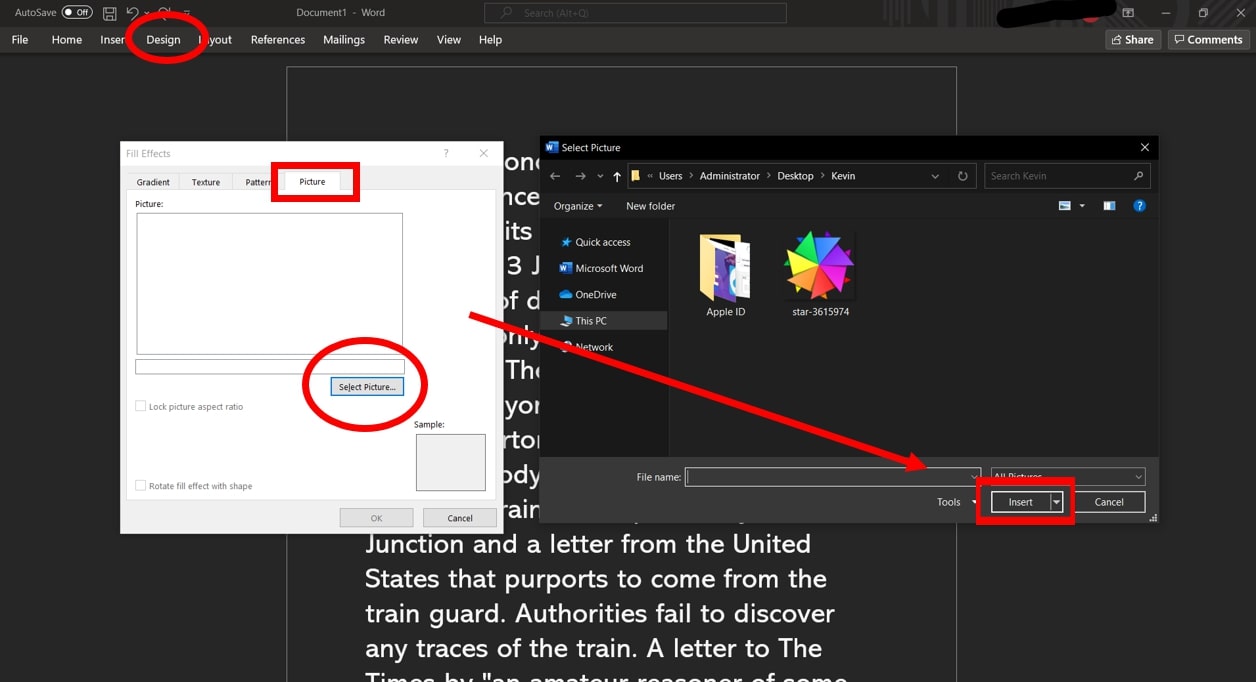
Once you tap on OK, the chosen image will be added as the background image of the Word document. And unlike the above two methods, the text color will change to view the image in the background.
Note: To add a page color to a word document instead of an image:
Choose one of the color shades from the drop-down menu of Page Color instead of the Fill Effects option.
You can also choose the More Colors option to choose the more desired image based on hex code.
FAQs About Background in Word Document
1. How can I resize an image in a Word document?
The most straightforward way to resize an image is via the Sizing handles:
- Choose the added image or object that you want to resize.
- You will find Sizing Handle located at each corner of the image. You will also find the Sizing handles at the top, bottom, left, and right borders of the image.
- Use the Sizing handles and move the bars to resize the image. Choose an aspect ratio that best suits your requirements.
For equal proportions, press the Shift key while dragging the bars. Plus, you can utilize the Ctrl key to keep the image position in its initial position.
Moreover, for exact proportions: choose Picture Format from the ribbon. And select the Crop option to enter the width*height manually.
2. How can I compress an Image in Word?
Follow these simple steps to compress an image in a Word document:
- Click on the desired picture
- Select Format Picture
- Choose the Compress Pictures option
- In the Compress Pictures window, choose the Apply only to this Picture option
- Select the check box assigned to Delete cropped areas of pictures
- Choose the desired resolution depending on your requirements
- Select OK to compress the image successfully
*Not applicable on Word online.
3. How can I remove the background image (or color) from the Word document?
Follow these simple steps:
- Select the Design tab
- Go to Page Color
- And select the No color options
Conclusion
Now that you know how to make a picture background in Word — you can make your documents more pleasing to look at and read. The first method — the insert image option — is desirable for users looking to add a background image only on one page of the documents. Whereas the Design tab option to apply a background image will suit users looking to insert the background image to all the pages of the Word document.