PowerPoint is one of the world’s biggest presentation applications in terms of its user base. Millions of users utilize PowerPoint to set up visually appealing slideshows that incorporate various multimedia elements. As presentations present information to people, many users share their PowerPoint documents via email and cloud storage services. However, a lot of users only need to share their PP slideshows for viewing, not editing, purposes.
Fortunately, Microsoft recognizes that some users will need to apply editing protection to PowerPoint documents before sharing them. Therefore, PowerPoint, and other applications of the MS Office suite, include numerous built-in protection settings users can select to protect their shared documents from unwanted editing. With those built-in editing protection options, users can apply various degrees of editing restrictions to PowerPoint presentations.
Beyond PowerPoint’s built-in options, there are also a few other ways users can protect presentations from editing. Thus, there’s more than one way to skin a cat, so to speak, when it comes to applying editing protection to slideshows. This is how to protect a PowerPoint presentation from editing with six alternative methods.
Method 1. Mark the PowerPoint Presentation as a Final Version
This first method applies a “Marked as Final” message that discourages recipients from applying editing protection to shared presentations. However, users can still apply editing by clicking its “Edit Anyway” option. Thus, marking a document as final doesn’t exactly amount to editing protection. Yet, this option is sufficient for users who only need to inform file recipients that they’ve received final document versions for which editing is not expected. You can mark a PowerPoint document as final as follows.
Step 1: Open a slideshow to mark as final in PowerPoint, and select the File tab.
Step 2: Click “Info” on the left of the File tab to open the options shown directly below.
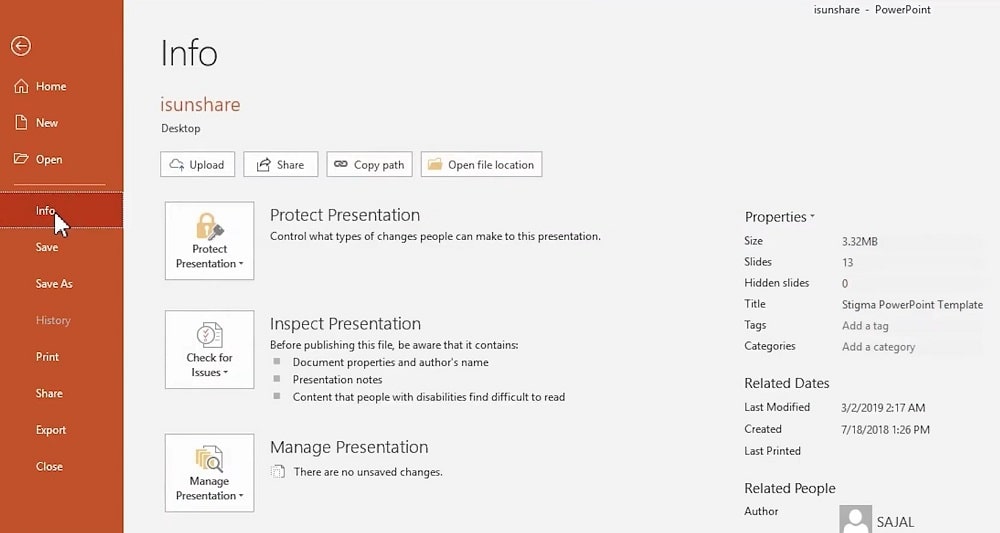
Step 3: Then press the “Protect Presentation” to open the drop-down menu in the screenshot directly below.

Step 4: Next, select the “Mark as Final” option there.
Step 5: Click “OK” to confirm the selected option.
Step 6: A dialog window will then pop up that includes a message that says, “This document has been marked as final to indicate that editing is complete and that this is the final version of the document.” Select the “OK” option on that dialog window.
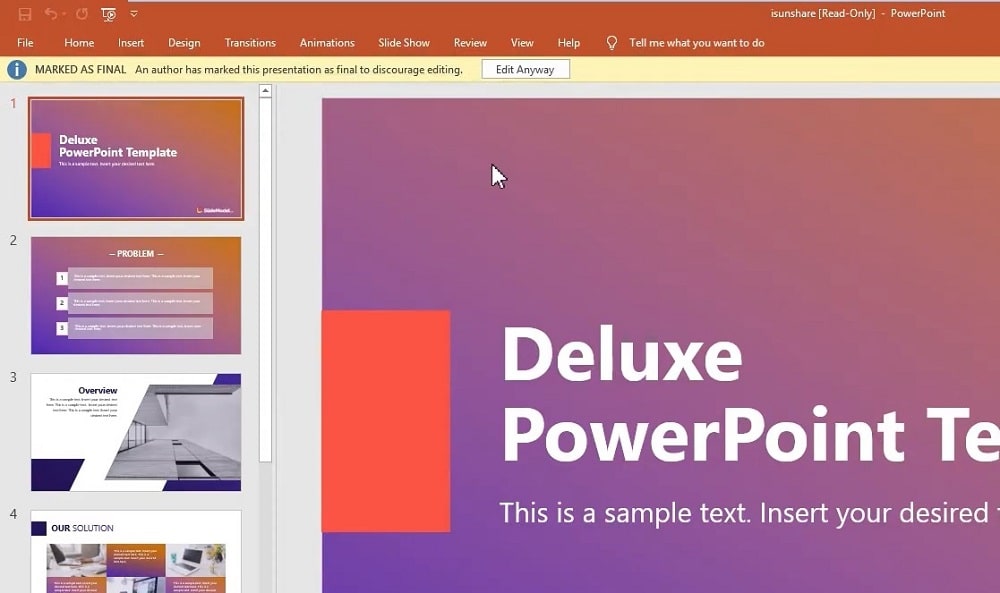
Thereafter, recipients will see the “Marked as Final” message in the snapshot directly below when they open the PowerPoint presentation. If the recipients close that message without clicking “Edit Anyway,” the presentation will remain in a read-only mode.
Method 2. Set Restrict Access to Protect PowerPoint from Editing
Some PowerPoint users will be able to select a “Restrict Access” option to restrict document permissions to read-only. However, that’s not an entirely universal Office feature as it requires Windows Rights Management Services (RMS) Client Service Pack 1 to be installed and enabled. If you have an Office subscription with Information Rights Management (IRM) enabled, however, you can restrict presentation permissions with that option. This is how to lock a PowerPoint presentation from editing with the “Restrict Access” option.
Step 1: First, click File in PowerPoint.
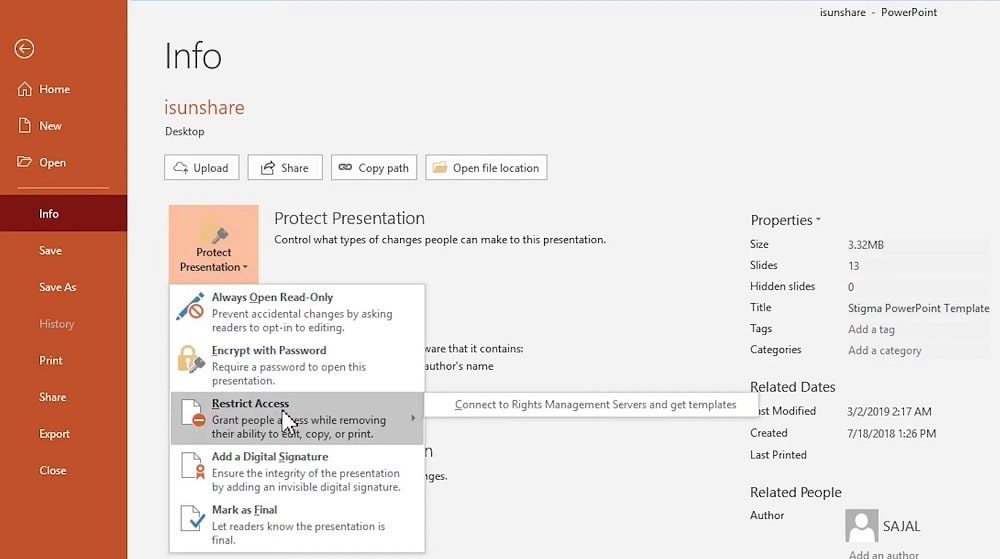
Step 2: Select “Info” to click the “Protect Presentation” button.
Step 3: Then select the “Restrict Access” option shown directly below if it’s available.
Step 4: Click “Restricted Access” to open a Permissions window like the one directly below.
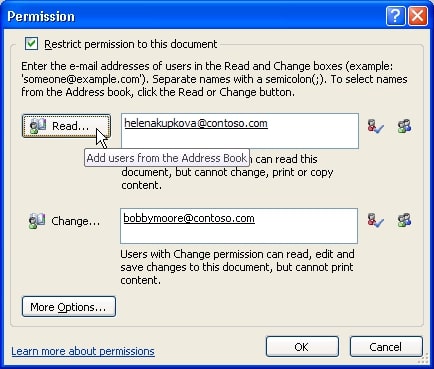
Step 5: Select the “Restrict permission to this document” checkbox.
Step 6: Then click “Read” to select an email address from the Address Book for the user you need to apply restricted read-only document access to.
Step 7: Press the “OK” button.
Method 3. Set “Password to Modify” to Lock A PowerPoint So It Cannot Be Edited
If you want to make sure a presentation recipient won’t modify a shared slideshow document, your best bet is to apply a modification (editing) password to the file. By doing so, recipients you share the presentation with will need to enter a password to edit it. However, they will still be able to open the slideshow in a read-only mode. Thus, applying a password to modify is perhaps the most full-proof way to forestall document editing. This is how to password-protect PowerPoint documents from editing.
Step 1: First, open the slideshow you want to apply an editing password to in PowerPoint.
Step 2: Click PowerPoint’s File tab at the top left of the application.
Step 3: Select the “Save As” option on the File tab.
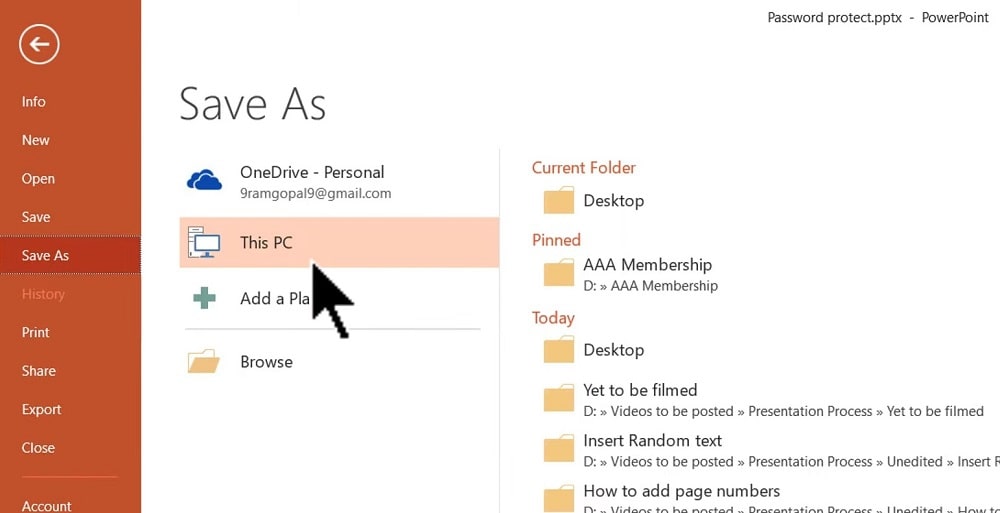
Step 4: Choose a location to save the presentation.
Step 5: Click the “Tools” button on the Save As window that opens.
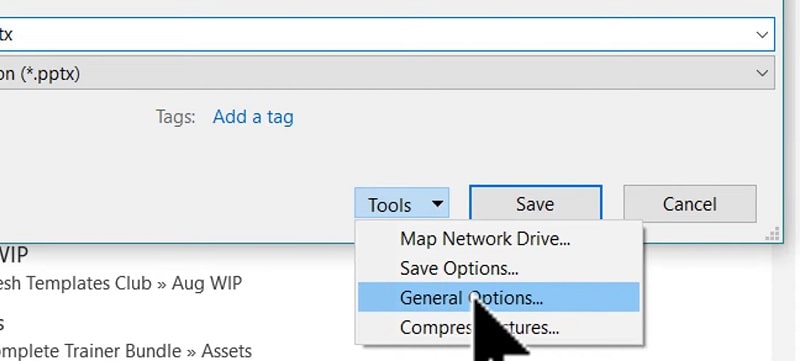
Step 6: Then select “General Options” on the menu to open the password window in the screenshot directly below.
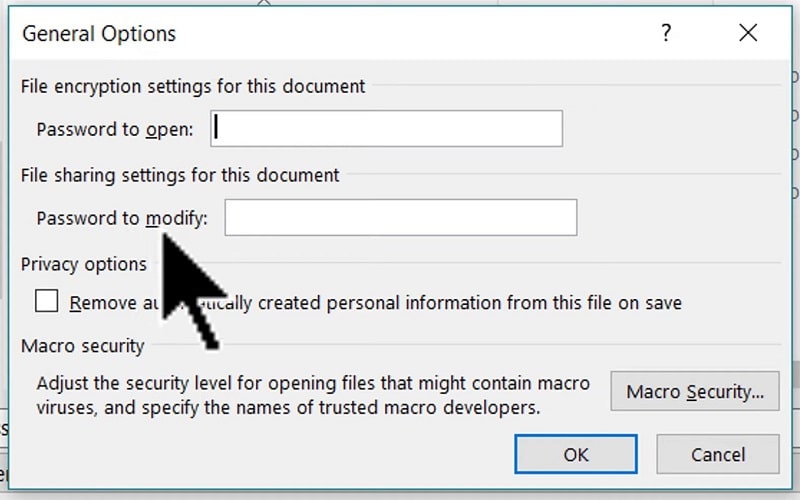
Step 7: Type a password in the Password to modify text box.
Step 8: Click “OK” to open a Confirm Password window.
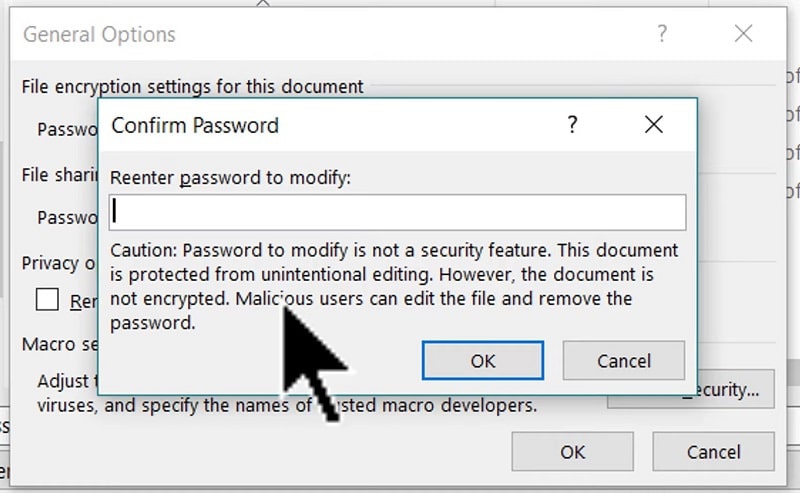
Step 9: Next, type your password within the Reenter password to password to modify box.
Step 10: Select the “OK” option on Confirm Password window.
Step 11: Thereafter, click the “Save” option.
Thereafter, the PowerPoint document you applied an editing password will have a Password window that pops up whenever it’s opened. That window includes a “Read Only” option recipients can select to view the document. You can enter the presentation’s password in the text box to edit it.
Method 4. Save the PowerPoint Presentation With a PPSX Format
PPSX is a read-only PowerPoint file format. Presentations saved with in format are non-editable documents. So, saving a PowerPoint slideshow to the PPSX format is another way to protect it from editing. However, it’s not an entirely full-proof method because recipients can utilize conversion tools to change a presentation’s format to an editable PPT one. This is how to lock a PowerPoint presentation from editing by saving it in the PPSX format.
Step 1: Open a presentation to save with a different file format in PowerPoint.
Step 2: Click File at the top left of PowerPoint’s window.
Step 3: Select the “Save As” option.
Step 4: Then click “Browse” to open a Save As window.
Step 5: Click the “Save as type” drop-down menu.
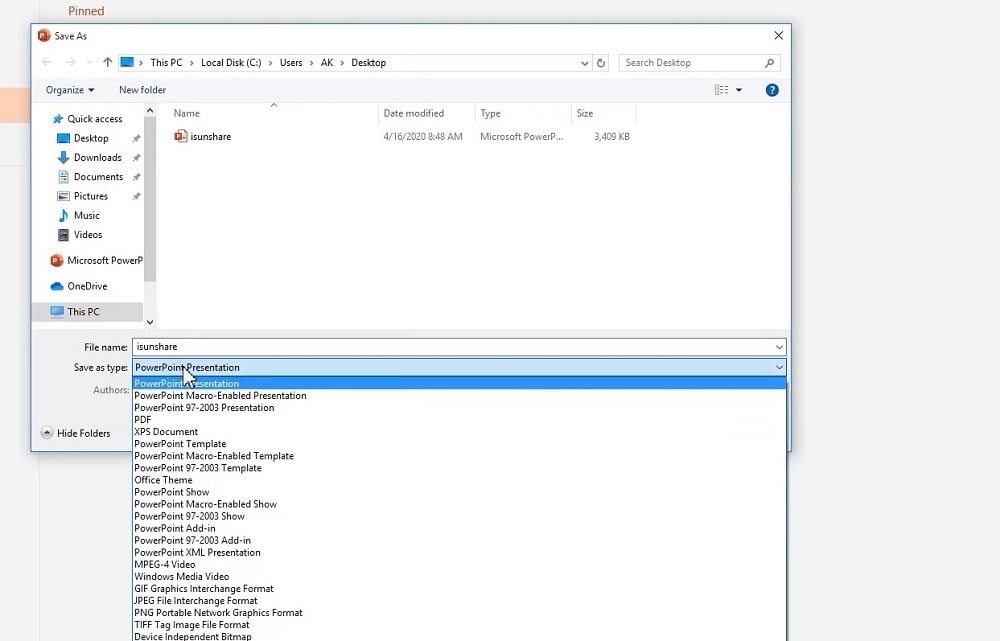
Step 6: Select the “PowerPoint Show (*.ppsx)” option on the drop-down menu.
Step 7: Choose a folder to save the file to.
Step 8: Click “Save” to save the presentation with the selected PPSX format.
Method 5: Select the Read-Only File Attribute Option
Aside from PowerPoint’s protection options, you can also select a “Read-only” File Explorer setting for PowerPoint files and other document types. Selecting to apply the read-only attribute to a file will prevent writing to it. Thus, a presentation with a read-only attribute is a non-editable file. This is how to lock a PowerPoint file so it cannot be edited by selecting the “Read-only” attribute setting.
Step 1: To launch File Explorer, press the Windows and E keys at the same time.
Step 2: Open a folder that includes a PowerPoint presentation.
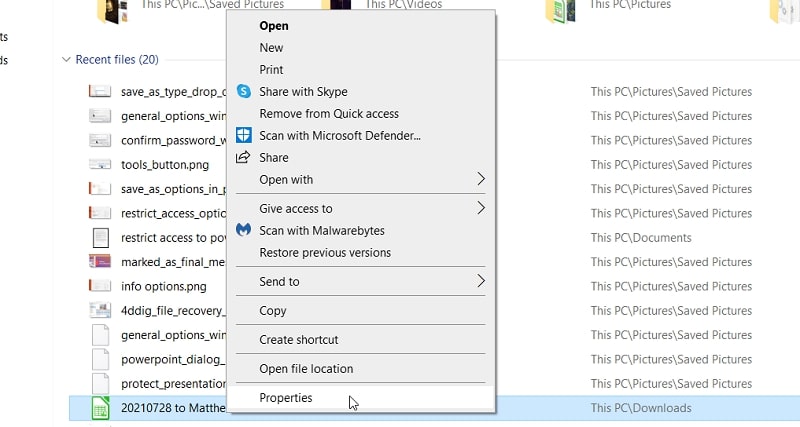
Step 3: Right-click a PowerPoint slideshow file and select “Properties” on its context menu.
Step 4: Then select the “Read-only” checkbox.
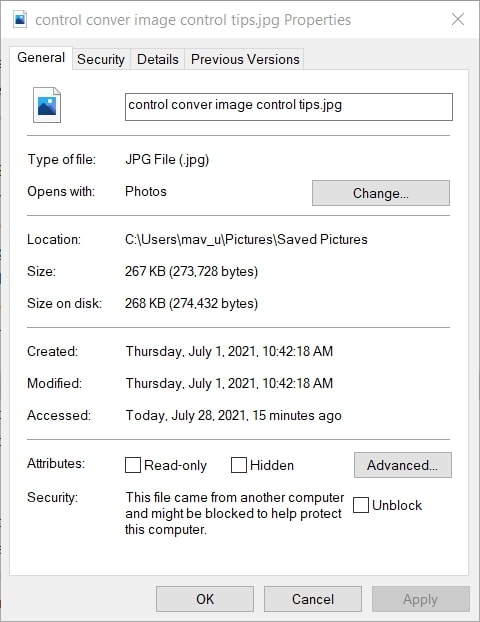
Step 5: Press the “Apply” button to save the new file attribute setting.
Step 6: Click “OK” to close the properties window.
Method 6: Convert an Editable PowerPoint PPT to PDF Format
Another way to protect a PowerPoint presentation from editing is to convert it to a PDF format. PDF is a universal non-editable document format users can open with PDF viewers and browsers. One thing to note is that a presentation will not strictly be a slideshow in Portable Document Format. However, recipients will still be able to view and read all the presentation’s slides within PDF document pages.
You can convert PPT files to PDF alternatives with the free Online2PDF web app as follows.
Step 1: Open the Online2PDF web app in your browser.
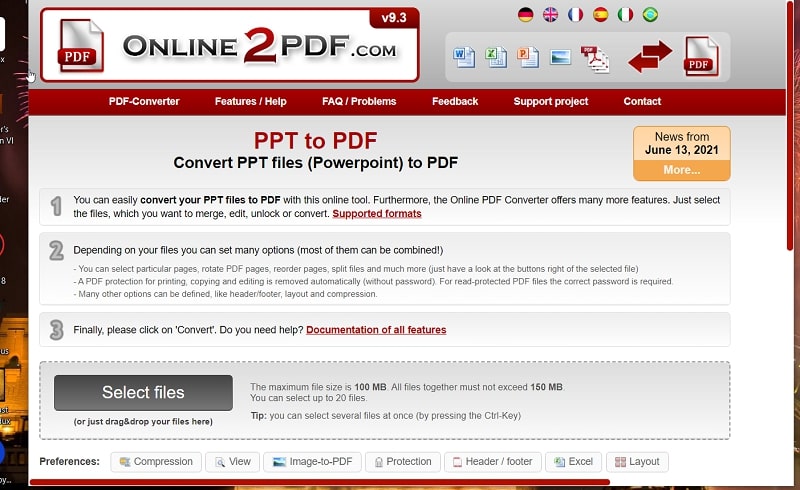
Step 2: Click the “Select files” button there.
Step 3: Choose a PowerPoint file to convert, and click the “Open” button.
Step 4: Press the “Convert” button to initiate the conversion.
Step 4: Then select a folder to download the PDF to, and click the “Save” option.
FAQs About Editing Protection in PowerPoint
Does the PowerPoint web app have the same protection features as the PowerPoint desktop applications?
No, the PowerPoint web app doesn’t include a “Protect Presentation” button like its desktop software alternatives. However, PowerPoint web app users can select a “Download as PDF” setting to save a presentation in a non-editable PDF format. Furthermore, there’s an “Embed” sharing option in the PP web app you can select to incorporate non-editable presentations on blogs and websites.
What PowerPoint desktop versions are the aforementioned editing protection features applicable to?
The above presentation protection methods are primarily applicable to PowerPoint applications dating back to 2010.
Is an editing password the same as one for an encrypted document?
No, an editing password is not the same because it’s doesn’t block users from opening documents altogether. Users can still open documents without entering editing passwords, but they can’t modify the presentations. Encrypted document passwords block users from opening files.
Does PowerPoint include a built-in “Read-Only” option?
Yes, you can select an “Always Open Read-Only” option on the “Protect Presentation” button’s drop-down menu. However, that option isn’t much different from the “Mark as Final” setting because users can still click an “Edit Anyway” button on its yellow message. Therefore, File Explorer’s “Read-only” file attribute setting is a more full-proof alternative.
Can I remove restrictions from a PowerPoint file I’ve forgotten my editing password for?
There are numerous third-party software packages available that enable users to remove editing restrictions from files. For example, you can utilize Passper for PowerPoint to recover an editing password or remove all restrictions applied to a presentation.
Read More: Best PPT password recovery tools
Conclusion
So, there you have six different ways to apply editing protection for PowerPoint slideshows you share with colleagues. Most of those methods are primarily intended to protect presentations from accidental modifications and aren’t necessarily supposed to be entirely full-proof editing blocks. Methods three and two are the most full-proof ways to stop users from editing shared PowerPoint presentations, which aren’t so straightforward to bypass.