When you install Windows 10 for the first time on your computer, you’re prompted to create a local user account and grant administrator privileges to it. Many users don’t know that another hidden administrator account is created during the installation, which is disabled by default for security reasons. This account is automatically enabled if you boot into safe mode. However, you can also manually enable this administrator account if needed. For instance, if your primary user account gets corrupted or has no other account with admin privileges, you can use the built-in administrator account to create a new user account with admin privileges.
Are you looking to make use of this administrator account on your Windows 10 computer? Well, there are multiple ways to enable the hidden administrator account on Windows 10. We’ll be covering all of them here. So, without further ado, let’s take a look at how to enable built-in administrator account on Windows 10.
Method 1. Enable Built-in Administrator Account on Windows 10 Using Command Prompt
Let’s start with the easiest method, and that’s by using Command Prompt on your computer. All you need to do is type in the necessary command line to enable the built-in administrator account on Windows 10. Just follow these steps:
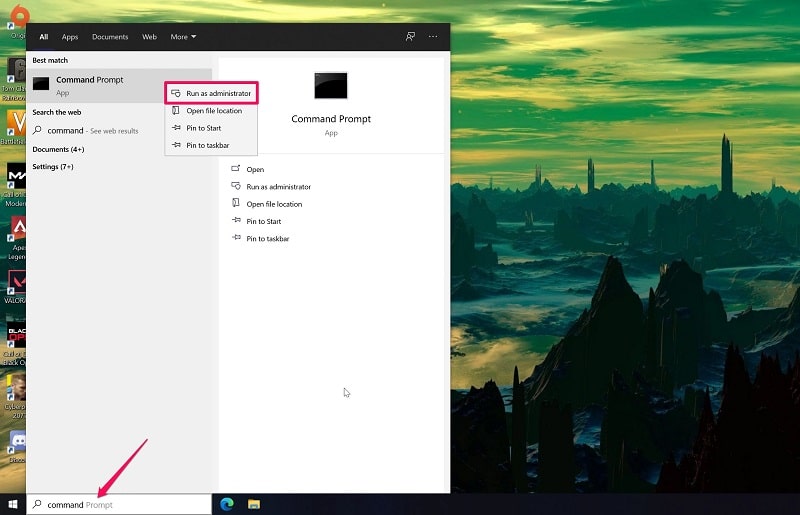
Step 1. First of all, you need to type in Command Prompt in the Windows search bar, right-click on the program and choose ‘Run as administrator.’
Read More: How to Open Command Prompt as Administrator in Windows 10
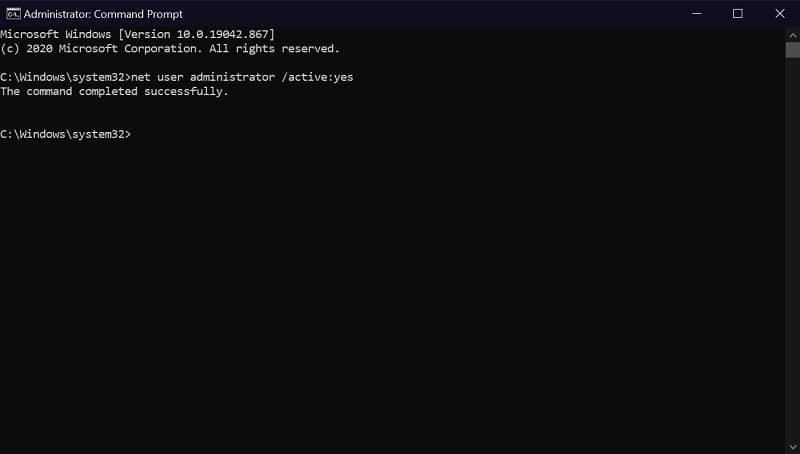
Step 2. Once Command Prompt opens up on your computer, type in or copy-paste the following command line as shown below and hit the ‘Enter’ key on your keyboard.
net user administrator /active:yes
Step 3. The built-in administrator account has been successfully enabled on your Windows 10. If you’re only enabling it temporarily to remove corrupted user accounts or create a new admin account, just use the following command line to disable the built-in administrator account when you’re done.
net user administrator /active:no
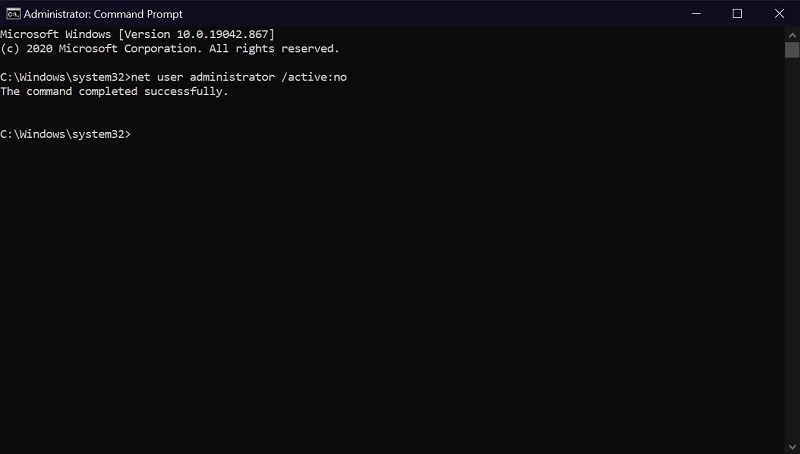
They’re the same command line except that you’re replacing ‘yes’ with ‘no.’ This might be the quickest way to enable the hidden administrator account on Windows 10. Still, there are two other methods that you may be interested in learning.
Method 2. Enable Built-in Administrator Account Windows 10 in Local Security Policy
This method requires you to mess with your local group policy editor, but we’ll make it as simple as possible. Here’s what you need to do to enable built-in admin account Windows 10:
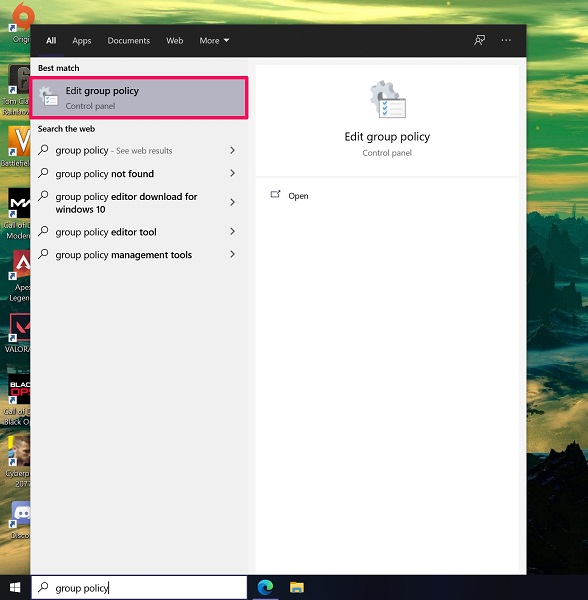
Step 1. Type in ‘Group Policy’ in the Windows search bar, and you’ll get the result ‘Edit Group Policy’ as shown below. Click on it to proceed.
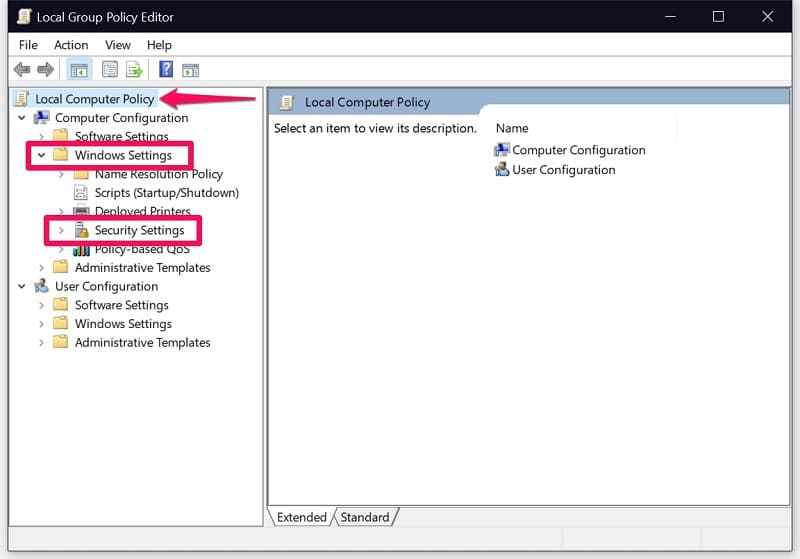
Step 2. This will launch the Local Group Policy Editor on your Windows 10. Here, expand ‘Windows Settings’ from the left pane located under ‘Local Computer Policy’ and select ‘Security Settings’ to continue to the next step.
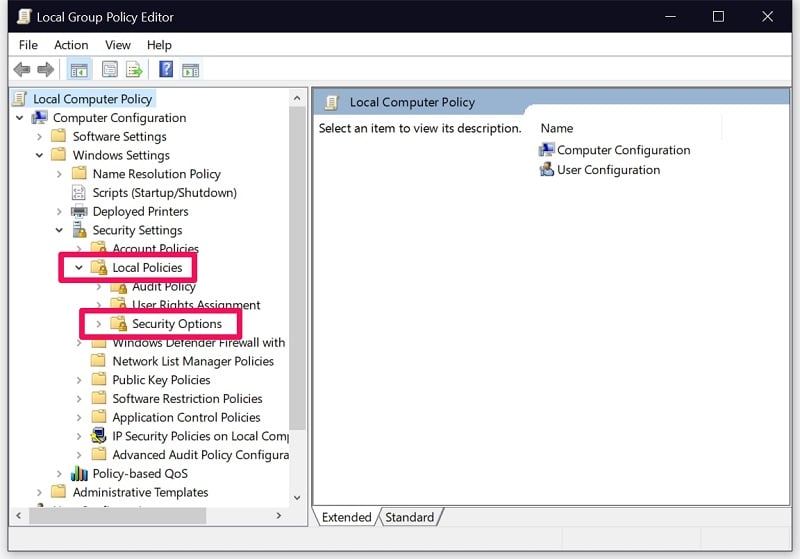
Step 3. Now, expand ‘Local Policies’ from the same left pane and select ‘Security Options.’
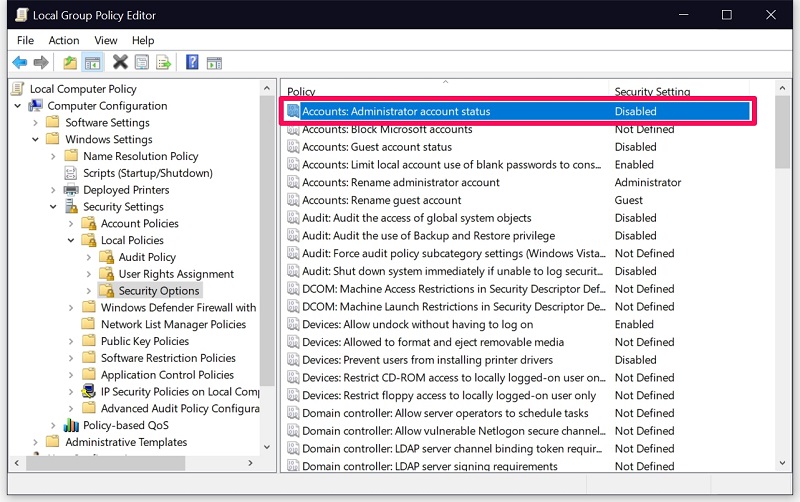
Step 4. Once selected, you’ll see things on the right pane too. Click on the first option, which is ‘Administrator account status.’
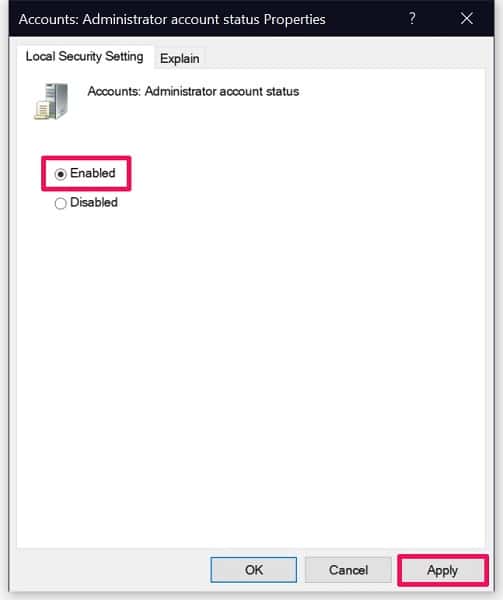
Step 5. This will open a new window within the Local Group Policy Editor. You’ll see that the administrator account status is set to Disabled. Simply select the ‘Enabled’ option and click on ‘Apply’ to save your changes.
That’s it. You’ve successfully enabled the hidden administrator account on Windows 10. When you’ve decided that you no longer need this account, you can head back to the same menu by following these steps and set the option to ‘Disabled’ again.
Method 3. Enable Built-in Admin Account Windows 10 in Local Users and Groups
This particular method might seem fairly similar to what we just discussed, but we’re accessing the Computer Management tool in Windows 10 rather than the Local Group Policy Editor here. Let’s take a look at what you need to do to activate built-in administrator account on Windows 10:
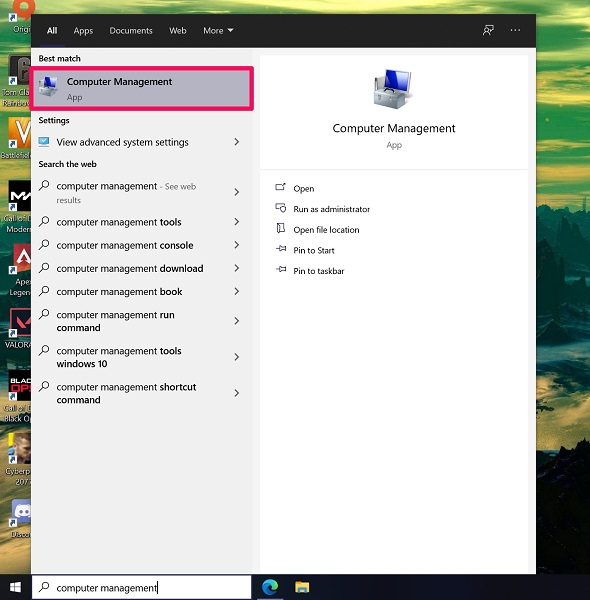
Step 1. Type ‘Computer Management’ in the Windows search bar and click on the app from the results to open it.
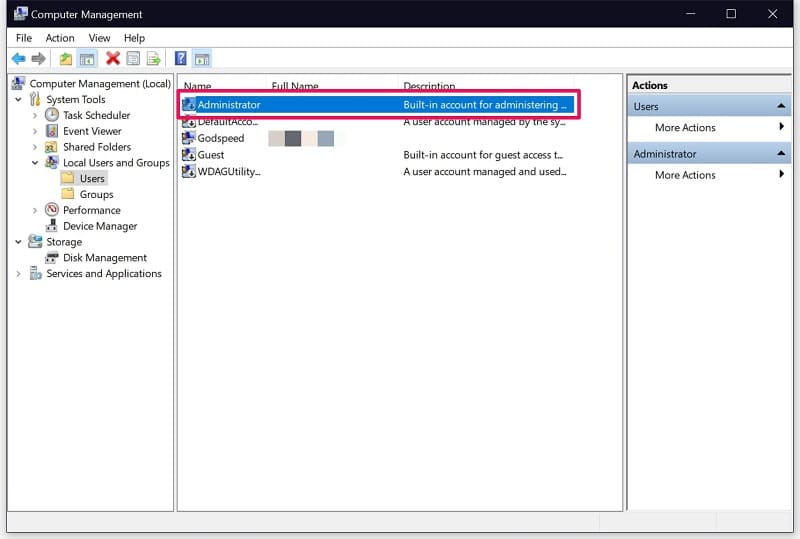
Step 2. Now, select ‘Local Users and Groups’ from the left pane and click on the ‘Users’ folder from the right pane.

Also Read: How to Open Local Users and Groups on Windows 10
Step 3. Next, double-click on the very first option that you see on the right pane, which is ‘Administrator.’
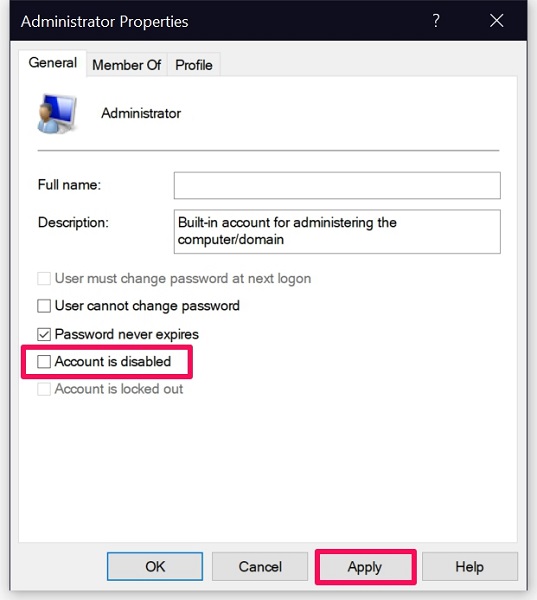
Step 4. This will launch an Administrator properties window on your screen. Here, you’ll see a check box next to ‘Account is disabled.’ Simply uncheck this particular option and click on ‘Apply’ to save your changes.
Likewise, you can use the same setting to disable the administrator account when you no longer need it.
Bonus: How to Reset Administrator Password on Windows 10
Most users would need this hidden administrator account only when they have trouble accessing their primary user account with admin privileges. But we’d like to point out that this is not the only way to get around the issue you’re facing. Alternatively, you can use a third-party Windows password recovery software called PassFab 4WinKey to remove or reset the admin password or delete the corrupted user account and create a new one within minutes. This tool basically eliminates the need to rely on the built-in administrator account. Learn how to reset Windows 10 forgotten passwords here.
Bottomline
As you can see, you have various options to choose from when it comes to accessing the hidden administrator account in Windows 10. Since the built-in administrator account is mainly used for troubleshooting and disabled by default due to security reasons, you cannot open Windows Store apps while you’re logged into this account. Therefore, once you’re done fixing your primary user account, it’s recommended to disable this built-in administrator account in Windows 10.
Hopefully, you were able to fix the issues you were facing with your Windows 10 accounts by taking advantage of the hidden administrator account. Which of the above methods do you prefer to enable or disable the built-in administrator account? Do you know any additional ways to access the same? Feel free to share your thoughts and ideas in the comments section below.