The Network and Sharing Center has been an integral part of Windows computers since the release of Windows Vista over a decade ago. It’s one of the Control Center apps that you access whenever you want to make changes to your network and, more importantly, when you’re troubleshooting network problems on your PC. You may have visited this section already if you’ve tried fixing internet issues on your computer before. Typically, it takes a simple search or a couple of clicks to open the Network and Sharing Center in Windows 10, but there are other ways to access the same. Here, we’ll be taking a look at how to open the Network and Sharing Center on Windows 10.
Part 1. What Is Network and Sharing Center on Windows 10
If you’re new to Windows 10, you may not realize the importance of the Network and Sharing Center. In layman’s terms, the Network and Sharing Center is that one destination in your PC where you’ll be able to check the actual status and location of each network connection. In Windows 10, the Network and Sharing Center is basically split into two sections. On the left pane, you’ll see shortcuts to network-related tasks like changing adapter settings, network sharing settings, internet options, and Windows Firewall settings. On the right side, you’ll be able to view your active network connections and have the option to set up or connect to a new network.
Part 2. How to Open Network and Sharing Center on Windows 10
Accessing Network and Sharing Center on a Windows 10 computer is pretty easy and straightforward, but you’re not limited to using a single method. There are various ways to access this particular section on your computer whenever you want to troubleshoot your network issues. Some of these additional methods may come in handy when your Windows taskbar or Start menu isn’t working properly.
2.1. Open Network and Sharing Center on Windows 10 in Control Panel
Since Network and Sharing Center is a Control Center application, you’ll be able to find it by visiting the Control Panel on your Windows 10 computer. Here’s how to open Network and Sharing Center Windows 10 from Control Panel:
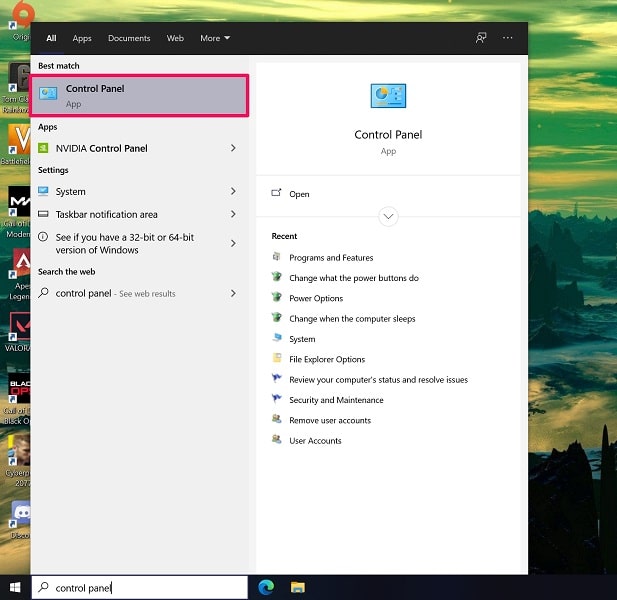
Step 1. Type ‘Control Panel’ in the search field of your taskbar and click on the Control Center app from the results to get started.
Read More: How to Open Control Panel in Windows 10
Step 2. Once the Control Center window opens on your computer, you’ll see a bunch of different options. Select the ‘Network and Internet’ option from here.
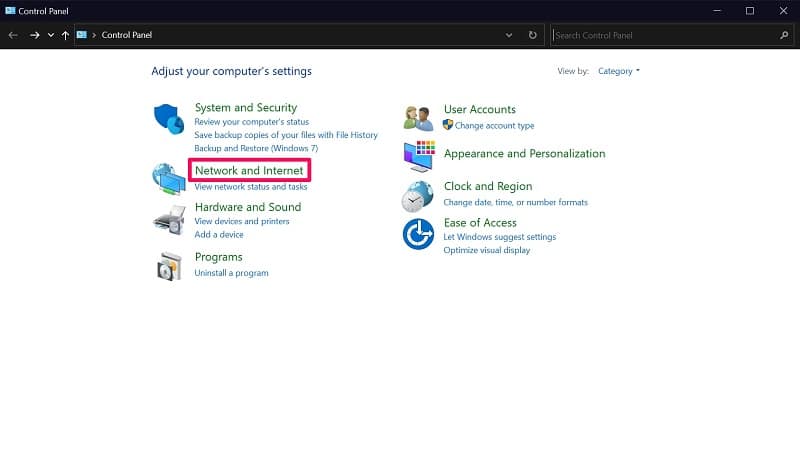
Step 3. Now, you’ll be able to see the ‘Network and Sharing Center’ option. Click on it to access the dedicated menu for the same.

This might be the most direct way to open the Network and Sharing Center on your Windows 10 computer, but there are easier methods that you can use.
2.2. Open Network and Sharing Center on Windows 10 by Right-click Internet Icon
This might be the easiest way to open the Network and Sharing Center on Windows 10, and it can be used no matter what application is running on your system. We’ll be making use of the Internet access icon that’s located in your Windows taskbar to access the menu. Just follow these steps:
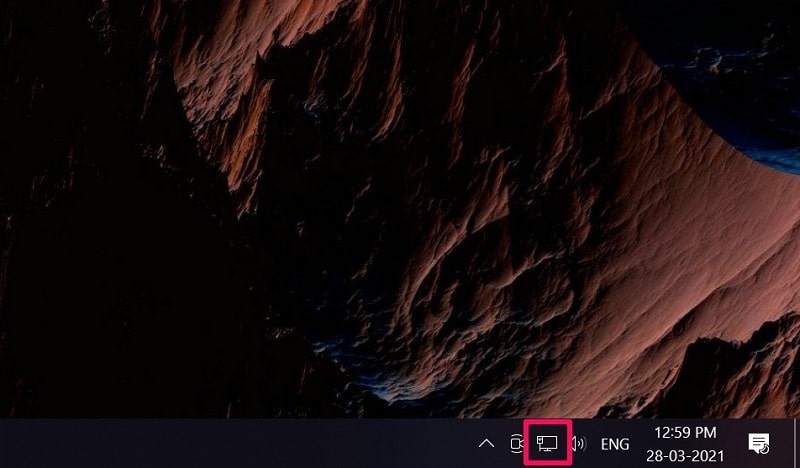
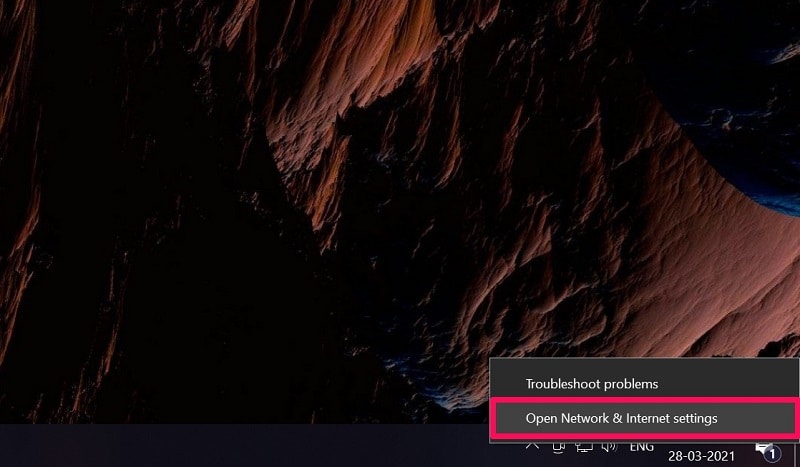
Step 1. The Internet icon is typically located at the bottom-right corner of your Windows taskbar, next to the speaker icon, as you can see here. Right-click on this icon to bring up the context menu.
Step 2. Now, you’ll see two options. Select ‘Open Network & Internet settings’ to proceed.
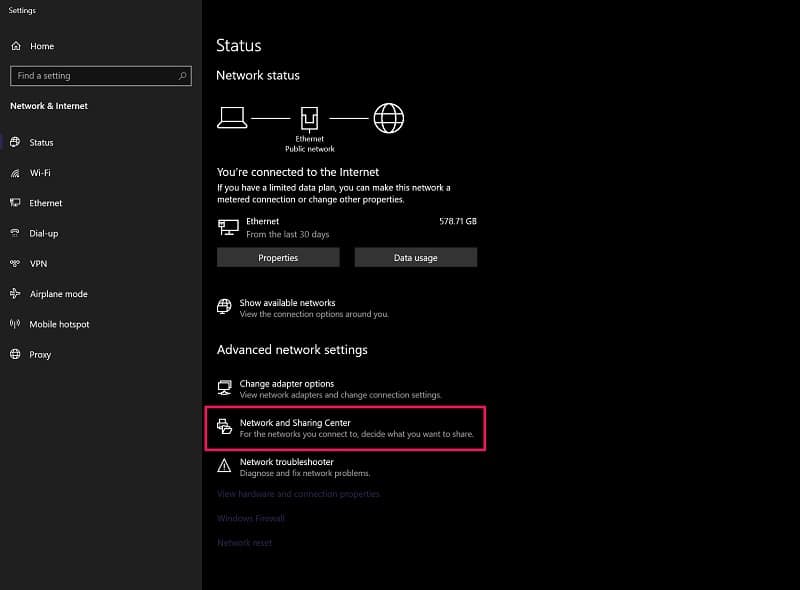
Step 3. Here, you’ll see ‘Network and Sharing Center’ listed as an option below Advanced Network Settings. Click on it to bring up the Network and Sharing Center menu on your screen.
Usually, this particular method is used when you see a yellow exclamation mark next to the internet icon so that you can quickly troubleshoot the connectivity problem.
2.3. Open Network and Sharing Center on Windows 10 by Searching
If you found the above method convenient, you might like this one even more. You can open the Network and Sharing Center in Windows 10 by using the search field in your Windows taskbar. Just start typing ‘Network and Sharing’ in the search field, and you’ll see it in the results.
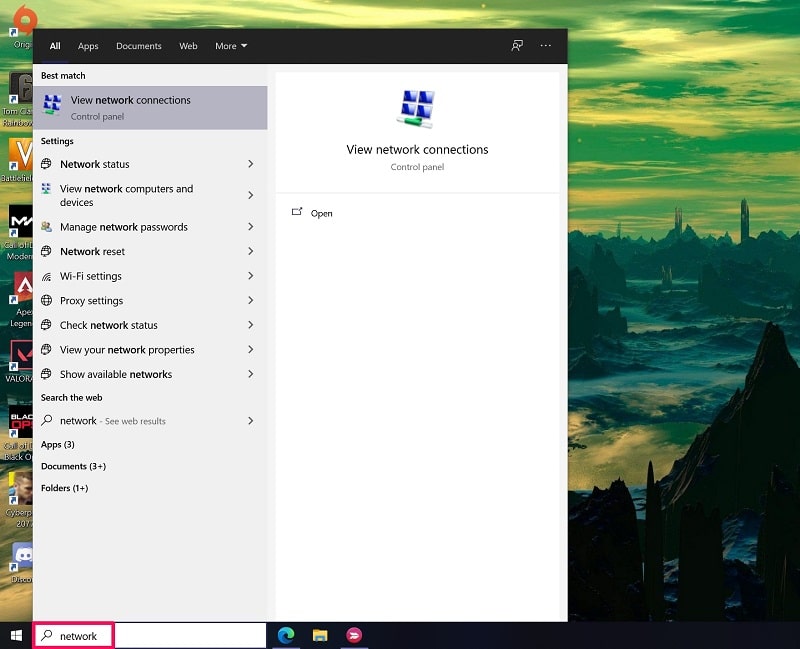
Some users may be unable to find Network and Sharing Center in the search results for some reason. If this happens, you can select the ‘Network Status’ option instead, which takes you to the internet settings menu discussed in the previous method.
2.4. Open Network and Sharing Center on Windows 10 from Run Dialog Box
Another way to access the Network and Sharing Center on Windows 10 is by entering a command line in the Run dialog box. The Run command is normally used to open an application or document with a known path directly. On Windows 10 devices, the Run dialog box can be quickly accessed by pressing the ‘Windows + R’ keys. Now, copy-paste or type in the following command and hit ‘Enter.’
control.exe /name Microsoft.NetworkAndSharingCenter

That’s it. Upon pressing Enter on your keyboard or clicking OK, the Network and Sharing Center will open a new window on your desktop.
2.5. Open Network and Sharing Center on Windows 10 from Command Prompt
Most of us are familiar with Command Prompt in Windows. Just like how it’s used to execute commands and perform tasks on your system, you can type in a command line that opens up the Network and Sharing Center on your Windows 10 PC. We’ll be using the same command line that we used in the previous method. So, let’s get started:
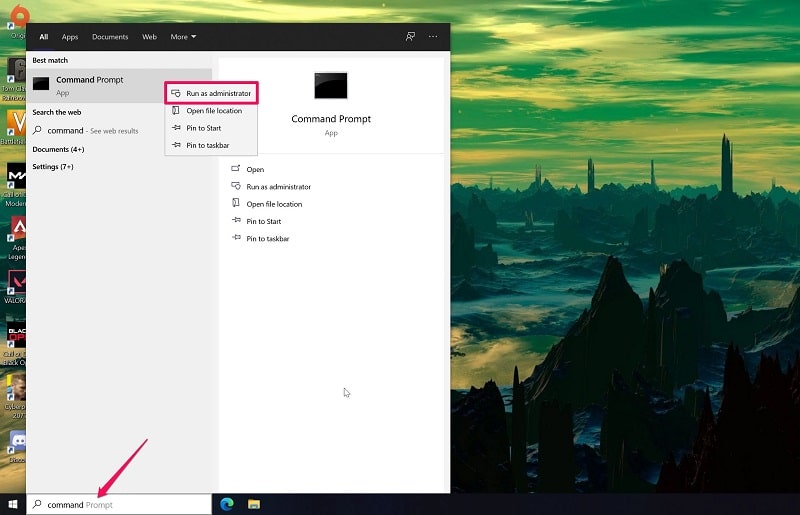
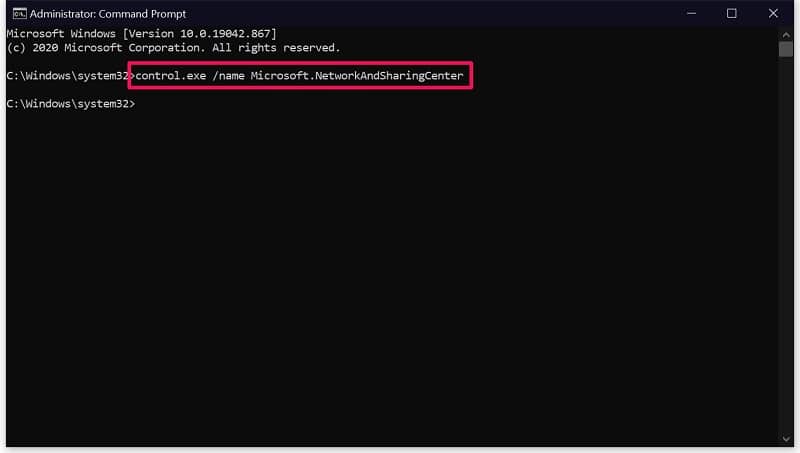
Step 1. First, you need to launch Command Prompt as an administrator. To do this, type Command Prompt in the Windows search bar, right-click on Command Prompt, and choose ‘Run as administrator.’
Step 2. Once Command Prompt opens up, type in or copy-paste the following command line and press the ‘Enter’ key on your keyboard.
control.exe /name Microsoft.NetworkAndSharingCenter
There you go. Now, this wouldn’t be the method that most people would want to use, but if you’re a coder by any chance, this will come in handy when you’re working on CMD.
2.6. Open Network and Sharing Center on Windows 10 from Windows PowerShell
Moving on to the last method, we’ll be using Windows PowerShell to open the Network and Sharing Center on your Windows 10 PC. If you don’t know what PowerShell is, it’s Microsoft’s new command-line interpreter that combines the Command Prompt functionality with a new scripting instruction set. Therefore, you’ll find this technique very similar to the Command Prompt method that we just discussed above.
Step 1. You can find and launch Windows PowerShell by using the search field in your Windows taskbar, as shown below.

Step 2. Once the PowerShell window opens, copy-paste or type the following command line and hit the ‘Enter’ key on your keyboard to execute it.
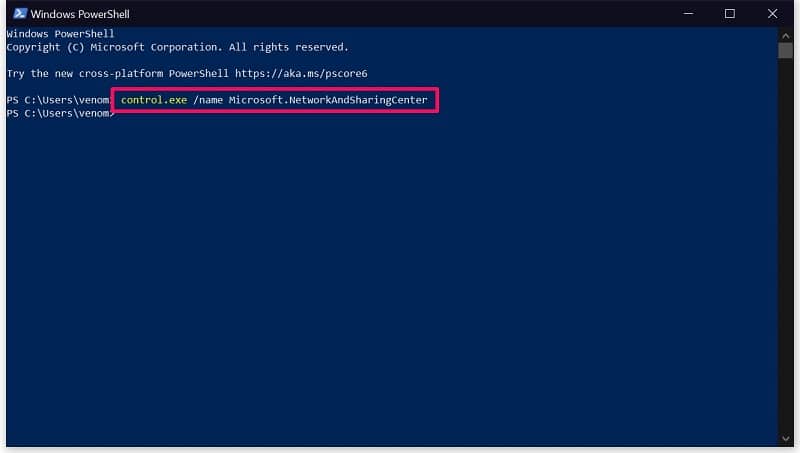
When the command is executed, the Network and Sharing Center window will show up on your screen, just like the Command Prompt technique. Whether you’re using Command Prompt or PowerShell, you’re just trying to do the same thing, which is executing a command that opens the Network and Sharing Center in Windows 10.
Conclusion
If you haven’t been keeping count, there are six different methods that you can try out to open the Network and Sharing Center on your Windows 10 PC. The last three techniques are pretty similar since you’re using the same command line on different programs. While the focus was Windows 10 in this particular article, most of these methods apply to Windows 7/8/8.1 users as well.
We hope you were able to find a preferred way to access the Network and Sharing Center on your Windows 10 computer. Which one of the methods that we covered here is your personal favorite? Do you know any other techniques to open the Network and Sharing Center? If so, make sure to let us know in the comments section down below. We’d love to read your valuable feedback as well.