PCs shared between multiple users usually have different user accounts for each person who utilizes them. It makes more sense to have different user accounts with unique user preferences for a PC than one single account for everybody. Then a PC’s users can configure their accounts to suit preferences and keep their files to themselves.
Admin and standard are the two basic types of user accounts. An admin account has full access rights and permissions to a PC’s administrative tools, settings, and files. Standard users can utilize installed software, open user files, and change built-in Windows customization settings, but they have limited admin access. However, two account type options provide only a somewhat limited way to assign user access rights for a PC. Therefore, Windows 10 includes user groups that enhance its access right flexibility. Below we tell you how to open Local Users and Groups on Windows 10.
Part 1. What is Local Users and Groups?
A user group is a group of user accounts with the same access and security rights. The user group security feature enables more flexible multiple user permission and right management. Windows 10 includes 19 default user groups to group multiple accounts in. Those groups assign more specific rights and permissions for users included within them. These are the default user groups:
- Administrators
- Backup Operators
- Distributed COM Users
- Event Log Readers
- Cryptographic Operators
- Guests
- Network Configuration Operators
- Power Users
- Remote Desktop Users
- Users
- Replicator
- Performance Monitor Users
- Performance Log Users
- IIS_IUSRS
- Hyper-V Administrators
- Access Control Assistance Operators
- Remote Management Users
- HomeUsers
- System Managed Account Groups
Local Users and Groups (otherwise lusrmgr.msc) is a snap-in utility for managing local user groups included within Windows 10 Pro, Enterprise, and Ultimate. That snap-in tool is not available within Windows 10 Home. With the Local Users and Groups snap-in, administrators can view the list of default user groups and assign different users to them.
Although you can also add users to groups via the Command Prompt, the Local Users and Groups snap-in is a better tool for user group management. There are various ways you can open the Local Users and Groups utility. This is how to open Local Users and Groups in Windows 10 with five different methods.
Part 2. 5 Ways to Open Local Users and Groups on Windows 10
2.1. Open Local Users and Groups in Windows 10 using the Search Box
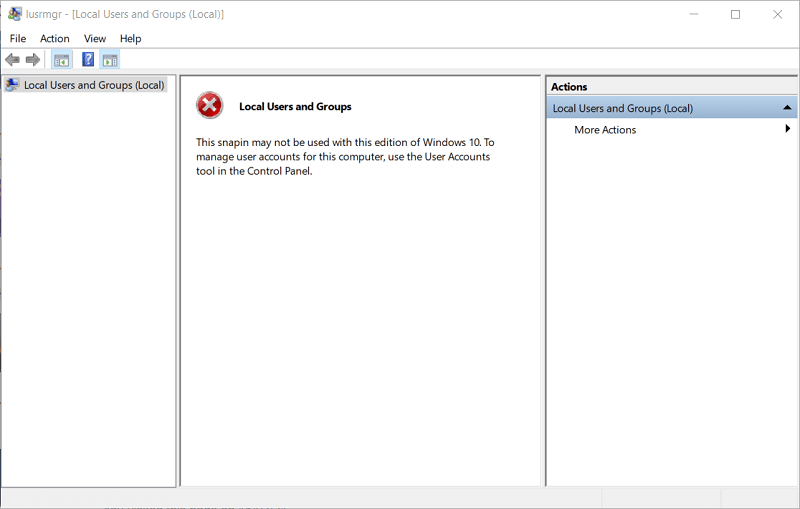
Step 1: First, open Windows 10’s search box, which you can do by clicking the “Type here to search taskbar” button.
Step 2: Enter the keyword ‘lusrmgr.msc’ within the search box.
Step 3: Click lusrmgr.msc to open the Local Users and Groups window shown directly below.
2.2. Open Local Users and Groups in Windows 10 using the Run Dialog
Step 1: First, you’ll need to open Run with the Windows + R keyboard shortcut.
Step 2: Enter ‘lusrmgr.msc’ in the Open text box.
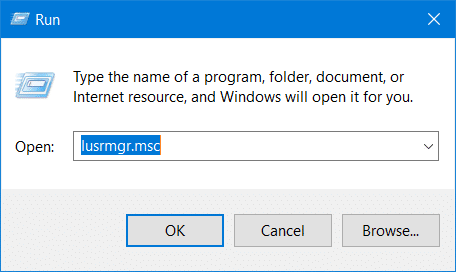
Step 3: Press the “OK” button to open the lusrmgr window.
2.3. Open Local Users and Groups in Windows 10 from Computer Management
Step 1: Press the Windows and X keyboard keys simultaneously to open the menu in the snapshot directly below.
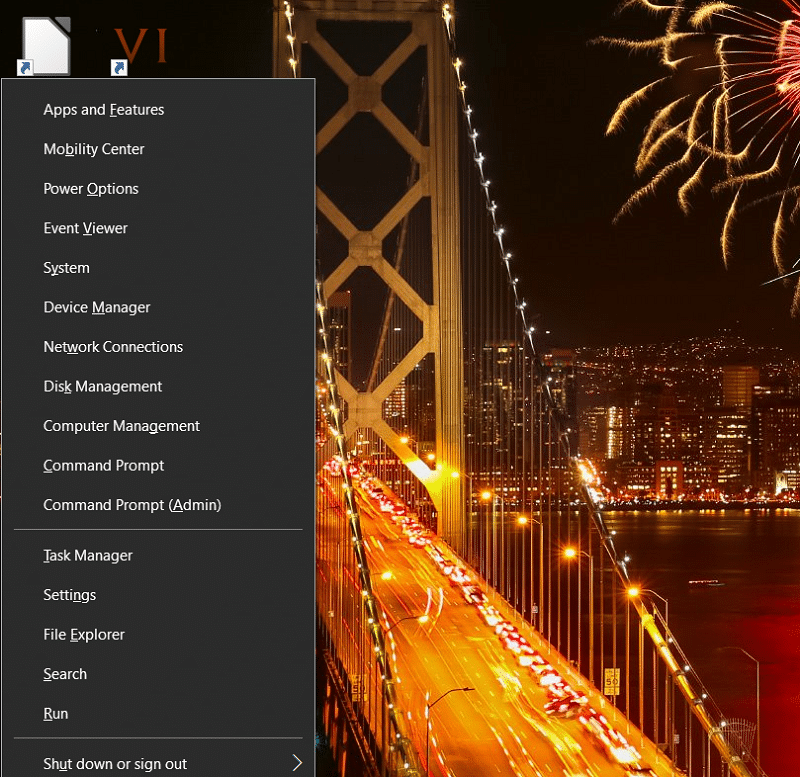
Step 2: Select “Computer Management” on that menu to open the window shown directly below.
Read More: How to Open Computer Management in Windows 10
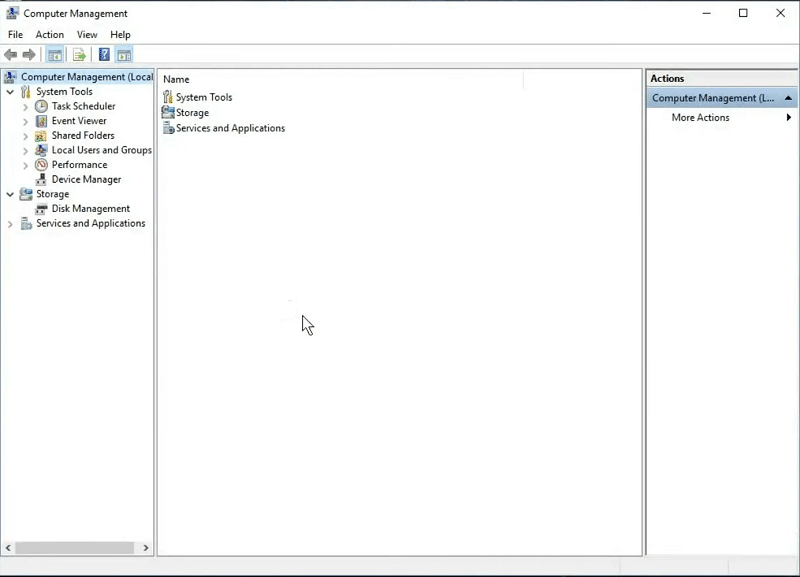
Step 3: Click “System Tools” on the left of the Computer Management window.
Step 4: Then click “Local Users and Groups” to expand that snap-in tool.
Step 5: You can click “Users” to view a list of users for the PC.
Step 6: Click “Groups” to look through the default user groups.
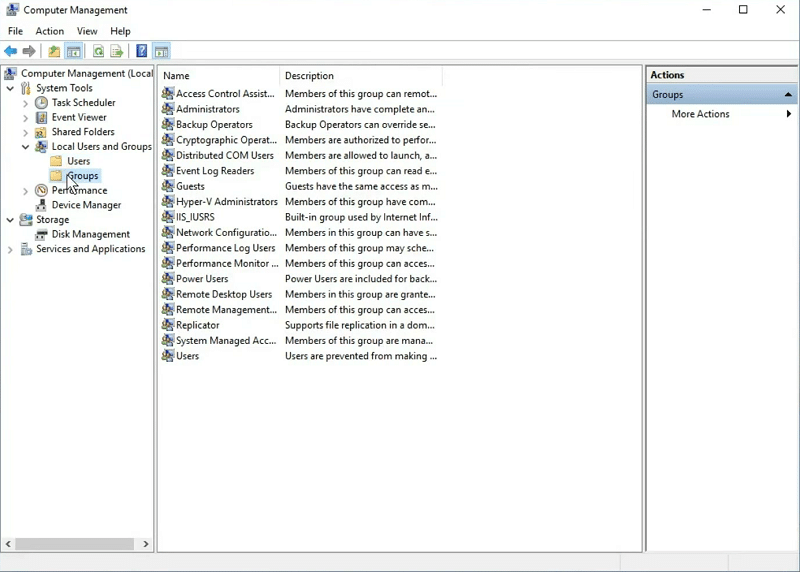
Note that the Local Users and Groups snap-in tool you utilize within Computer Management is the same as that in the lusrmgr window. Thus, there’s no difference between utilizing Local Users and Groups via the Computer Management or lusrmgr windows.
2.4. Open Local Users and Groups in Windows 10 using Command Prompt
Step 1: Press the Windows and S key combination to open the Type here to search box.
Step 2: Type ‘CMD’ in the search box to find the Command Prompt.
Step 3: Click Command Prompt to open that window.
Step 4: Then input ‘lusrmgr.msc’ in the Command Prompt as in the shot directly below.

Step 5: Press the Enter key to initiate the command and open the lusrmgr window.
Read More: How to Open Command Prompt on Windows 10
2.5. Open Local Users and Groups in Windows 10 using Windows PowerShell
Step 1: Alternatively, you can open Local Users and Groups with Windows PowerShell much the same. First, open Windows 10’s search tool.
Step 2: Enter the keyword ‘PowerShell’ to find that command-line utility.
Step 3: Select Windows PowerShell in the search results to open that command-line tool.
Read More: How to Open PowerShell in Windows 10
Step 4: Then input the ‘lusrmgr.msc’ command in PowerShell’s window.
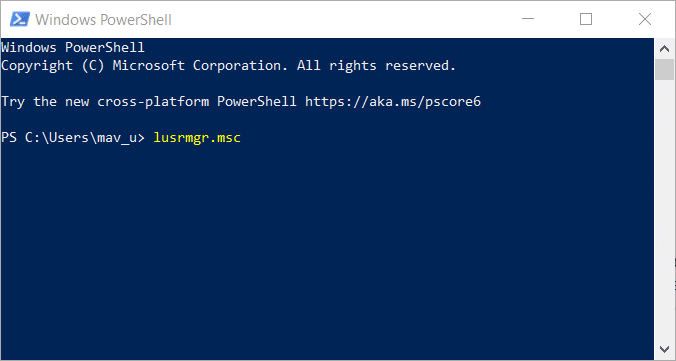
Step 5: Press the Enter keyboard key to launch the Local Users and Groups utility.
When you’ve opened the Local Users and Groups tool with one of the above methods, you can add users to local groups. You can do so by selecting “Users” on the left of the window and right-clicking a user account to select the “Properties” option. After that, click “Add” on the Member of tab to open the Select Groups window like the one shown directly below.
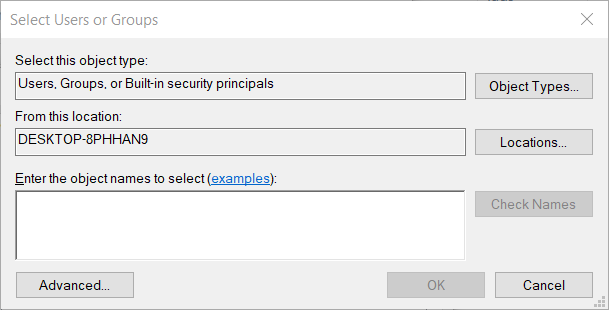
You can add a user to a default group by clicking the “Advanced” and the “Find Now” options. Then you’ll see a list of user groups, and the default ones are those within the DESKTOP folder. Select a default group to include the user within. Then click the “OK” buttons to confirm the new group setting and exit windows.
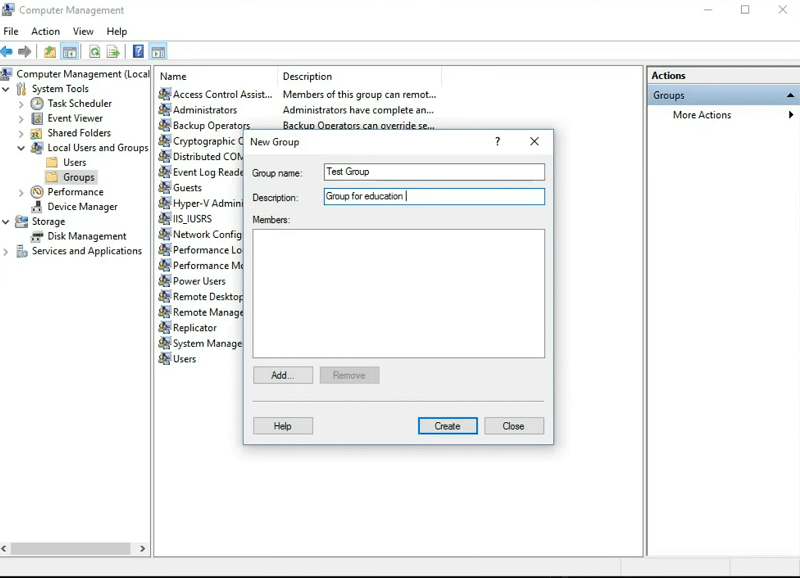
Alternatively, you can set up new groups by right-clicking Groups and selecting the “New Group” option. You can enter a group title and description within the New Group window that opens. Click the “Add” button to enter or select a user account to include within the group. Then click the “OK” and “Create” buttons to add the new group.
Conclusion
After you first open Local Users and Groups on Windows 10 with one of the above methods, you’ll discover a handy tool for user account management. Local Users and Groups provides a centralized Windows 10 tool that simplifies multiple account management for many users. That utility will save you having to configure permissions for each account on your PC separately. So, it’s worth checking out Local Users and Groups in Windows 10 Pro, Ultimate, and Enterprise if you utilize a shared PC with multiple user accounts.