Microsoft Word offers certain features to improve your writing experience and ensure you make the least number of mistakes while typing. Spell check is one such major feature that it has to offer. You may have noticed some red wavy lines beneath certain words in your Word document. This is the spell check feature in action. Many new Word users may not know what these lines mean, but that’s exactly what we’ll be talking about here. Not just that, we’ll be helping you remove red lines in Microsoft Word documents permanently if they bother you too much.
Word files working incorrectly might be the result of the document being damaged or corrupted. Word Repair tool is able to fix most existing issues and ensure correct function of the document.
Part 1. What Do the Red Lines in Word Mean?
Usually, when you see a red line under a word, it means that there’s a spelling mistake that you need to correct. However, this isn’t entirely accurate all the time. Any word that’s not in Word’s spell-check dictionary will be marked with a red wavy underline.
Although these red lines can be helpful in correcting your mistakes, they can also be quite annoying at times. Several technical terms and slang words aren’t present in this dictionary, and if you use them while you’re working on your Word document, it will end up having red lines even if you’re spelling it correctly. Hence, people who’re confident with their spelling may want to remove these unnecessary red lines in Word.
Part 2. How to Remove Red Underlines in Word
Typically, users would have to right-click on an underlined word and choose the ‘Ignore All’ option to remove it, but this is not ideal if there are too many red lines in your document. Rather than taking this time-consuming route, you can get rid of red lines altogether in Microsoft Word.
Depending on whether you want to remove the red lines for just the current document or for all the documents you’ll be working on, the steps you need to follow will vary. Here, we’ll be covering two different methods to remove red lines in Microsoft Word documents.
2.1. Remove Red Lines in All Word Documents
If you no longer wish to bother with these red lines whenever you’re working on Word documents, you can remove them permanently. This can be done by changing Microsoft Word’s Proofing settings. Here’s what you need to do:
Step 1. Assuming you have Microsoft Word open on your computer, click on ‘File’ from the menu bar.

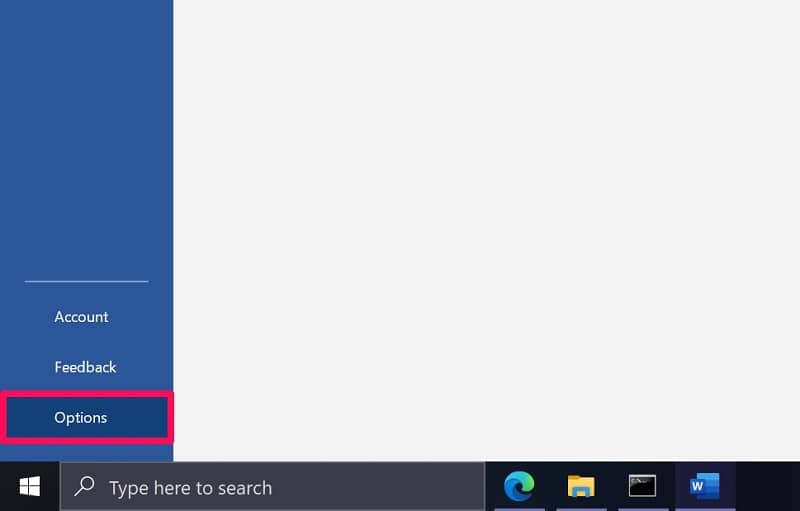
Step 2. This will take you to the File menu, where you’ll see all the Word documents you’ve worked on. Here, click on ‘Options’ located at the bottom-left corner of the Word window.
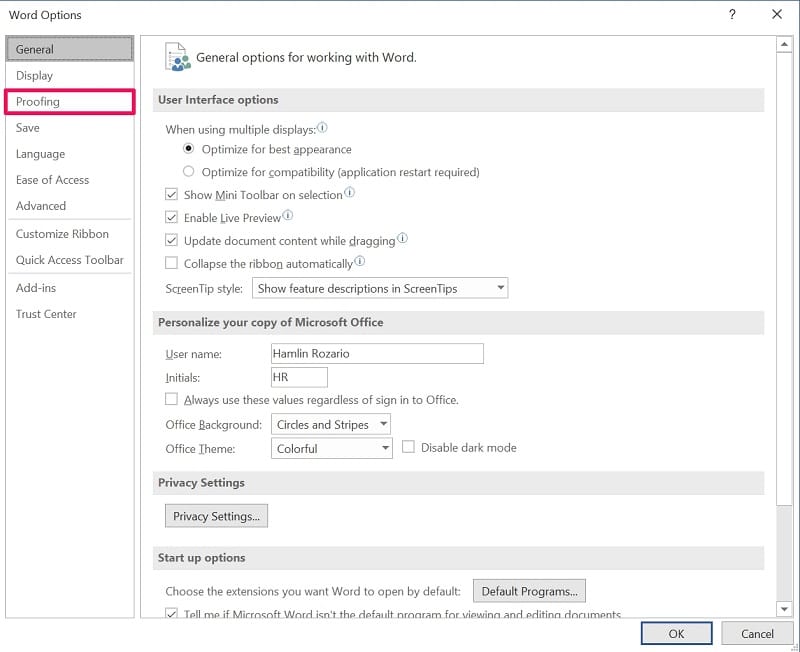
Step 3. A new ‘Word Options’ window will launch within Microsoft Word. You may be in the General section of Word Options. Click on ‘Proofing’ from the left pane to make changes for spell check.
Step 4. Here, you’ll find a bunch of check boxes under the ‘When correcting spelling and grammar in Word’ section. Uncheck the boxes next to ‘Check spelling as you type’ and ‘Frequently confused words.’ Make sure to click ‘OK’ to save your changes.
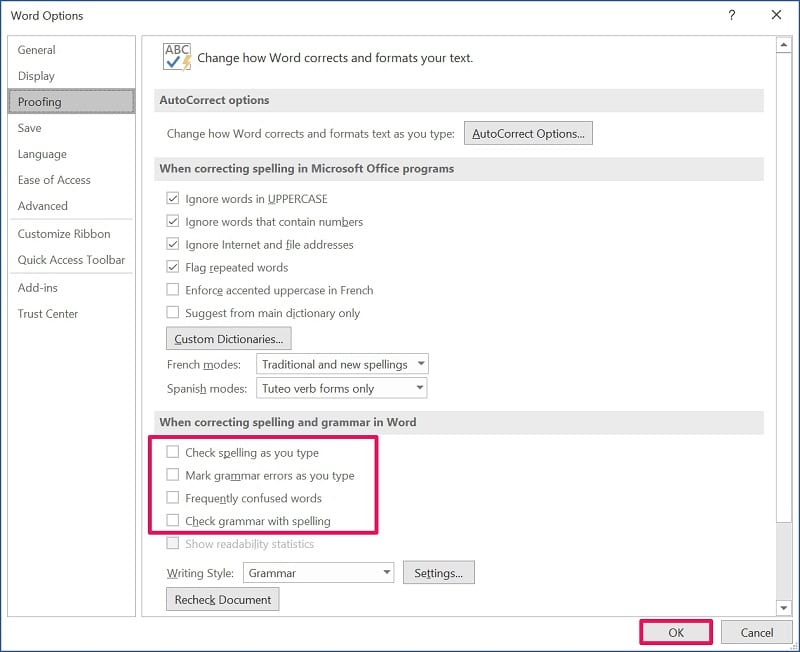
There you go. Unchecking the boxes for grammar will remove green underlines from your Word document too. Either way, you will no longer find any red underlines in any of your Word documents.
2.2. Remove Red Lines in the Current Word Document Only
This method might be useful for those working on Word documents containing a lot of technical terms that aren’t available in the spell check dictionary. Follow the steps below to remove all the red lines from your current Word document:
Step 1. Just like the above method, head over to the ‘File’ section from the menu bar once you’ve opened up Microsoft Word.
Step 2. Next, click on ‘Options’ from the bottom-left corner of the window to access the Word Options menu.
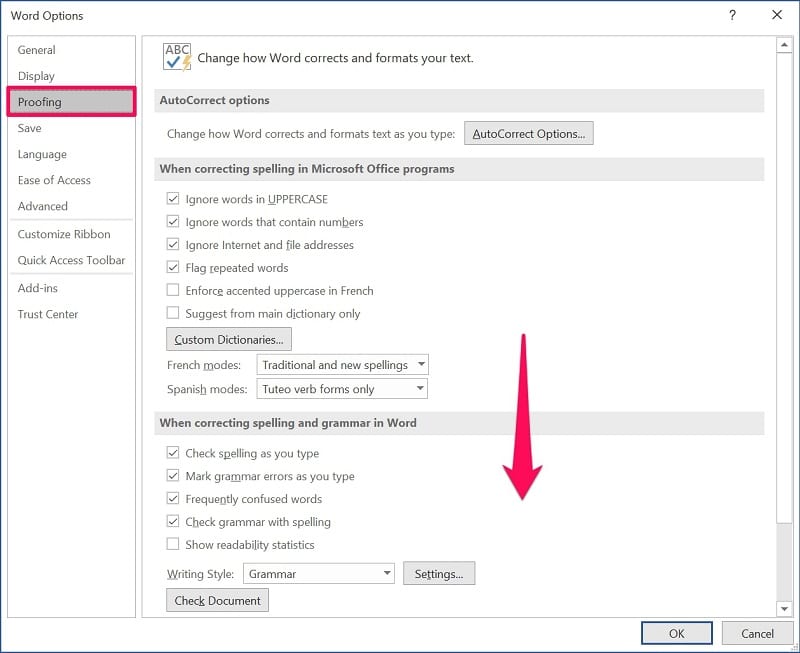
Step 3. Now, click on ‘Proofing’ from the left pane and scroll down to the bottom to make spell check exceptions for your current document.
Step 4. Here, check the box next to ‘Hide spelling errors in this document only’ as shown in the screenshot below, and click on ‘OK’ to save your changes.
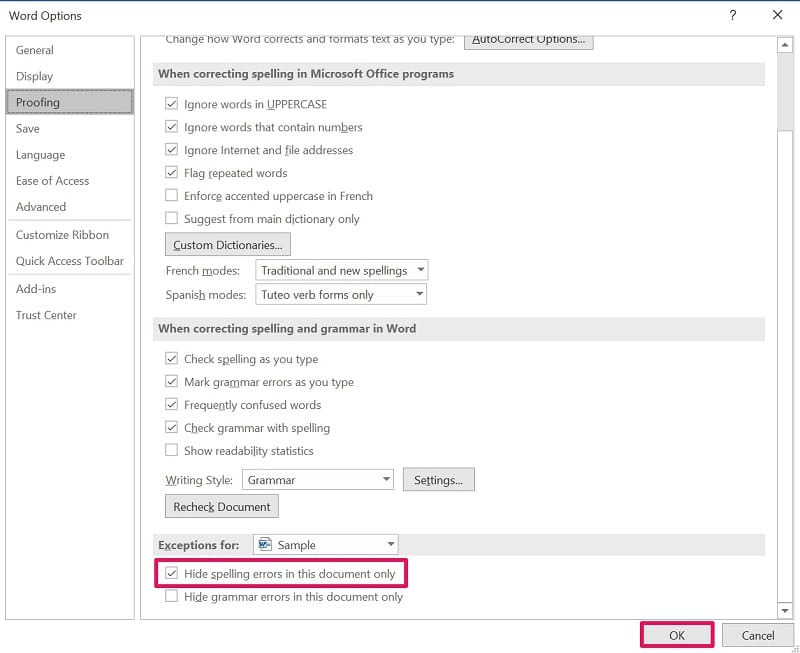
You can make exceptions for other documents here too. Here, the current document is selected by default, but you can click on it and select a different Word file instead. Also, if you want to get rid of green lines, you can check the box for hiding grammar errors.
Conclusion
As you can probably see, it’s not hard to turn off all the red lines in Word whenever it bothers you. For a handful of people who’re on point with their spelling in general, the feature does more harm than help. However, if you change your mind, you can always head back to the Proofing settings and toggle the feature on or off.
We hope you could finally learn multiple ways to get rid of red lines in Microsoft Word. Did you remove red lines from just your current document, or did you turn them off permanently? Do you know any additional ways to deal with red underlines in Word? Feel free to share your ideas, and don’t forget to leave your opinions in the comments section down below.