Google’s Chrome browser is the gateway to everything on the World Wide Web for over 2.65 billion people (daily). Thus, it’s highly probable you find yourself among them. And, many others, you also have to deal with an unresponsive browser occasionally.
Usually, the problem’s a one-off, maybe related to resource-usage, or some wonky JavaScript code on a particular site. But what if it persists?
That’s why we’ve collected the best solutions for when Chrome keeps becoming unresponsive, stuttering, pausing, crashing, or even making your whole OS crawl. If you’re dealing with such problems, you’ll probably find their solution below.
Read More: How to Fix Google Chrome Won’t Open in Windows 10
The Solutions to Fix Chrome Not Responding in Windows 10/11
Some of the solutions we’ll see overlap, but most deal with different problems. This means that the problem you are dealing with might be solved with only one of the following solutions.
Thus, it’s worth trying them all out in the order we’ve listed them.
Method 1: Update Chrome Manually
Chrome usually downloads and installs updates automatically. The process is seamless, transparent, but like most things in our digital lives, not guaranteed. One wrong byte here or there, one interrupted update, or the occasional bug the good folks at Google might miss, and there you go: broken browser.
Unfortunately, there’s no easy way to uninstall a particular Chrome update or revert the browser to its previous state. However, Google was the first to introduce a “rolling-release” model for Chrome’s updates, which means there’s probably a new one waiting for you to install as you’re reading this.
So, if your browser’s somehow stuck on its current version for months, and it’s also lately started behaving erratically, it’s worth trying to jump-start the update process.
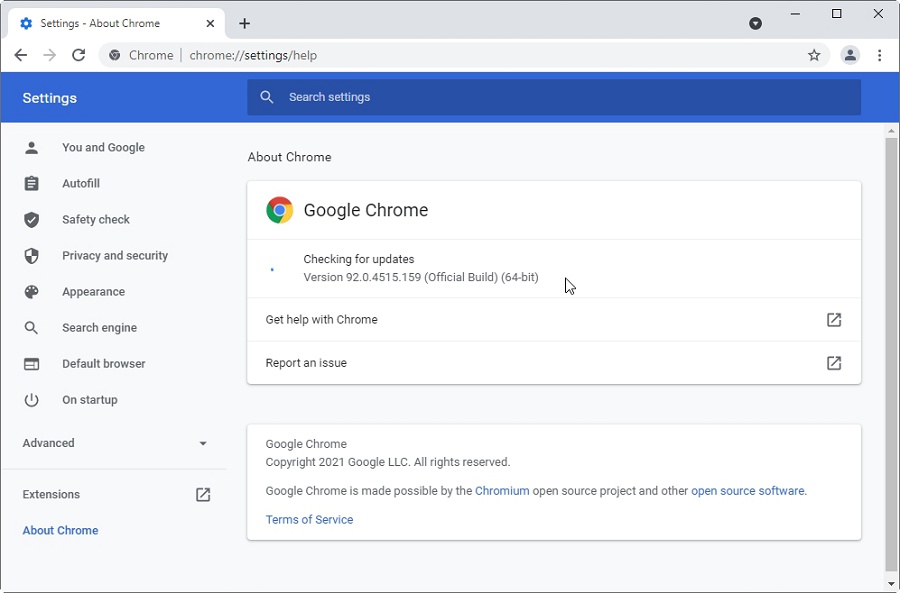
To do that, click on Chrome’s menu button on the top right. Choose Help > About Google Chrome.

If your computer’s connected to the Internet when you choose that option, Chrome will start checking for updates. If any are available, Chrome should download and install them automatically.
Method 2: Disable All Extensions
Suppose it’s a pesky extension that’s to blame for your misbehaving browser. How can you disable it if the browser isn’t working? That’s precisely why Google’s equipped Chrome with a run flag that can disable all extensions. You can invoke it from a terminal, but we think it’s easier to use a dedicated shortcut on your desktop.
To do that, create a shortcut to Google Chrome’s existing shortcut on your desktop so that you’ll have two of them.
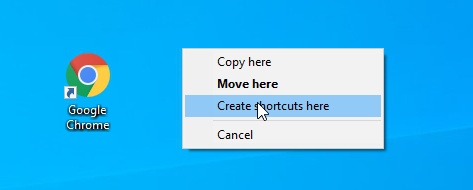
Rename the second shortcut so that you’ll be able to tell which one’s the “Normal” Chrome and which one is the version that will launch without any extensions.

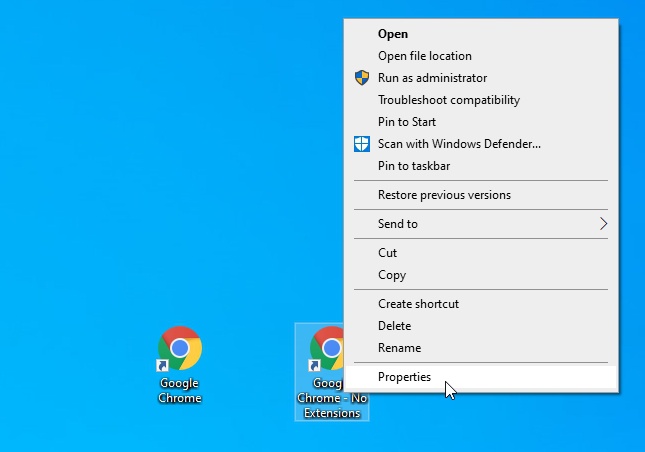
Right-click on your new shortcut and choose Properties.
Move to the Shortcut tab and click in the field next to Target. It will contain the path to Chrome’s executable, probably in quotation marks. Leave it as it is, and move to the end with either the End key or the right arrow key on your keyboard. Press space and add “–disable-extensions” (without the quotation marks) there. Click on OK to accept the changes to the shortcut and close this window.
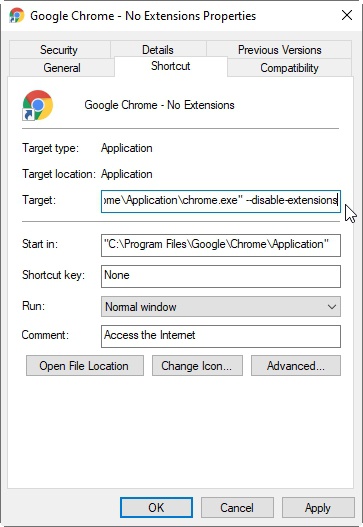
Double-click on your new shortcut, and Chrome will launch without loading any extensions. You can proceed to disable all of them and then re-enable them one by one until you find the culprit.
Method 3: Disable Problematic Extension
If, after disabling all extensions, Chrome is working fine, you’ve found the source of the problem. It’s one of the extensions. But which one?
You can randomly disable and enable your browser’s extensions, hoping you’ll fall on the culprit. However, a more systematic approach will allow you to find the problematic add-on quickly and painlessly. Let’s see how.
The easy way to get to the extensions page is to type “chrome://extensions” (without the quotation marks) in Chrome’s URL bar and press Enter.
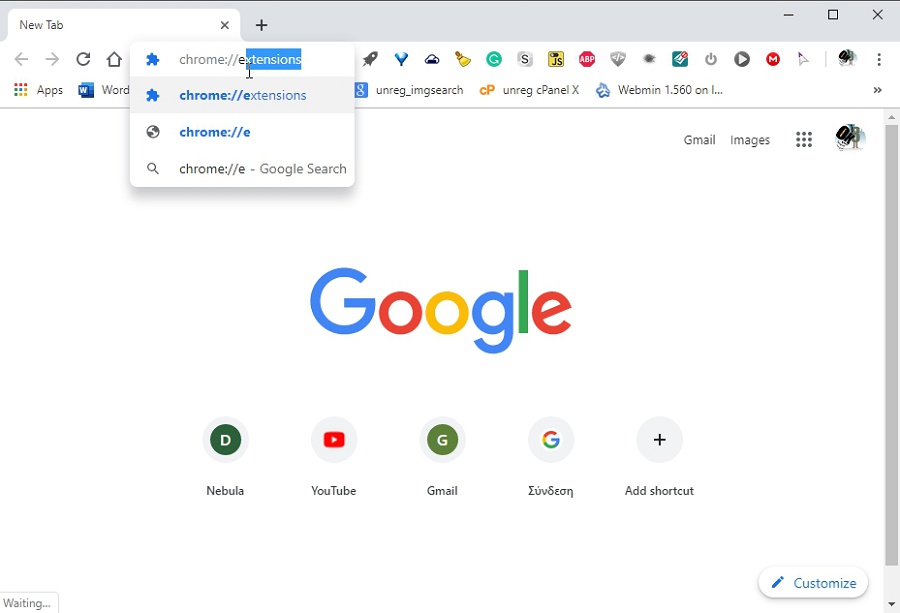
Fans of the mouse who’d prefer to keep typing to a minimum can get to the same place through Chrome’s menus. Click on Chrome’s menu button on the top right, and choose More tools > Extensions.

In both cases, you’ll reach the same Extensions page. Disable half of your extensions by flicking the switch at their bottom right.
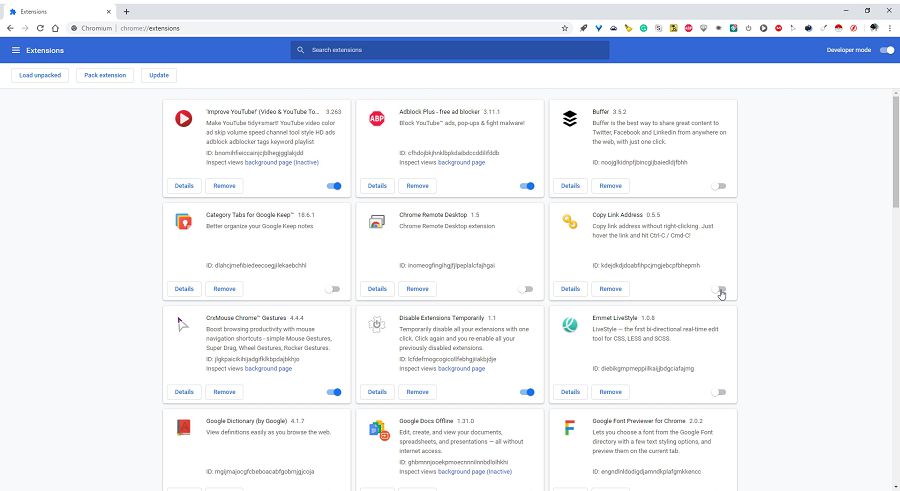
Restart your browser and check if it works properly. If Chrome doesn’t become unresponsive, the problem lies within one of the other extensions. Disable your currently active extensions and vice-versa, enable the ones that were disabled.
With the problematic extension among the enabled ones, the problem should now rear its ugly head again. So, repeat the process we just saw, and disable half of your currently active extensions. Then, check if Chrome becomes unresponsive again. Rinse-repeat, each time eliminating half of the active extensions in one sweep. Eventually, you’ll find the problematic extension. Disable it and re-enable the rest.
Method 4: Clear Browsing Data
Does Google Chrome stop responding in Windows 10/11 whenever you visit a particular site? One of the possible causes of the problem may be the files Chrome’s stored locally about this site.
Thankfully, the solution’s easy: delete those files. Google Chrome allows you to delete any stored site data selectively.
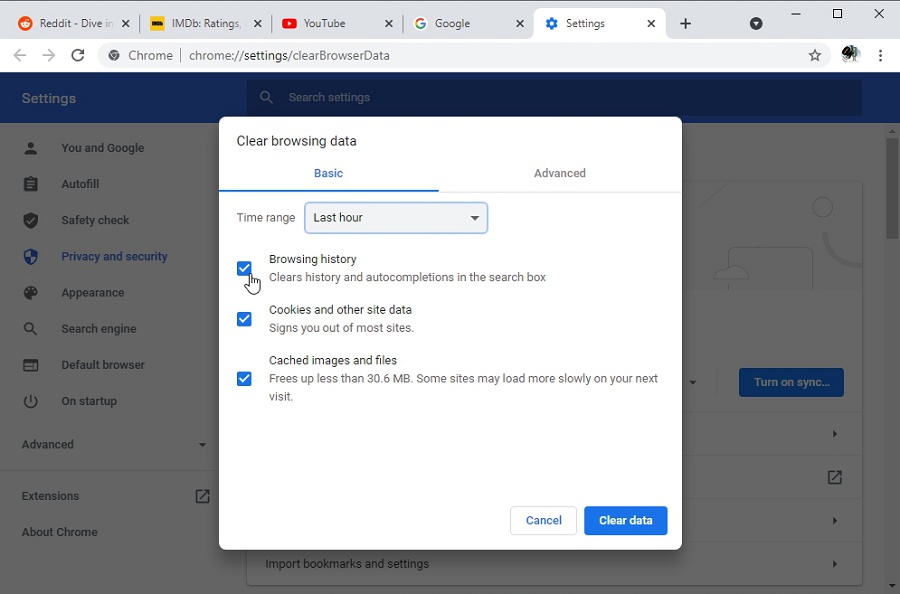
To do that, click on Chrome’s menu button on the top right, and select More tools > Clear browsing data…, or press Ctrl + Shift + Del on your keyboard.

Chrome’s Clear browsing data dialog will appear. By default, you’ll be at the Basic tab, which offers some general options. You can choose to clear all your browsing history, cookies, and other site data, and Cached images and files.
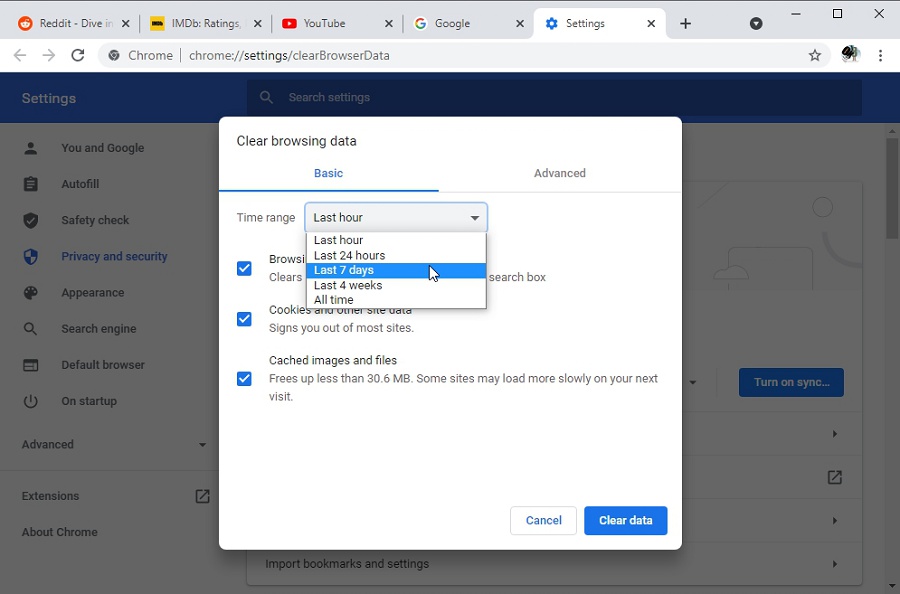
You can use the drop-down menu to define the timeframe for the deleted data. You can choose to delete everything stored by Chrome within the Last hour, Last 24 hours, Last 7 days, Last 4 weeks, or All time.
For more granular control, visit the Advanced tab. There you can explicitly specify if you want to delete the contents of your Browsing history, Download history, Cookies, and other site data, etc.
It’s better to go for the Advanced, more detailed approach and begin with only Cookies and other site data to see if this fixes the problem. This won’t delete “useful stuff”, like cached images and files (for quicker browsing) or saved passwords and sign-in data.
After choosing what to remove, click on Clear data, on the bottom right, to delete the selected files.
Method 5: Force-Close Running Instances
Here’s a scenario: Google Chrome just stopped responding in your Windows 10 installation, and there’s no way to try the rest of the methods we mentioned. The browser’s entirely unresponsive, and it’s also dragging your whole OS down with it. If you believe you’ve waited enough and the situation’s only getting worse, it’s time to end the browser’s processes forcefully.
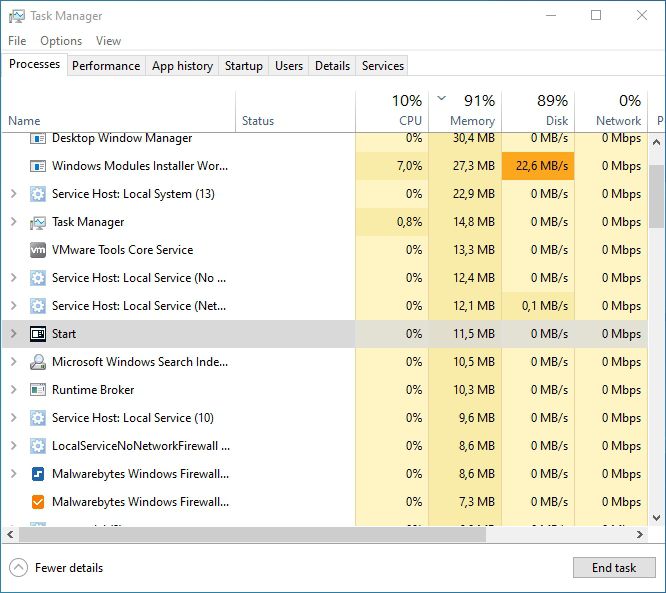
Press CTRL + Shift + Esc to run Windows 10’s Task Manager.
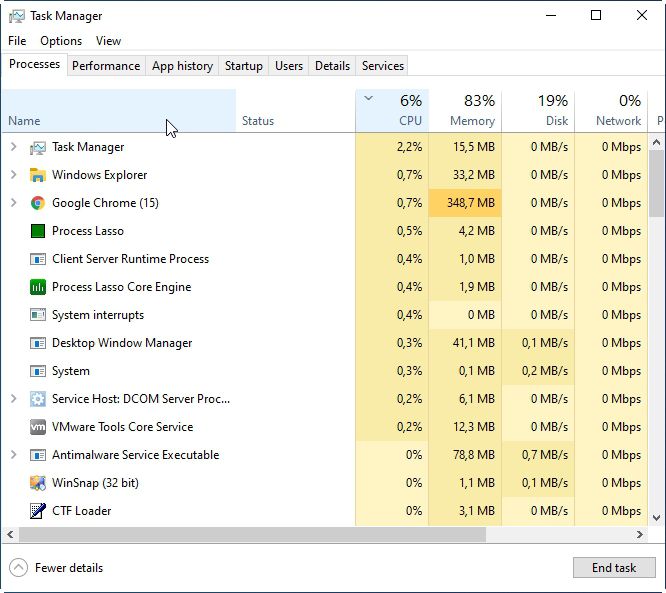
Ensure you’re looking at the Processes tab. Locate Google Chrome in Task Manager’s process list. It might help if you click on the Name column to list everything alphabetically.
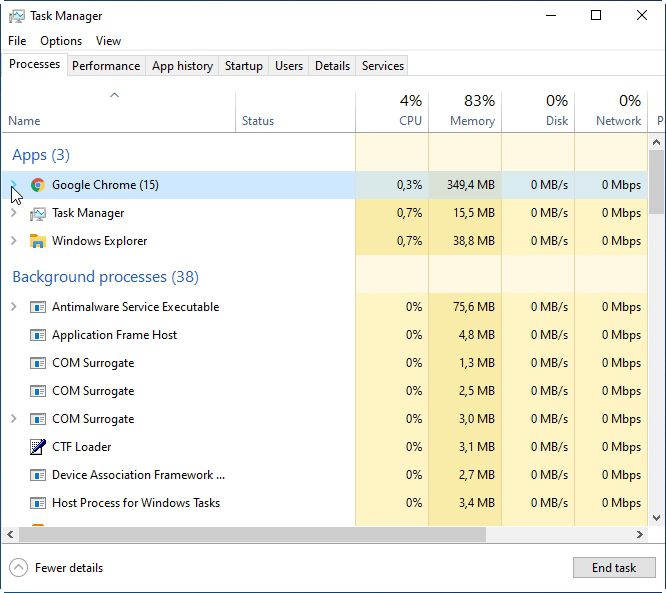
To the left of some entries, including Google Chrome, you can see a little arrow. That shows the entry consists of multiple processes, which you can see by clicking on it to expand the entry.
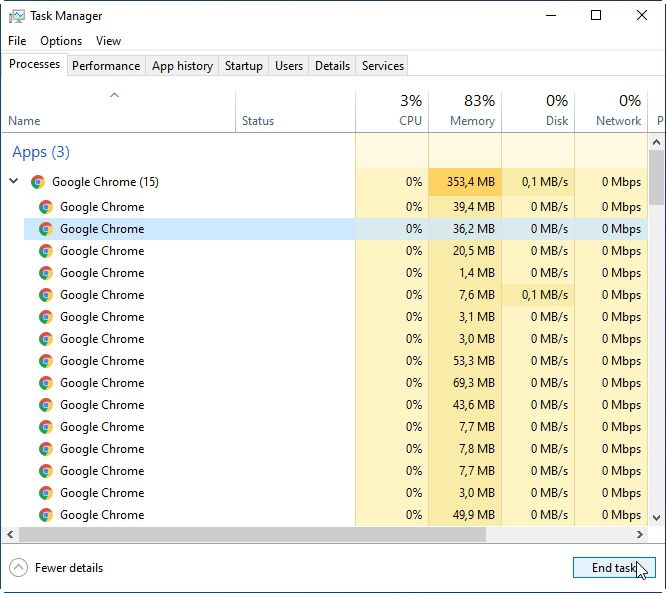
You might be able to tell which of those sub-processes is at fault because of high CPU, Memory, or Disk Utilization usage. You can then try to force-close only that sub-process. Google Chrome is “compartmentalized”, so “the rest of the browser”, for lack of a better way to put it, will probably remain responsive. Think of this move as force-closing a specific extension or single tab. To do that, click on the problematic entry and then on End task, on the bottom right.

If Google Chrome remains unresponsive, you’ll have to force-close the parent process, the app’s main entry (which includes all sub-processes). You can do it in precisely the same way we saw above for ending a sub-process.
Note that terminating a parent process alco force-closes all of its sub-processes. So, if you have web apps that rely on Chrome while running as background tasks, they’ll close, too.
Method 6: Disable JavaScript
We already saw one of the ways you can deal with an unresponsive site and how to force-close its tab (or the whole browser) if it ends up eating all your resources. Still, if that keeps happening, maybe it would help to turn JavaScript off. A lousy piece of JavaScript is the most usual suspect for high resource usage in modern browsers.
Chrome allows you to disable JavaScript on a global level through its settings. Still, extensions make the task even more accessible.
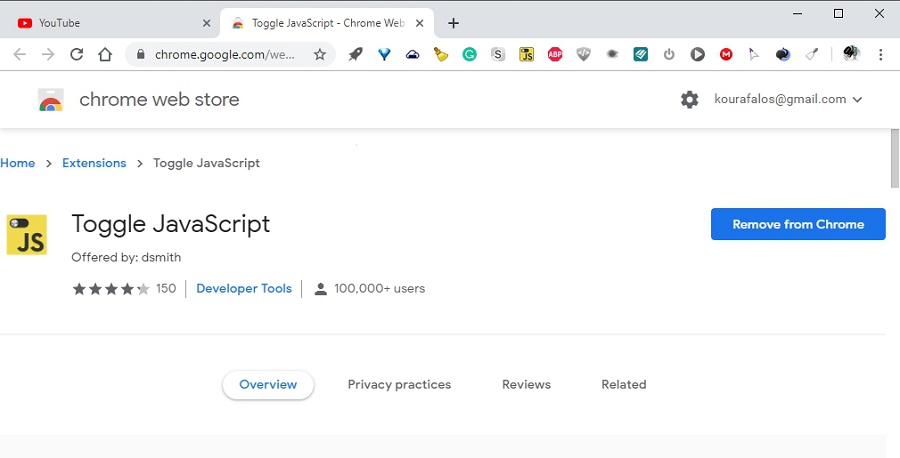
For this guide, we decided to go with the simple Toggle JavaScript. It’s a “global toggle” with no extra features. And that’s precisely why it’s also one of the most popular extensions of its kind.
To install it on Chrome, visit Chrome’s Web Store and search for its name, “Toggle JavaScript” (without quotation marks). Install it with a click on Add to Chrome, on the right.
Note that the same button states “Remove from Chrome” in the screenshot below because we already had the Toggle JavaScript installed.
Return to the site that seems to make your browser crawl on every visit. If Chrome starts becoming unresponsive again, click on the new yellow JS button the extension placed close to your URL bar.
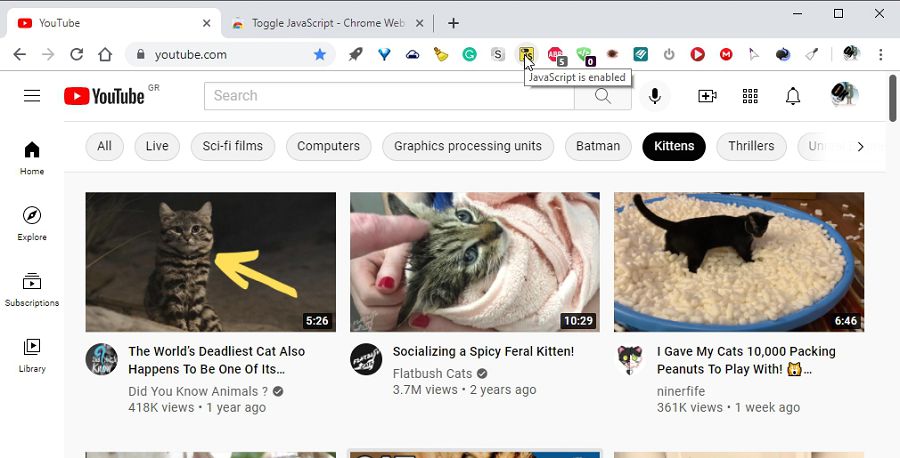
The site will reload with JavaScript disabled. It will probably be a somewhat worse experience, with missing features or even a different page layout. However, the core content should be accessible without Google Chrome becoming unresponsive.

Method 7: Selectively Block Sites
Sometimes when Google Chrome stops responding when you visit a site, it might not be the site to blame but the third-party resources it uses. Those can be extra fonts, JavaScript libraries, comment systems, etc. Usually, though, they’re related to advertising. Thus, you wouldn’t really miss them if they weren’t there in the first place.
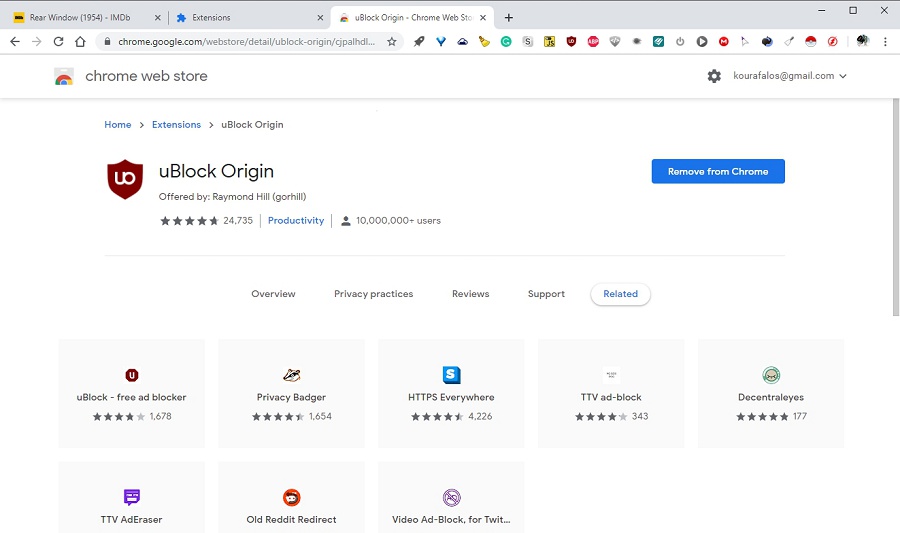
Thankfully, extensions like uBlock Origin allow you to nuke from orbit any unwanted elements in the sites you visit. To install uBlock Origin on Chrome, visit Chrome’s store and look for the extension with its name, “uBlock Origin”. Install it with a click on Add to Chrome on the right.
uBlock Origin blocks the most common annoyances in all sites by default. However, some sites might require an external element to work correctly, breaking without it.
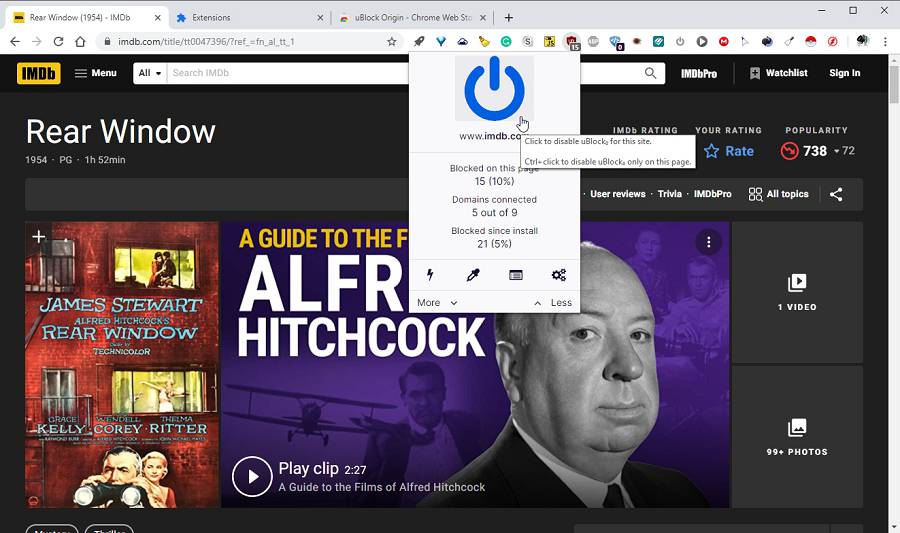
If any site you visit after installing uBlock Origin doesn’t work as it should, you can turn off blocking. Click on uBlock Origin’s icon and then on the large On/Off switch at the top.
Chrome’s active tab will reload, with uBlock switched to the state you chose – either On or Off.
If a site breaks after installing uBlock Origin, you can revert the change the same way.
It’s worth noting that uBlock Origin also offers you controls to block extra elements in the sites you visit.

Method 8: Check Your Internet Settings
Is Google Chrome responsive in your Windows 10/11 installation, but it can’t locate any site or present any content? The source of your problem could be the hardware that connects you to the Internet: your network adapter.
Sometimes, especially when restoring Virtual Machines, a network connection can get “stuck”. The simplest way to bring it back is the famous, by now, computer mantra: turn it off and on again!
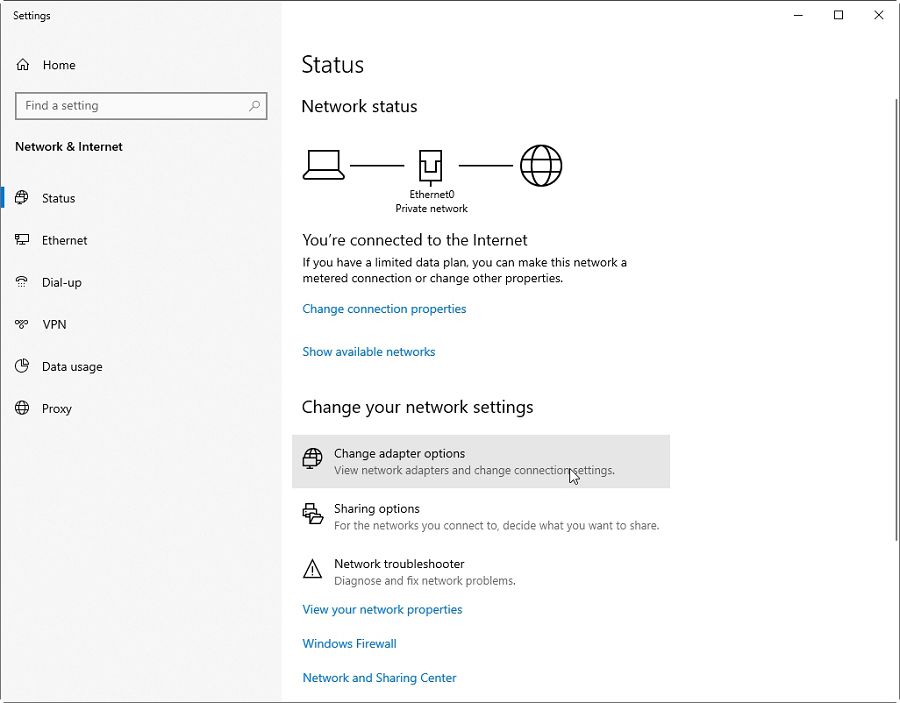
Click on the little gear icon in Windows 10’s start menu to access its Settings. Choose Network & Internet, then Change adapter options under Change your network settings.
Also Read: How to Open Network and Sharing Center on Windows 10
Choose your active network connection by clicking once on it. Then, click on Disable this network device on the window’s taskbar, above the list of available connections.
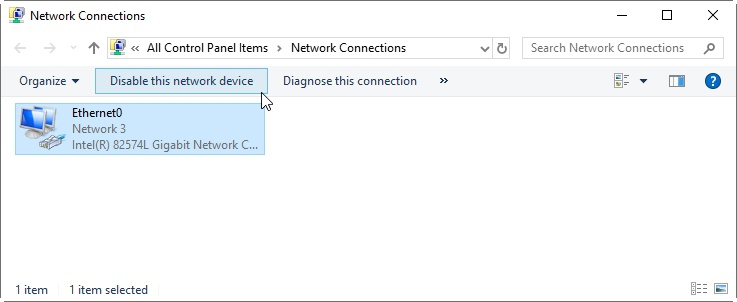
Finally, re-enable your connection by clicking on the same button, which should now read “Enable this network device”. Hopefully, Chrome will respond to your requests for online content.
If it’s not, you should also look into the settings of your:
- Modem/Router
- Firewall
- Proxy Server
- DNS Provider
Unfortunately, we can’t help with this since the options vary depending on hardware, network environment, Internet provider, etc.
For the first two, Modem/Routers and Firewall, you’ll have to check their manuals and instructions “to let your browser through”.
For Proxies and DNS Servers, if you’re in an office environment, you’ll have to ask the administrator of your local network. If at home, contact your network provider.
Method 9: Check Your Connection
If your networking hardware seems a-okay, maybe it’s the connection itself that’s at fault.
It’s a rare problem for a connection to stop working, but not impossible. Was your router, network adapter, or other network-related hardware recently updated? Maybe your connection hasn’t “adapted to the changes”. The “fix” might be something as simple as using a different IP address.
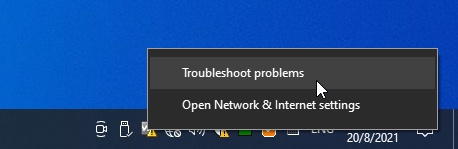
Windows 10 makes dealing with such problems easy, thanks to its included troubleshooters. To troubleshoot your network connection, right-click on its icon in the Windows tray. Note that you might have to expand your tray to locate the networking icon depending on your taskbar configuration. Choose Troubleshoot problems from the pop-up that appears.
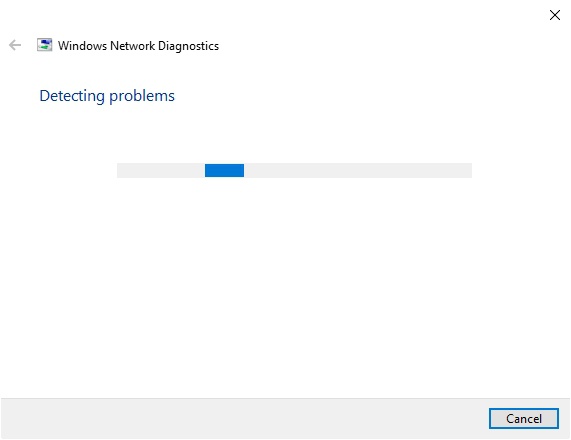
Wait for the Windows Network Diagnostics wizard to complete its analysis. If it detects a problem with your connection, it will suggest potential fixes. The wizard might even deal with many problems automatically, without asking you anything. It may merely report that the problem’s fixed.
Method 10: Use Chrome Malware Scanner
Did you know that mining for crypto-currencies in the browser is now a thing? Combine that with shoddy sites you might have visited in the past, and maybe you found the reason Google Chrome is not responding in your Windows 10 setup. How can you deal with such malicious software? That’s why Google gave Chrome a Malware Scanner.
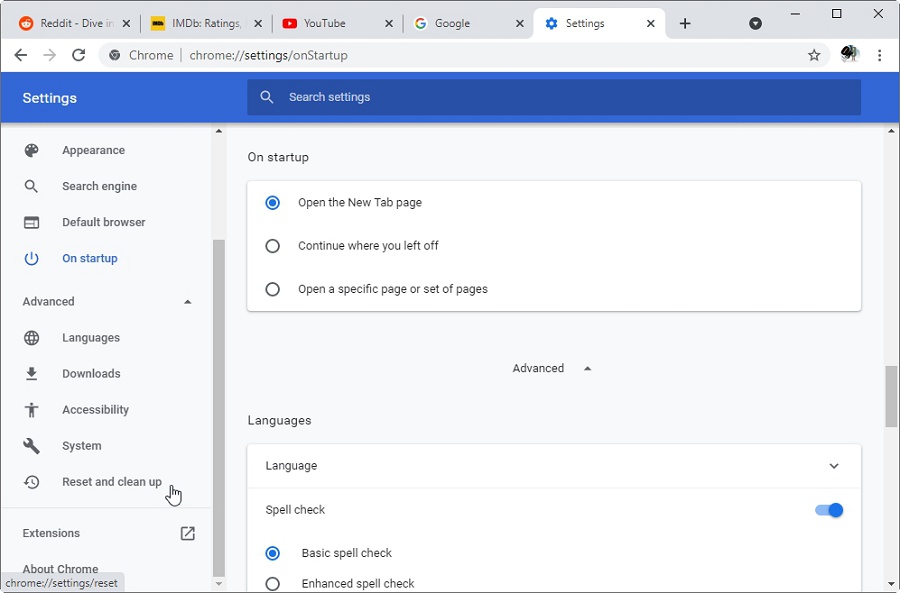
To access Chrome Malware Scanner, click on the browser’s menu button and choose Settings. Click on Advanced from the menu on the left to open and expand it.
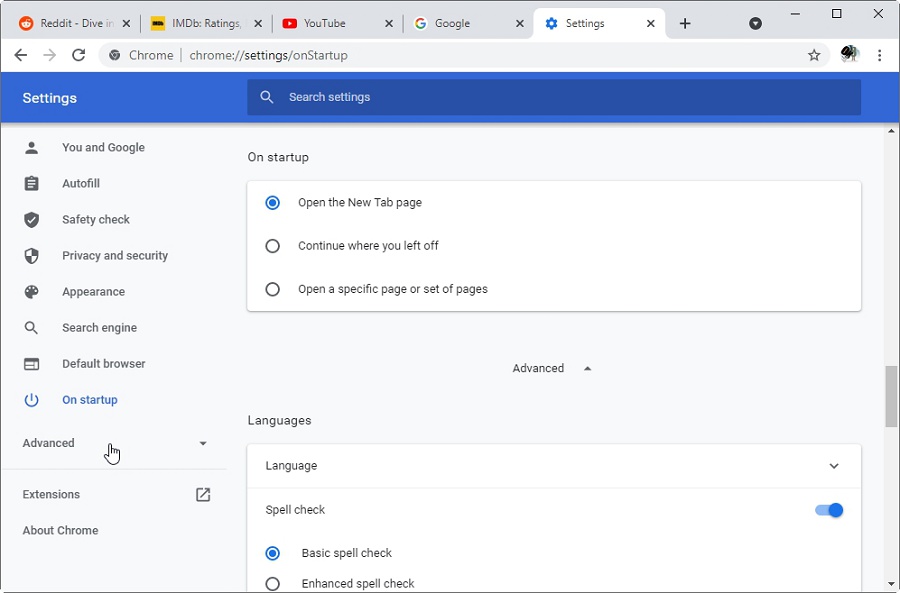
From the options under Advanced, pick the last one, Reset and clean up.
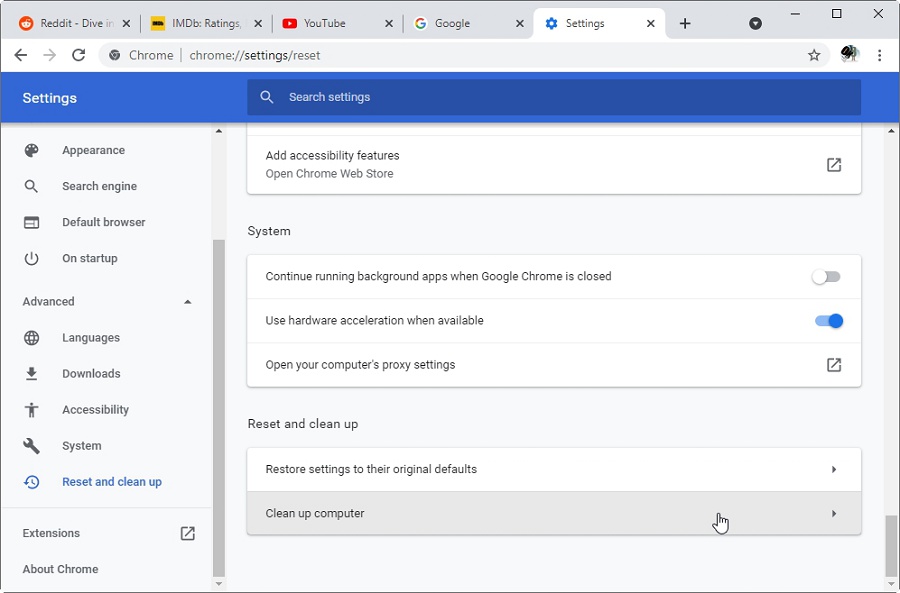
Scroll to the very end of the main page and under Reset and clean up click on Clean up computer.
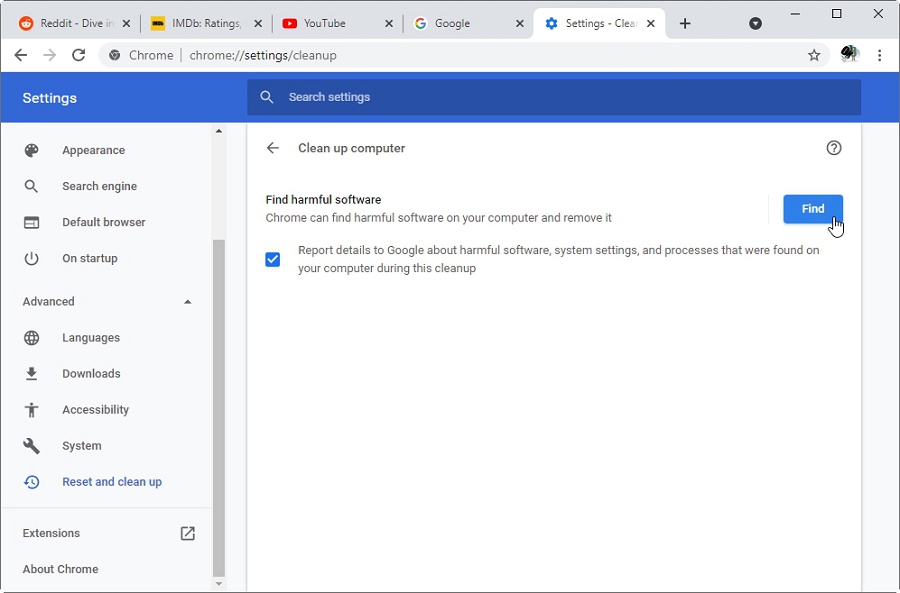
Click on the “Find” button you’ll see here to have Google Chrome scan your computer for harmful software.
Note that Google Chrome will send a report of its findings to Google. If you consider this an intrusion to your privacy, disable the “Report details to Google…” option directly underneath.
If Chrome finds anything it believes you should remove, it will offer the option to do so. Click on the Remove button next to each harmful entry to banish it from your PC.
Method 11: Reset Settings
The more we use a browser, the more “stuff” accumulates in its directories. Those can be data stored from older versions of sites, cookies, stored images, etc. And maybe one of them is the reason Google Chrome stops responding in your Windows 10 installation.
If you didn’t find the culprit with one of the previous methods, maybe it’s time to try resetting Chrome to its original state, as if you’d just installed it.
To reset Google Chrome, click on its menu icon and, as before, choose Settings.

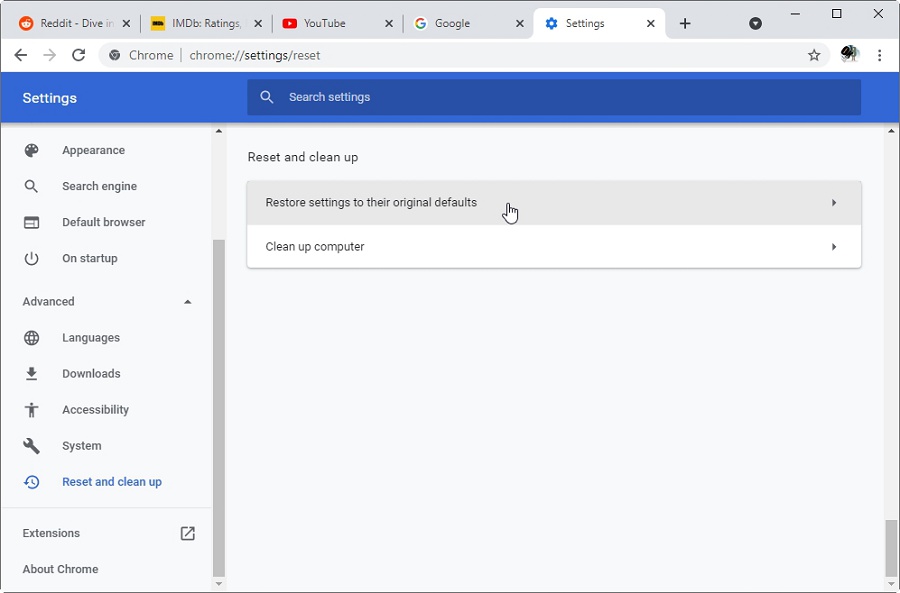
The path you have to take is similar to our last method: expand Advanced from the menu on the left and visit Reset and clean up.

Click on the first of the two options, Restore settings to their original defaults.
Chrome will warn you about the outcome of your choice. If you’re OK with nuking all settings, shortcuts, cookies, temporary site data, and disabling all installed extensions, click on Reset settings to proceed.

Method 12: Clean Reinstall
Does Chrome eventually become unresponsive in Windows 10 no matter what you’ve tried up to now? Maybe you should try the definitive solution for “fixing” any piece of software: removing and reinstalling it. It should at least guarantee all your browser’s files are “fresh”.
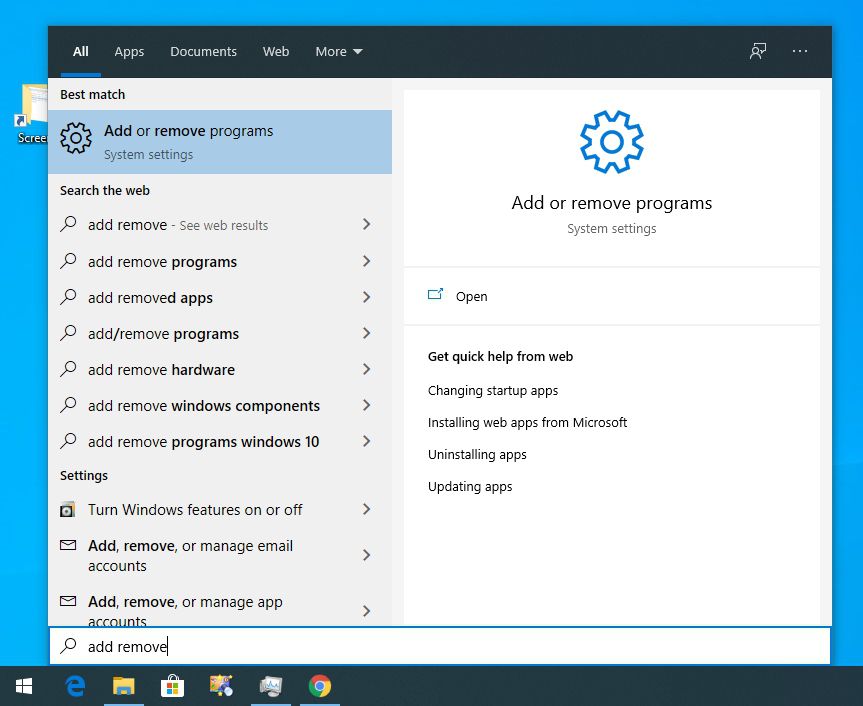
To uninstall Google Chrome, press Windows Key + S to access Windows 10’s search function, and start typing “Add or remove programs”. Allow us to offer a hint: typing a simple “add remove” is an even quicker way to locate the correct entry. When you find it, run it.
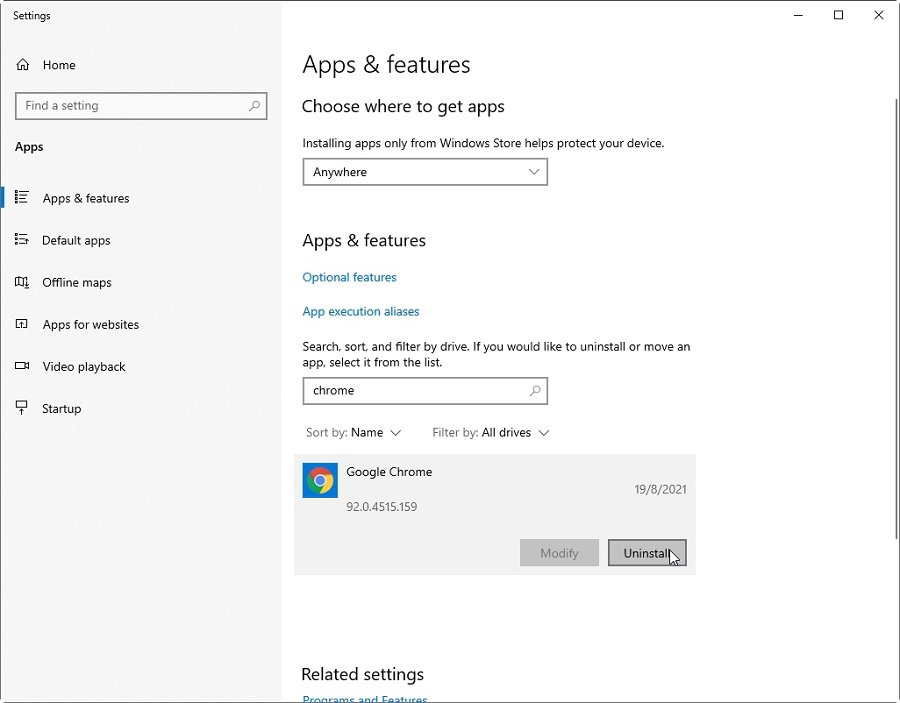
Windows 10’s Settings window should appear, showing its Apps & features page. Click in the search field over the list of apps and type “chrome” (without quotation marks) to locate Google Chrome.

Click on the Google Chrome entry to select it, and then on Uninstall to do precisely that. Follow the steps of the uninstall wizard that will appear to remove Google Chrome from your PC.
Finally, re-download and reinstall Chrome like you did the first time you used it.
Method 13: Check Your Windows Installation
If you’ve reached this point, you’re pretty sure by now it isn’t Chrome to blame for becoming unresponsive in Windows 10. Instead, it’s something related to the OS itself. Unfortunately, with complex pieces of software like an OS, there’s an endless number of potential problems. However, some simple solutions can deal with many of them.
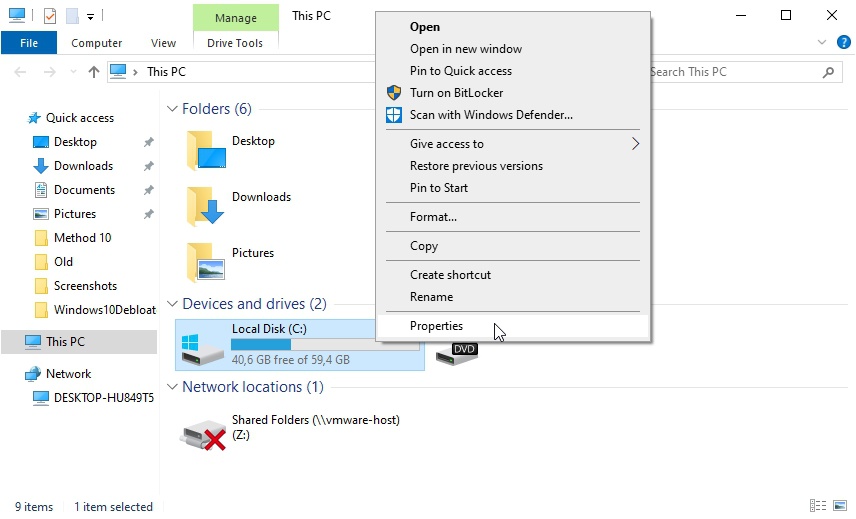
Start by checking the filesystem and storage device where Windows 10 and Chrome are installed. Run your favorite file manager – or Windows’ own File Explorer. Right-click on the storage device in question and choose Properties from the menu.
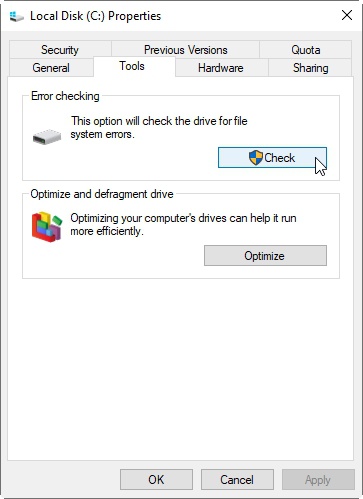
Move to the Tools tab and click on the Check button. Follow any on-screen prompts to check your storage device for errors and fix them.
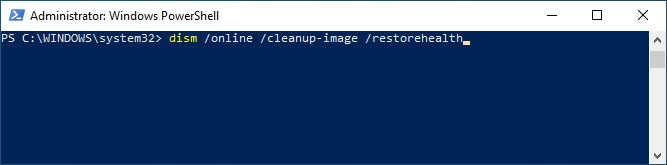
Next, check Windows 10’s own essential files. Press Windows Key + S and locate and run PowerShell with elevated rights (as an administrator). There, type the following:
dism /online /cleanup-image /restorehealth
Hit Enter to run the command. The dism tool will compare Windows 10’s installed files with those in an online image file and “pull” and restore the ones that differ. This way, you’ll “reset Windows 10’s files” to the state of their latest versions made available by Microsoft.
Before leaving PowerShell, complete the triad of fixes with an extra scan using sfc. You only have to type the following in a new line in PowerShell, followed by Enter.
sfc /scannow

After the scan completes, your Windows 10 installation should be as refreshed as possible without having to reinstall everything from scratch. Hopefully, that should also fix the problems you’re having with Google Chrome.
Note that since those tweaks affect the OS itself, it’s suggested you** restart your computer** after them for new changes to take effect.
Method 14: Revert Software Changes
It’s even rarer, but not impossible, for a third-party app to conflict with Chrome. Thus, it’s worth a try removing it to see if it’s the source of your problems with Chrome.
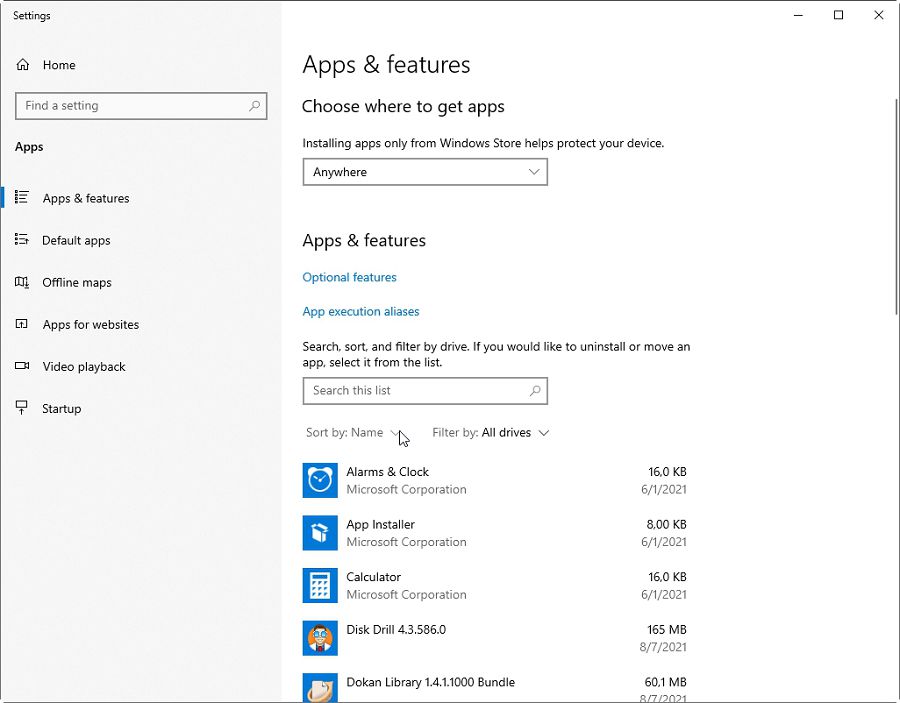
To find and remove the last piece of software you’ve installed, press Windows Key + S and use Windows 10’s search function to find “Add or remove programs” (without the quotation marks). Select the appropriate entry.

You’ll see a list of all installed software under the second Apps & features (yes, Microsoft used the exact phrase as heading and subtitle for this settings page). Notice the lighter-grey “Sort by: Name” and “Filter by: All drives” above the list. Those work as drop-down menus you can use to filter and rearrange the list. So, click on “Name”.
Choose Install date from the drop-down menu to sort all installed software according to, as you probably guessed, its installation date.
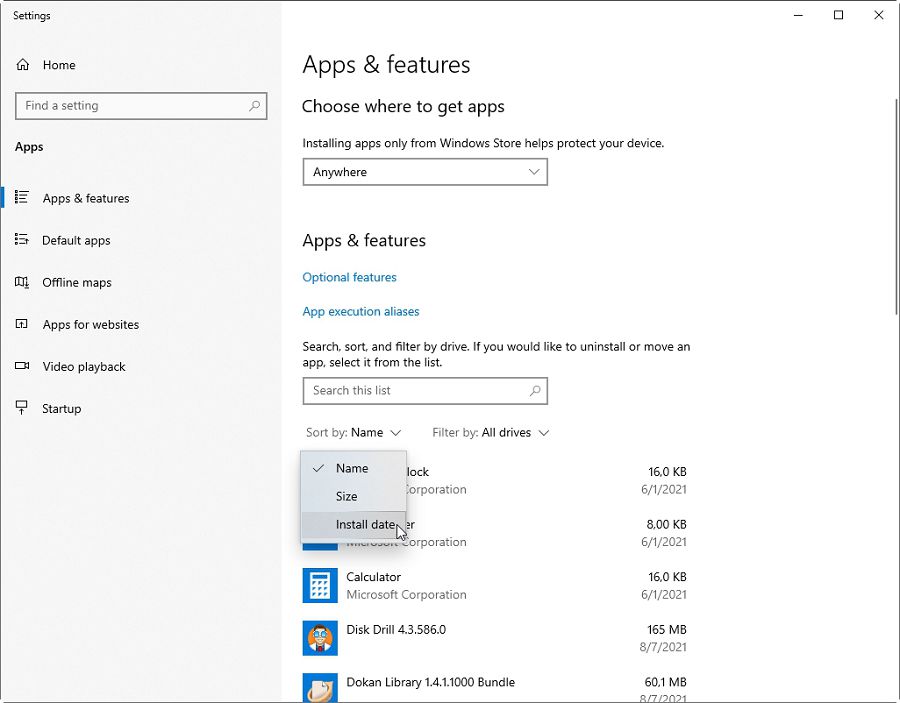
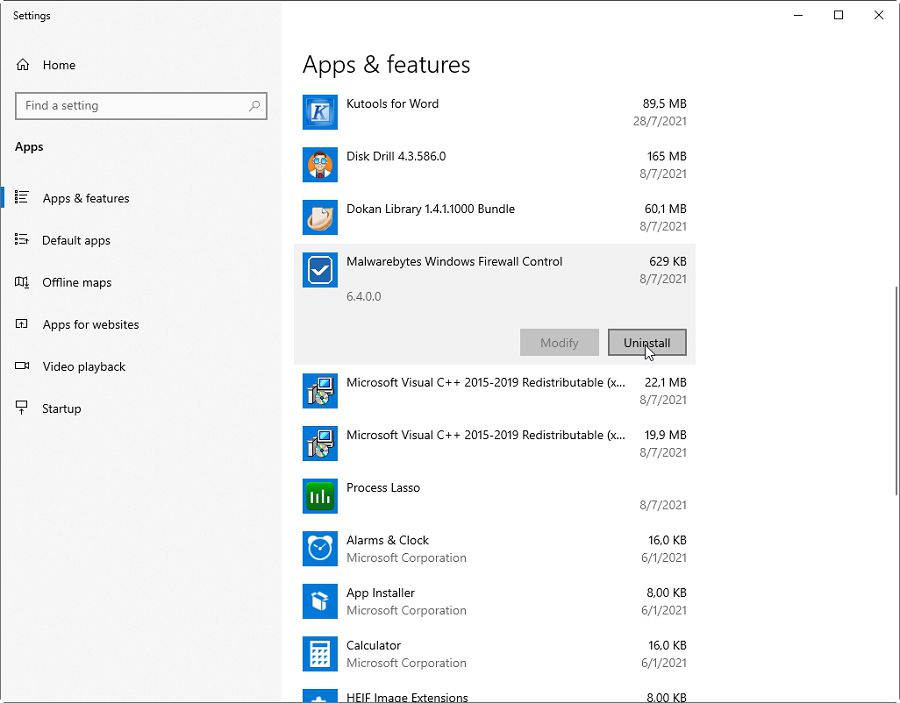
The software you’ve installed last will appear on top, with the oldest at the bottom of the list. So, if your problems with Chrome are relatively recent, uninstalling the first two or three entries should do.
Method 15: Change Affinity
If it’s your whole PC that becomes unresponsive, not only Chrome, and it’s not because of Google’s browser, maybe it’s time for an upgrade. Unfortunately, software’s demands for hardware are continuously rising.
That’s why sometimes it’s worth taking control of how your computer allocates its resources. Although you can change the priority of a process, with today’s multicore processors, you can also restrict the cores on which an app can run. And you can do that through Windows 10’s built-in Task Manager.
Press CTRL + Shift + Esc on your keyboard to run the Task Manager, or “call” its window if it’s minimized.
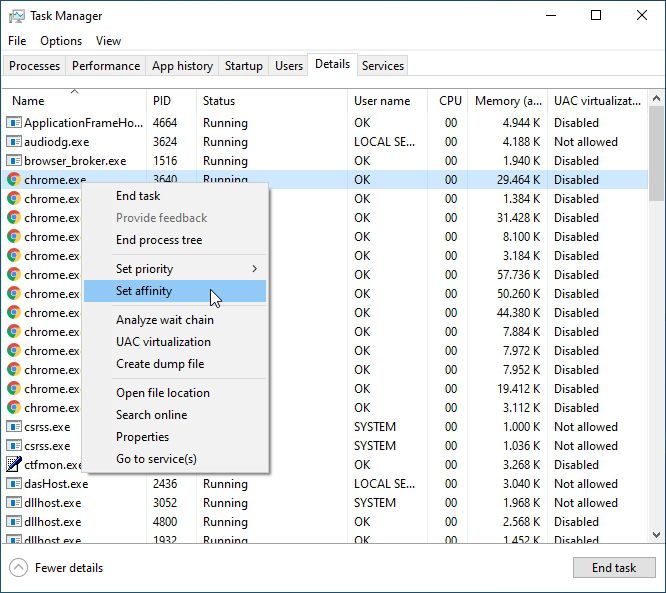
Move to the Details tab, which will show more information about everything running on your PC. Click on the “Name” column’s title to sort the list based on the software’s name. Alternatively, sort the list based on the CPU column to have the apps with the highest CPU usage on top.

Locate the problematic app and right-click on it. Choose Set affinity from the menu that pops up.
Place a checkmark on your CPU’s cores you want to allow the app to use.
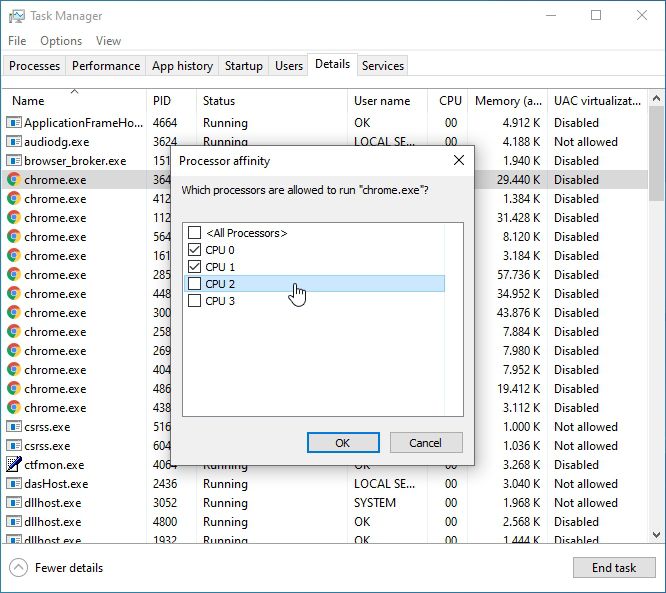
Immediately after this tweak, your whole OS, including Google Chrome, should be much more responsive.
FAQ About Google Chrome Not Responding in Windows 10/11
Question: I’m only using a handful of extensions. Surely they can’t be the source of Chrome crawling.
Answer: It’s not the number of extensions that can be a problem, but how they “behave”. You might be using only one extension, but if it were a resource-demanding piece of malware, it would be enough.
Question: Isn’t there an easier way to find problematic extensions?
Answer: Google usually disables remotely and stops offering in Chrome’s store any extensions it deems harmful. The problem’s that an extension might not be “harmful” per se, but only misbehaving on your PC. Unfortunately, there’s no automated solution for solving such problems, so you’ll have to go through the process of elimination we’ve described above.
Question: How could disabling JavaScript or other site elements help when Chrome starts crawling in my Windows 10 installation?
Answer: JavaScript is a parsed language that runs in the browser. That’s techie-lingo for “it’s heavy”. The very fact that the people programming our browsers strive to make JavaScript run faster in them should speak volumes about its toll. Combined with the number of connections a site makes to external resources (fonts, libraries, etc.) and the amount of data the browser needs to download, they’re what make modern sites slow.
Question: I think I’ll just reset my browser. Will that erase everything? Can’t I keep anything?
Answer: Yes, resetting your browser deletes everything apart from its base installation. You’ll be starting from scratch as if you’ve never used this browser before on your computer.
However, you’ll be able to get back most of your data if:
- You had logged in to Google’s services with that browser
- You used it with your Google Account
- You kept its syncing features on. After resetting Chrome, log in again to your Google Account. The browser will then “pull” all your synced data, like your bookmarks and installed extensions, from “the cloud” (AKA: Google’s servers).
Conclusion
We sincerely hope this little guide of ours helped you solved the problem you had with your favorite browser. After searching for the most prevalent issues, we collected the range of versatile methods you saw to deal with them.
If none of the above solutions worked, we’re sorry to say that you’re probably dealing with a much rarer problem. However, not all is lost.
Use a different browser temporarily to check out Chrome’s Help Center. If you don’t find a fix for your particular problem there, it won’t hurt asking Chrome’s Community about it.