Most of us already know what ZIP files are. If you aren’t aware, they are basically compressed files that take up less storage space on your computer. Typically, users rely on file archiving software like WinZip, WinRAR, or 7-Zip to create and manage ZIP files. However, this is not mandatory since Microsoft provides native support for ZIP files on Windows devices. That’s right, you can uninstall any file archivers that are stored on your computer and continue to compress or decompress files.
People who are fairly new to the Windows platform may not be sure how to take advantage of this valuable addition. Regardless, you may be excited to know that there is more than just one way to compress files natively on Windows 10, and that’s exactly what we’ll be discussing here. So, without further ado, let’s take a look at how to Zip or Unzip files on Windows 10 without WinZip.
Part 1. How to ZIP Files without WinZip
To be more specific, there are three different methods that you can utilize to ZIP files without WinZIP on Windows 10. You can either use the Windows context menu options or the File Explorer to create a compressed ZIP file. It all comes down to your personal preference.
1.1. ZIP Files without WinZip By Sending to Compressed Folder
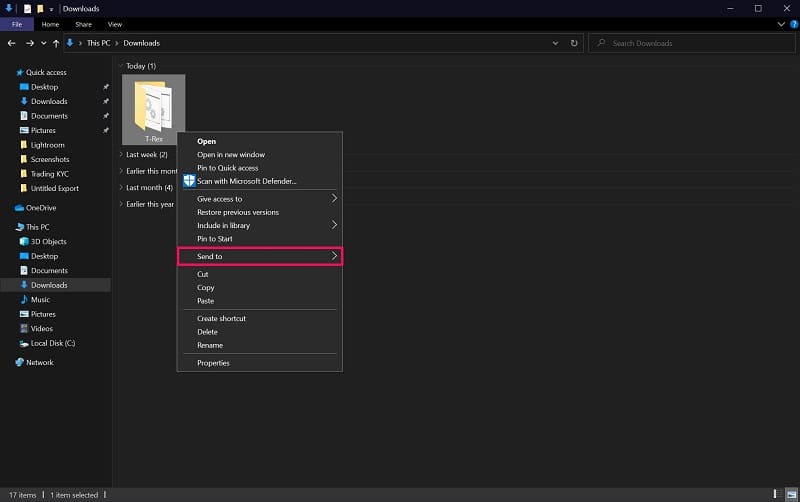
The first method to ZIP files without WinZIP is the one most people would prefer. Sending to a compressed folder is an option that’s available in the Windows context menu, and it’s easily accessible with a single click. Here’s what you need to do:
Step 1. First of all, you need to select the file you want to compress or make a ZIP file. Simply right-click on a file or folder to bring up the context menu and hover the cursor over the ‘Send to’ option.
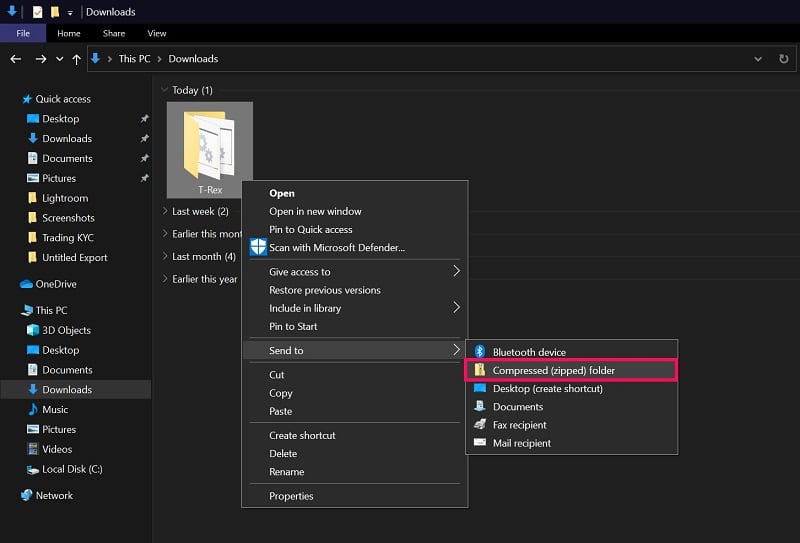
Step 2. Next, click on the ‘Compressed (zipped) folder’ option from the expanded menu.
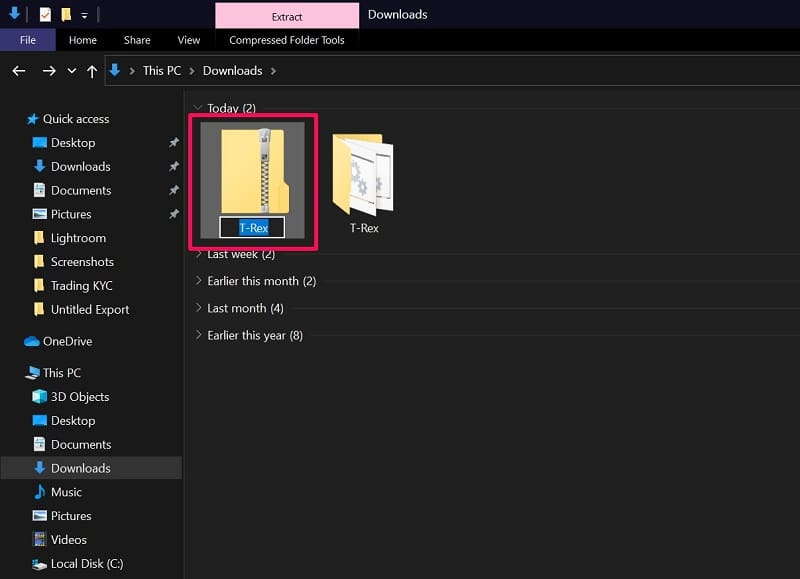
Step 3. Now, a ZIP folder will show up in the same location as the original uncompressed file. You’ll have the option to rename it as you desire.
That’s all you need to do. It’s that easy to ZIP files natively from the context menu on Windows 10. Sometimes, you may get an error saying that Windows cannot create a compressed folder in the location you’re in. In such cases, you’ll have the option to place it on your desktop instead.
1.2. ZIP Files without WinZip from File Explorer
In the second method, we’ll be making use of an option that’s available in the File Explorer’s menu bar. It might not be the most convenient way to ZIP files without WinZIP on Windows, but it’s definitely a decent alternative. Just follow these steps:
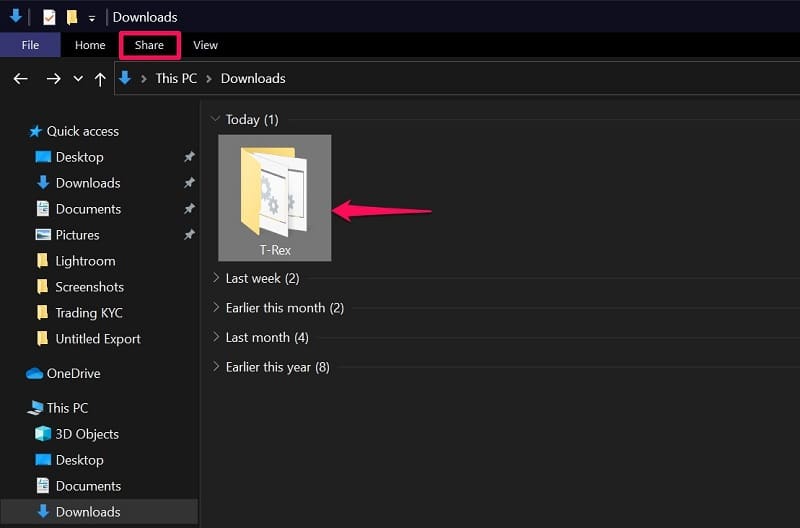
Step 1. Open the File Explorer on Windows and select the file or folder that you wish to compress. Once selected, click on the ‘Share’ option from the menu bar to access more options.
Step 2. Now, you’ll find the ‘Zip’ option right below. Click on it to create the ZIP file in the same location as the original file. Just like the previous method, you’ll be able to rename it immediately.
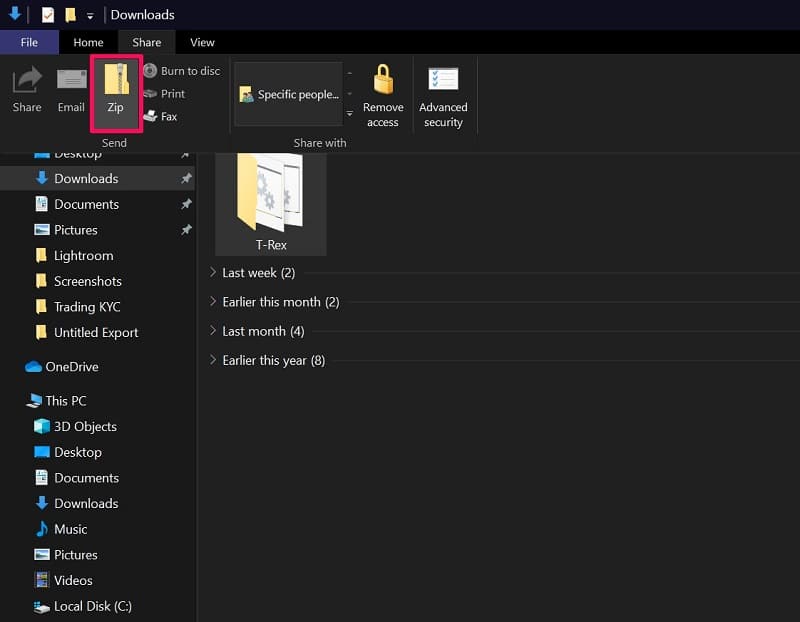
There you have your compressed ZIP folder. To view the contents of the ZIP file, you can simply click on it.
1.3. ZIP Files without WinZip By Dragging Files Into the Existing ZIP File
This particular technique involves creating an empty Zip folder first and then adding contents to it with a simple drag and drop action. It can be useful if you’re looking to add a bunch of different files stored in multiple locations to a single zipped folder.
Step 1. Right-click anywhere on your desktop or anywhere within File Explorer to access the context menu. Now, hover the cursor over ‘New’ and click on ‘Compressed (zipped) folder.’
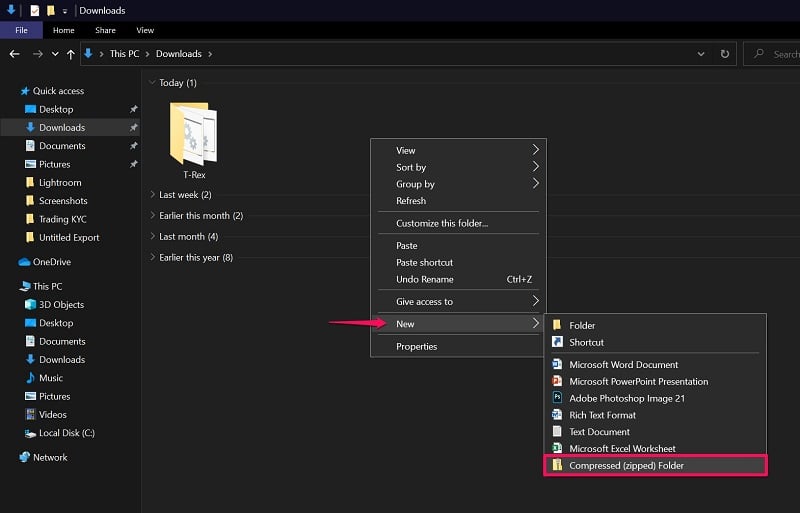
Step 2. This will create a new ZIP file/folder in the same location you accessed the context menu. Now, simply drag and drop the files into the ZIP folder as indicated in the screenshot below.
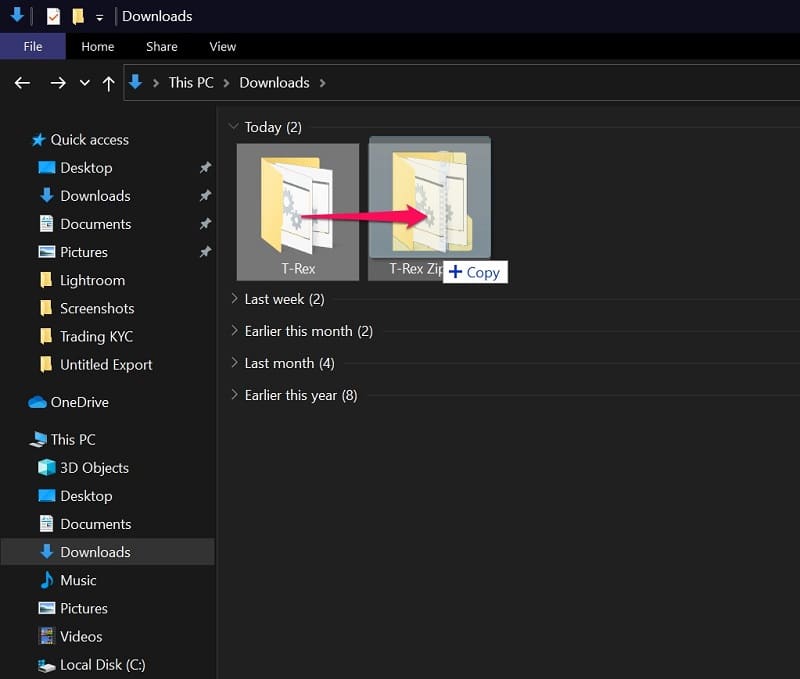
You won’t get any prompts while you drag and drop files into a compressed ZIP archive. It’s similar to how you’d normally move any file within Windows. Of course, this isn’t the fastest method to ZIP files in Windows without WinZip, but it does serve a specific use case.
Part 2. How to Unzip Files without WinZip By Using Extract All
Now that you know how to ZIP files without WinZIP natively, let’s move on to the steps you need to follow to unzip files without WinZip on Windows devices. There’s only one way to extract or unzip files on Windows, and that’s by using the context menu. It’s pretty straightforward, so let’s make it quick:
Step 1. Select the compressed ZIP file and right-click on it to bring up the context menu. Here, you’ll find the option ‘Extract All.’ Just click on it.
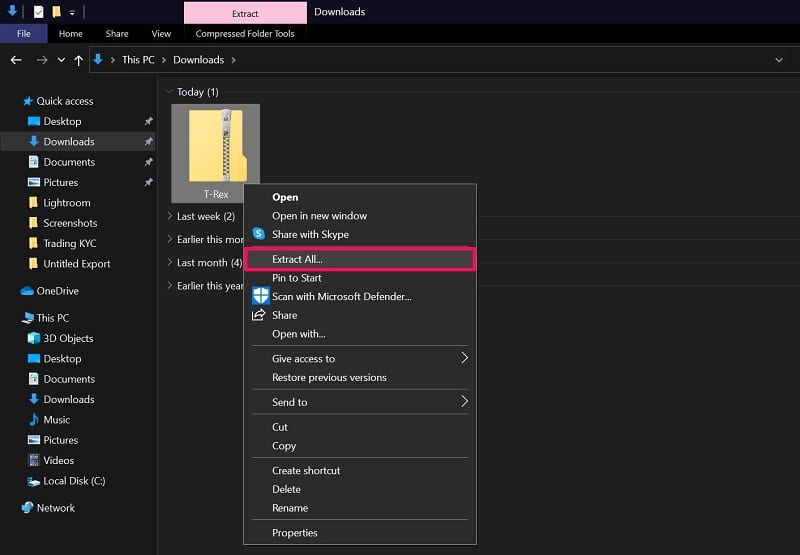
Step 2. This will launch a new window on your screen where you will be able to choose a destination folder for the extracted files. By default, it’s set to the same location as the original ZIP file. Select your desired directory and click on ‘Extract.’
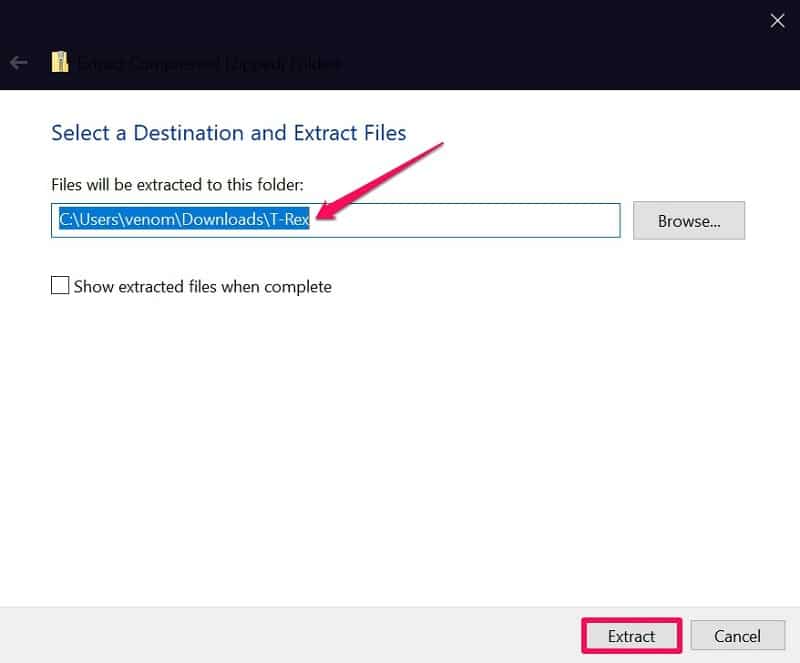
There you go. You’ve successfully extracted all the contents of the ZIP file. As a bonus tip, if you want to check what’s in the ZIP file first before extracting, all you need to do is just click on it. However, you’ll only have a limited set of options for the contents stored in it.
Bottomline
Although Windows 10 was our primary focus with this article, we’re pleased to inform you that you can use all these methods to zip and unzip files without WinZip on Windows 7 and Windows 8 too. Having said that, it’s important to keep in mind that Windows can only recognize ZIP files and not RAR files. To extract or create RAR archives, you have no other choice but to use WinRAR or other compatible file archivers since RAR is a proprietary file format that’s not natively supported by Microsoft at the moment. If you have RAR files, you can use an online solution like CloudConvert to convert them to ZIP and then natively extract them on Windows.
We hope you were able to learn how to extract zip and unzip files without WinZip on your Windows computer. If you already have a file archiver installed, are you planning to remove it now that you know there’s a native solution? Which of the methods that we discussed here do you prefer to create ZIP files? If you know any additional methods that we failed to mention, feel free to share them in the comments section down below. Also, don’t forget to leave your valuable feedback.