PowerPoint is a great presentation application with which users can set up slideshows that incorporate a wide variety of multimedia elements. As PowerPoint documents are presentations, which present information in slideshow form, users often share them via email and cloud storage. Some users who share MS PowerPoint documents apply editing restrictions so that recipients can’t modify them. To modify read-only PowerPoint slideshows, recipients need to remove the editing restrictions from them.
There are a few ways users can apply read-only editing restrictions to PowerPoint documents. Some users apply outright restricted editing with permission passwords. In that case, a password protects a PowerPoint presentation from editing.
Other users might just discourage editing by marking PowerPoint presentations as final. Users mark PowerPoint documents primarily to tell recipients not to change them. However, a marked document is not an editing block.
Beyond PowerPoint’s editing restriction settings, some users might also prevent recipients from changing slideshow documents by adjusting file attribute settings. Selecting a “Read-only” File Explorer option will make a document viewable only. However, that option is not entirely an outright editing block.
As there are a few different ways users can apply read-only editing restrictions to PowerPoint documents, there are a few ways to remove them. This is how to make a read-only PowerPoint file editable for different editing restriction cases.
Case 1. The PowerPoint Document is Read-Only by Marked as Final
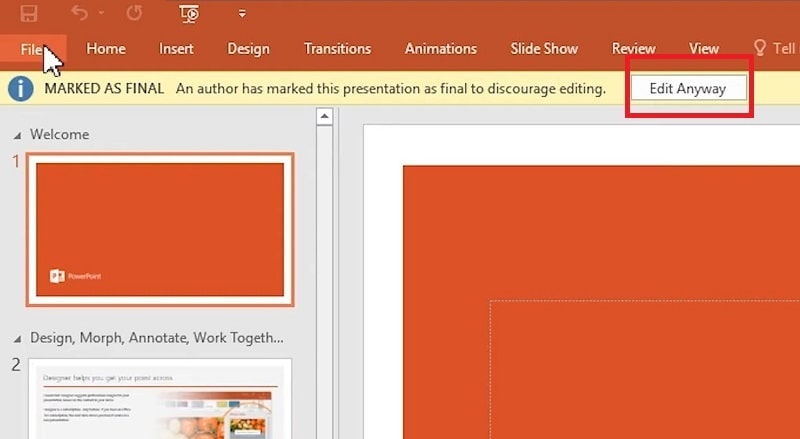
When a user has marked a PowerPoint document as final, you’ll see a message in a yellow bar that says, “An author has marked this presentation as final to discourage editing.” The good news is that it’s not truly an editing restriction at all! All you need to do to modify the PowerPoint presentation is click the “Edit Anyway” button on the message’s yellow bar. Then go ahead and edit the slideshow to your heart’s content – but remember that the original author discouraged it.
Nevertheless, some users might still prefer to disable the marked as final message. You can do that by changing the presentation protection settings. This is how to change from read-only in PowerPoint by modifying those settings.
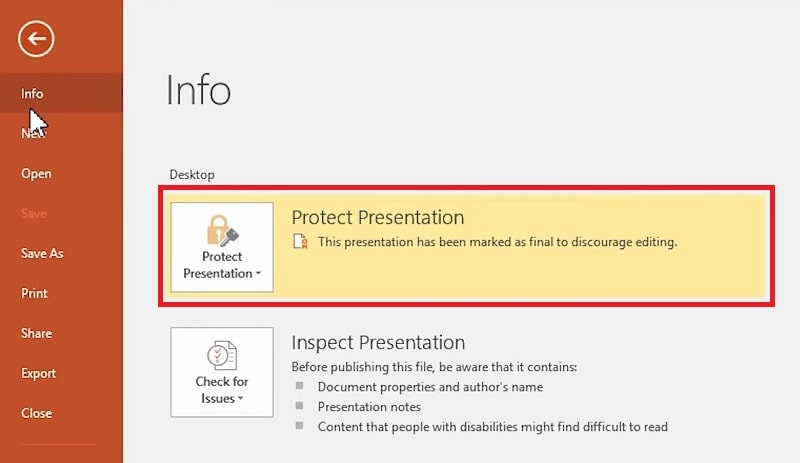
Step 1: First, click PowerPoint’s File tab.
Step 2: Next, select “Info” on that tab.
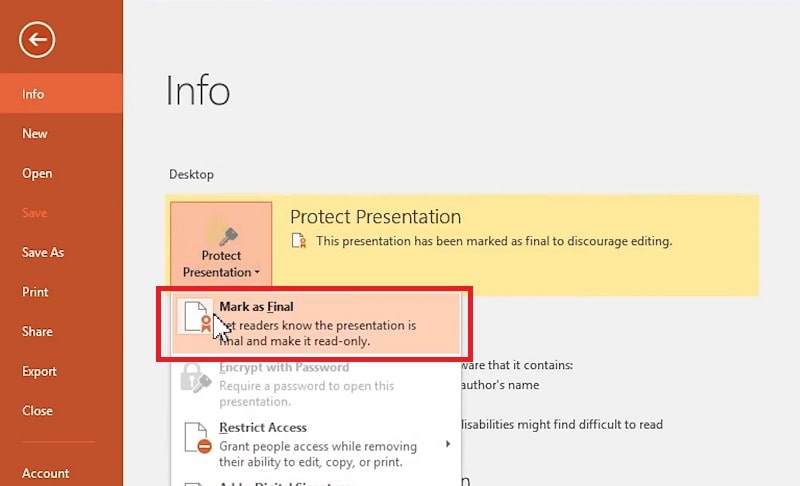
Step 3: Click the “Protect Presentation” button.
Step 4: Next, click the “Mark as Final” option to deselect it.
Step 5: Select “Save” on the left of the File tab.
Case 2. The PowerPoint Document is Read-Only by Restricted Editing
However, in this second read-only case, a Password box will pop up when you open a slideshow file in PowerPoint. Then you’ll need to enter the password to edit the document or click the “Read Only” option to view it. Users who know the password can enter it and remove the read-only protection via PowerPoint’s settings. However, if you don’t know the password, you can still remove that read-only restriction with some third-party software and web apps. This is how to remove read-only in PowerPoint for password-locked files.
2.1. Remove Read Only from PowerPoint with Restricted Password
Step 1: If you know the editing password, enter it within the Password text box.
Step 2: Click the “OK” button on the Password window.
Step 3: Select PowerPoint’s File tab.
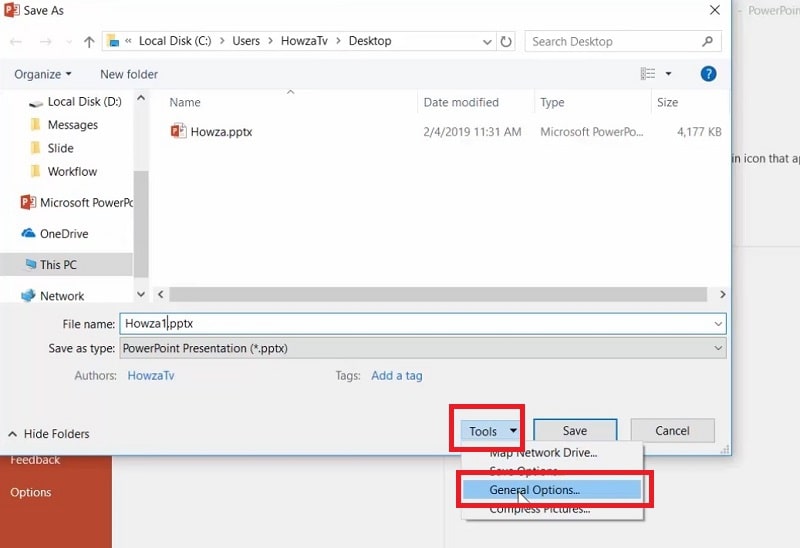
Step 4: Click “Save As” on the left side of PowerPoint’s window.
Step 5: In the Save As window, click the “Tools” button.
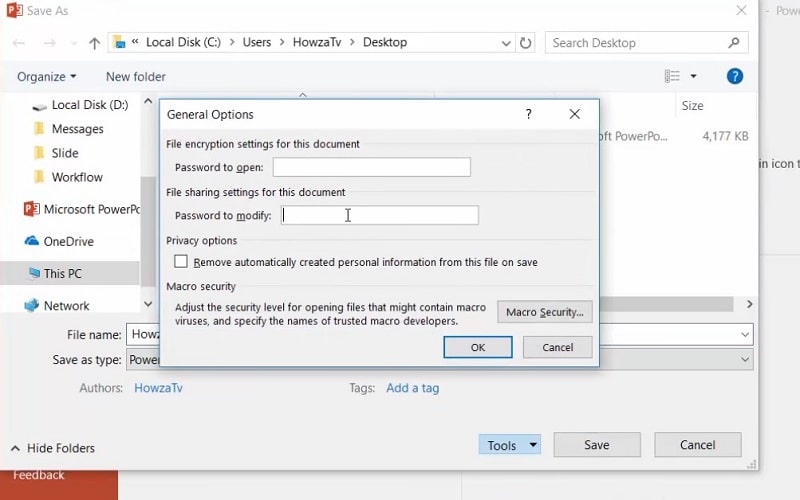
Step 6: Next, select “General options” on the drop-down menu to open the window in the snapshot directly below.
Step 7: Erase the password in the Password to modify text box.
Step 8: Click the “OK” button.
Step 9: Then press the “Save” button.
2.2. Remove Read Only from PowerPoint without Restricted Password
If you don’t know the password for a read-only PowerPoint file, check out Passper for PowerPoint. Passper for PowerPoint is software that enables users to remove password restrictions for editing slideshow files. You can also recover forgotten passwords for locked presentation files with that software. So, that’s an ideal utility for users who have forgotten their read-only passwords for PowerPoint files.
Read More: Best PowerPoint Password Recovery Tools
You can remove read-only from PowerPoint files with that software as follows.
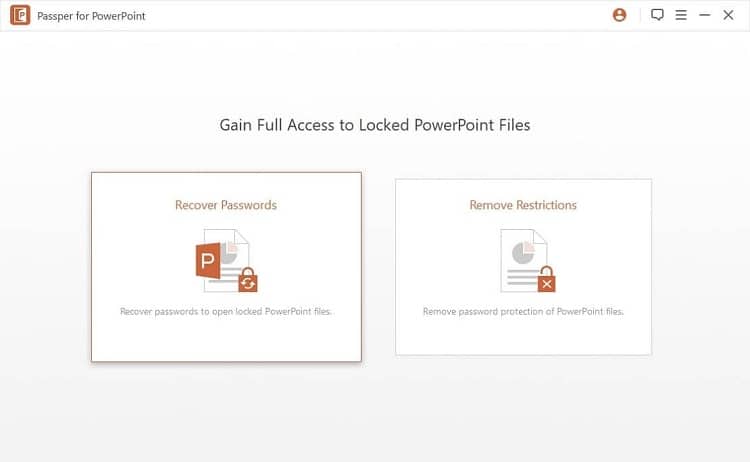
Step 1: First, open the Passper for PowerPoint software when you’ve installed it.
Step 2: Select the “Remove Restrictions” option.
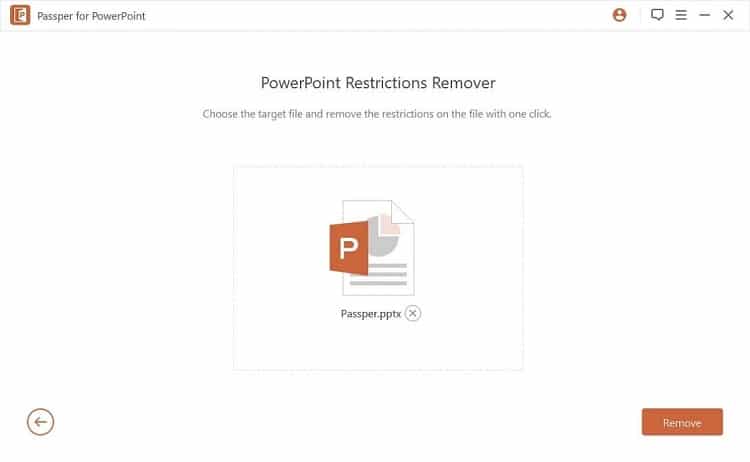
Step 3: Then, you’ll need to select a PowerPoint file to remove restrictions from.
Step 4: Click the “Remove” button.
Step 5: Thereafter, click “Back to Home” when the software says, “Restrictions on the PowerPoint file have been removed.”
2.3. Remove PowerPoint Permissions Password with Web Tool
There are also a few web tools that can help users remove permission passwords from PowerPoint PPT files. LostMyPass is one of those web tools to remove permission passwords for numerous Office application files. Although that utility charges for most password recovery, it offers free password permission removal.
However, data security is one potential pitfall of utilizing online tools. Uploading your file to LostMyPass could feasibly make it visible to other users. The LostMyPass privacy policy page states, “remember that no method of transmission over the internet, or method of electronic storage is 100% secure and reliable, so we cannot guarantee its absolute security.” Furthermore, LostMyPass doesn’t explicitly promise that it doesn’t retain or backup uploaded files. Nevertheless, LostMyPass is a reputable document password recovery and permission removal service.
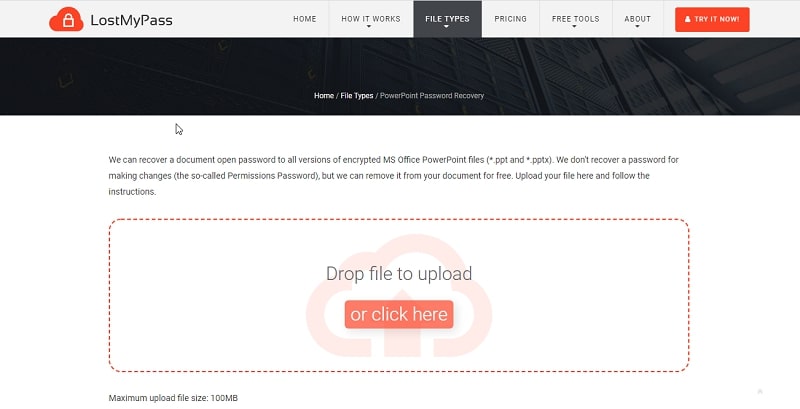
To utilize that tool, open its PowerPoint Password Recovery page in a web browser. Press the “or click here” button to select a PPT slideshow to remove the password. Thereafter, the utility will weave its magic. Then you can click the download link to save the unprotected document.
Read More: How to Remove Password from PowerPoint Document
Case 3. The PowerPoint File has a Selected Read-Only Attribute Setting
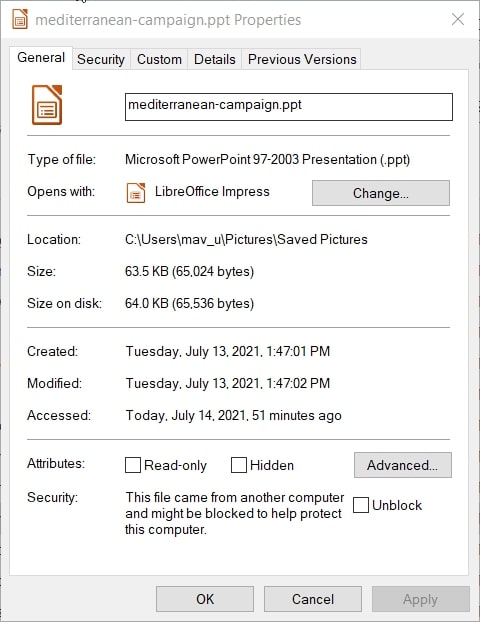
If you see a “Read-Only mode” message pop up, you’ll need to change the file’s properties. In that case, a user has most likely applied a read-only mode to the PowerPoint file via its attribute settings. However, you can undo such editing protection via the file’s properties window. To do that, follow the steps directly below.
Step 1: Click the File Explorer folder icon on the Windows 10 taskbar.
Step 2: Open the folder that includes the PowerPoint file you need to make editable.
Step 3: Next, right-click the PowerPoint slideshow file and select “Properties,” which will open the window in the snapshot directly below.
Step 4: Uncheck the “Read-only” checkbox to deselect it.
Step 5: Click the “Apply” button.
Step 6: Then select the “OK” option to exit the properties window.
Case 4: A PowerPoint Presentation is Saved With a Read-Only PPSX Format
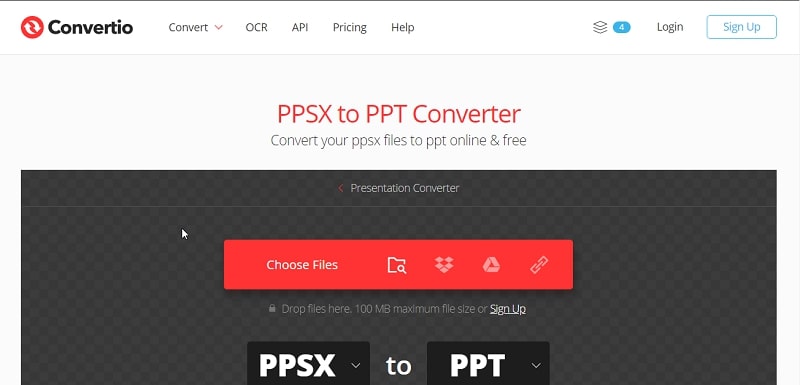
Some users might also save PowerPoint files in the PPSX format. A PPSX file is a read-only format for PowerPoint files. Clicking a PPSX file will only open the slideshow presentation in viewing mode. Thus, you can’t modify a PPSX slideshow in any way with PowerPoint’s editing mode. However, you can convert a read-only PPSX file into an editable PPT or PPTX format with the Convertio conversion tool as follows.
Step 1: Open the PPSX to PPT Converter page on the Convertio website.
Step 2: Click “Choose Files” on that page.
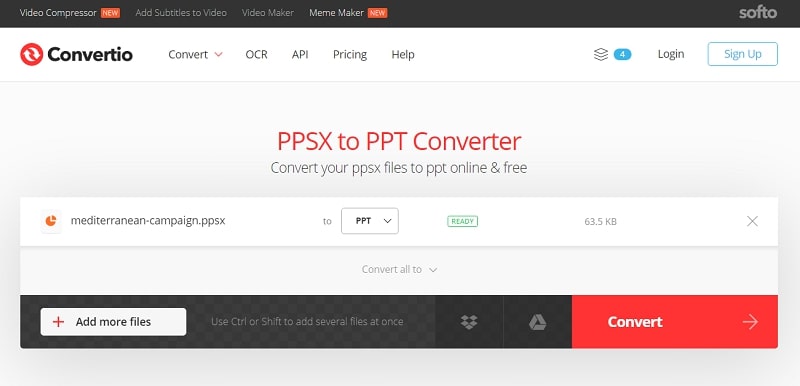
Step 3: Select a PPSX file to convert, and click the “Open” option.
Step 4: Then click “Convert” to initiate the conversion process.
Step 5: Finally, select the “Download” option to save the newly converted PPT file.
Conclusion
So, don’t think for one moment there’s no way you can’t edit any protected PowerPoint file you receive with editing restrictions applied to it. In most cases, you can bypass such restrictions with the relatively straightforward workarounds above. Password permission blocks for editing PowerPoint files are the trickiest to bypass. However, numerous third-party software packages and web apps are available for unprotecting PowerPoint presentations when the other methods aren’t enough.
