Regardless of how you lost the photos — accidental deletion, formatting, corruption, or something else — this guide will teach you how to recover the permanently deleted photos from your computer.

The simple, step-by-step instructions allow even the least tech-literates to follow the process and recover the photos effortlessly. Read on to find multiple ways to recover pictures from a computer.
Method 1. Best Way to Recover Permanently Deleted Photos from Computer — Tenorshare 4DDiG
As mentioned, there are several ways to recover permanently deleted photos from a computer. However, none of them come even closer to Tenorshare 4DDiG regarding results and efficiency.
Tenorshare 4DDiG is an all-in-one solution to perform data recovery, regardless of why they got destroyed. Yes, not only accidental deletion, but 4DDiG can also recover files lost due to formatting, lost partition, corruption, crashed system, virus attack, or any other scenario. Regardless of the file format of the photo, i.e., JPG/JPEG, TIFF/TIF, PNG, BMP, GIF, PSD, WEBP, CRW, RGB, CR2, NEF, ORF, SR2, MRW, DCR, WMF, RAW, SWF, SVG, RAF, DNG, ERF, ICO, DSC, or some other — if there is a photo to be recovered, 4DDiG is the best tool for the job.
Here’s how to recover pictures from a computer using Tenorshare 4DDiG:
Step 1. Visit the official page of Tenorshare 4DDiG and Download the 4DDiG application. 4DDiG has a free version that allows you to scan and preview the photos. However, to recover them — a subscription is a must.
Install the software and launch it.
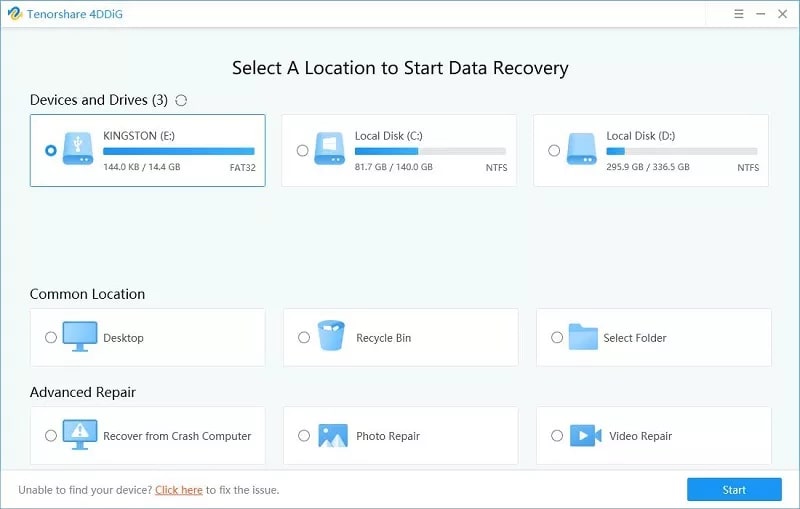
Step 2. On the main interface, you will see options: Devices and Drives, Common Locations, and more.
Choose the Drive from where the photos were present before deletion.
Select Start to proceed.
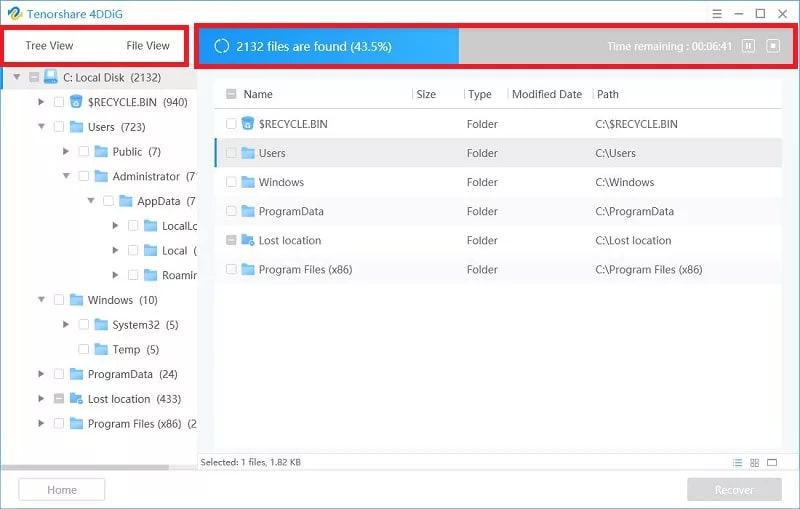
Step 3. Scan the selected drive.
As soon as you click on Start, 4DDiG will start the scanning process. You can see the scanning process via the progress bar. As soon as the application starts finding out the deleted files, you can access them via the left pane, listed in a Tree view and File view. You will also find a pause button to interrupt the scanning process, which is useful when you have found the files and do not want to scan further.
In case you do not find the deleted photos after the scanning process, you can choose Deep Scan (the option is present at the bottom of the screen). However, Deep Scan takes a lot of time to scan the drives; thus, it should be your last resource to recover permanently deleted photos from the computer.

Step 4. Recover the files.
Once you find the desired photos, all you have to do is mark the files and click on Recover.
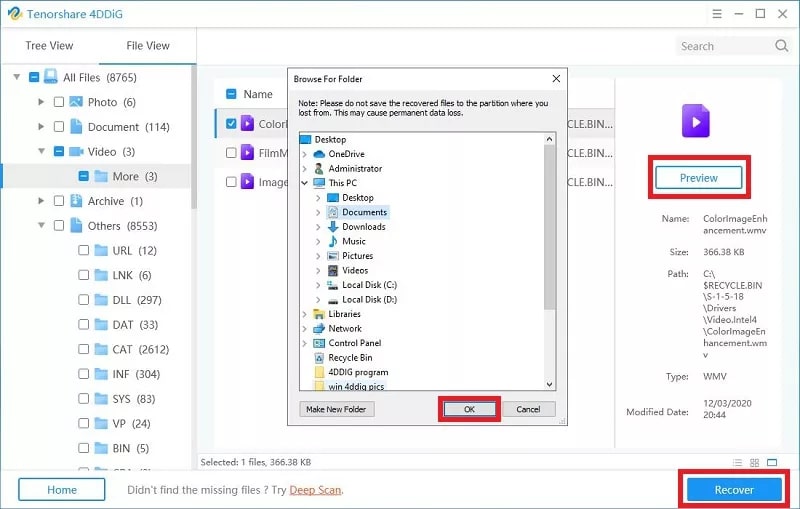
As soon as you click on the Recover button, you will see a pop-up asking you to choose the destination to recover the permanently deleted photos and save them on the computer. Remember not to select the same partition where the files are found (to avoid overwriting of data).
Method 2. How to recover pictures from a computer with ‘Previous Version’
Created by Windows Backup, Previous Versions are copies of files and folders that Windows saves as a part of the restore point function. Of course, you can use the Previous Version feature to restore the files and folders you deleted, including permanently deleted photos.
Here’s how to recover pictures from computer hard drive utilizing the Previous Version:
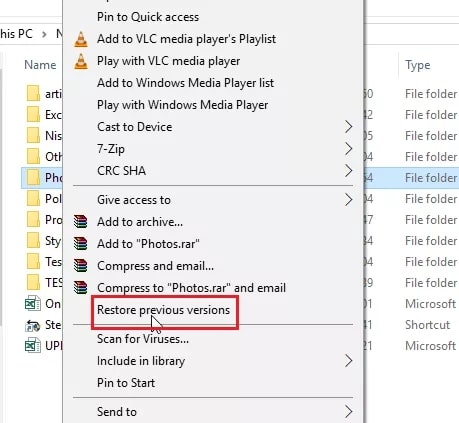
Step 1. Right-click on the folder from where the photos were accidentally deleted.
From the drop-down menu, choose Restore Previous Versions.
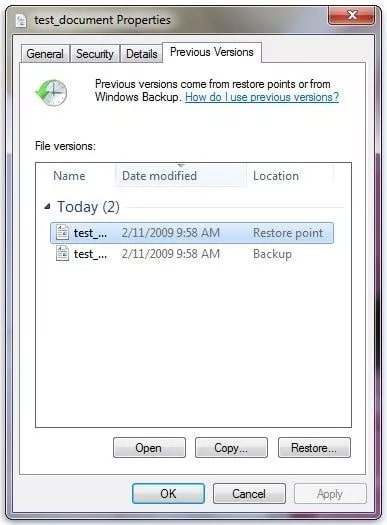
Step 2. From the dialog box, choose the version which contained the photos earlier (using timestamps).
Step 3. Choose Restore. To ensure that you’re restoring the correct version, select Open to see if the desired version contains the photos or not.
Method 3. How to recover permanently deleted photos from computer from File History?
File History is another exceptional restore point accessible on Windows 8 and 10 devices.
Here’s how to recover permanently deleted photos from File History:
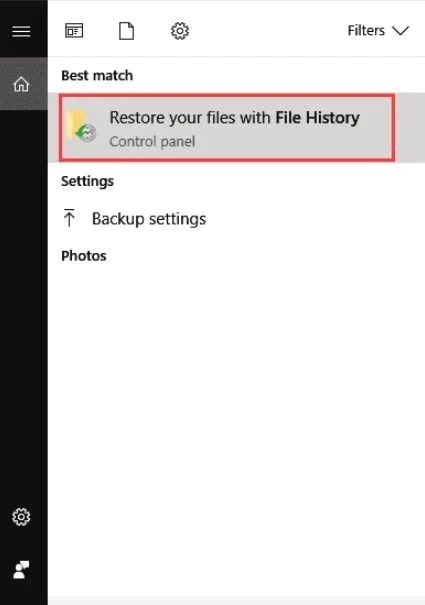
Step 1. From the search box, type in File History and open Restore your files with File History.
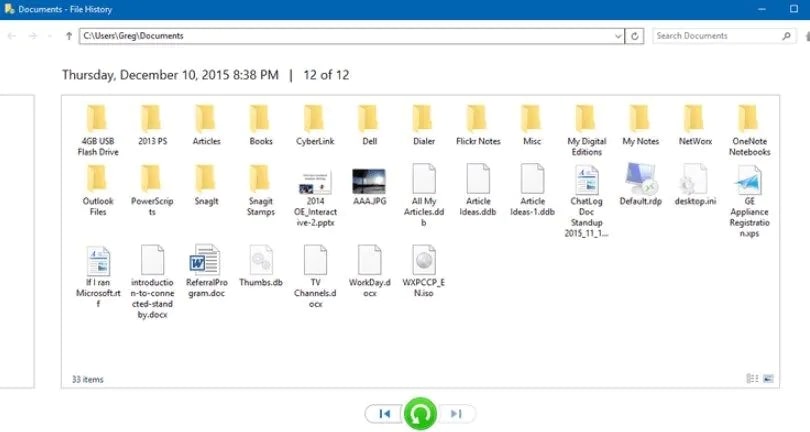
Step 2. Type in the path of the folders where the photos were present before deletion.
Navigate through all the folders and files and select the desired photos.
Click the Green (restore) button to restore the files at the same destination.
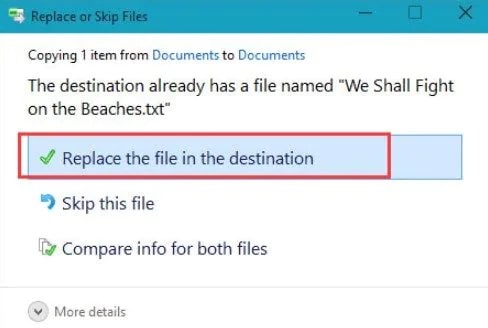
If you see a dialog box asking for permission, choose to Replace the file in the destination option to recover the photos from the computer hard drive successfully.
There you go! All three methods are to recover the permanently deleted photos from the computer.
FAQs
1. How to enable backup on Windows 7?
- Open Control Panel.
- Access System and Security.
- Choose Backup and Restore (Windows 7).
- Opt for Set up backup.
- You will have to assign a folder to create the backups. You can also let Windows choose the backup point on its own.
- Choose the items you want to save as backup and choose Save Settings and run backup.
2. How to turn on File History?
- Open Control Panel.
- Access System and Security.
- Choose File History.
- Select Turn On.
You will also have to assign a drive where the backups will be stored.
3. Can I recover deleted photos from a computer for free?
You can try the second and third methods, i.e., recover deleted photos using file history and previous versions if you are looking to recover deleted photos for free. But in case you did not create a backup folder, you will have to purchase a one-month subscription to recover the files. Of course, the free versions allow you to scan for free (to confirm whether the software is capable of recovering the data or not).
Conclusion
Of course, the first method — Tenorshare 4DDiG — is the best answer if you are looking for how to recover deleted photos from computer hard drive. Action speaks! Do not forget that 4DDiG lets you scan and preview the pictures beforehand for free. Meaning there are no deceiving tactics employed by the vendor.
So if you are looking to recover the files quickly and efficiently — look no further. Simply download Tenorshare 4DDiG.
You can try the other two methods mentioned, but users do not opt for backups most of the time. And if you are one of those users, then 4DDiG is the only way to get your hands on the deleted photos.