Microsoft Office apps come with built-in security and privacy features to protect confidential documents and files from unauthorized access. Password protecting your documents with encryption ensures they can’t be accessed by anyone without entering the password.
The steps to password protect a document is standard across all Office apps, including Word. This article shows you how to encrypt a Word document with a password and how to remove the password if required.
Steps to Password Protect A Word Document
Password protecting a Word document does not require using a third-party tool, as Microsoft offers an integrated encryption feature. You can lock your Word document from the Info tab of the Word app. Here’s how to do it.
Step 1. Launch the Word app and open the document you would like to encrypt.
Step 2. Click on the File tab and then open the Info tab in the left pane. This will show all the information regarding your documents, including the Protect Document feature.
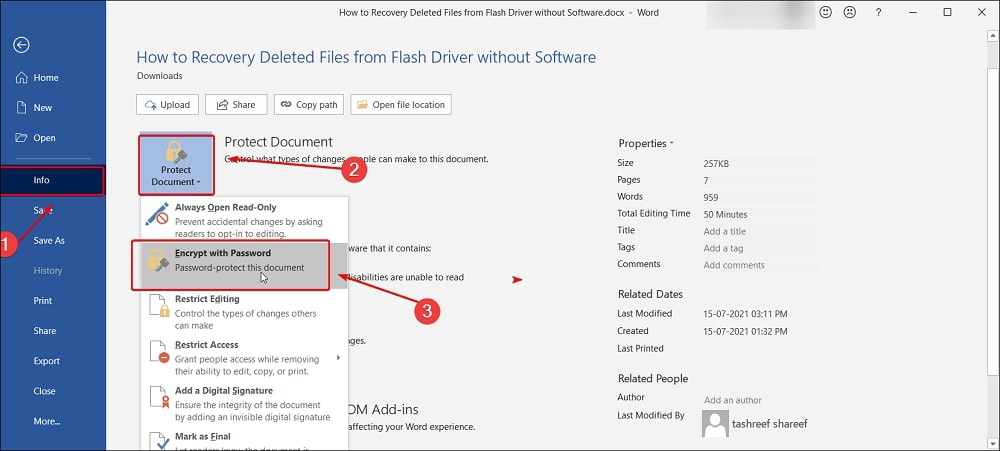
Step 3. To protect your Word document, click on the Protect Document button. Then, select the Encrypt with Password option.
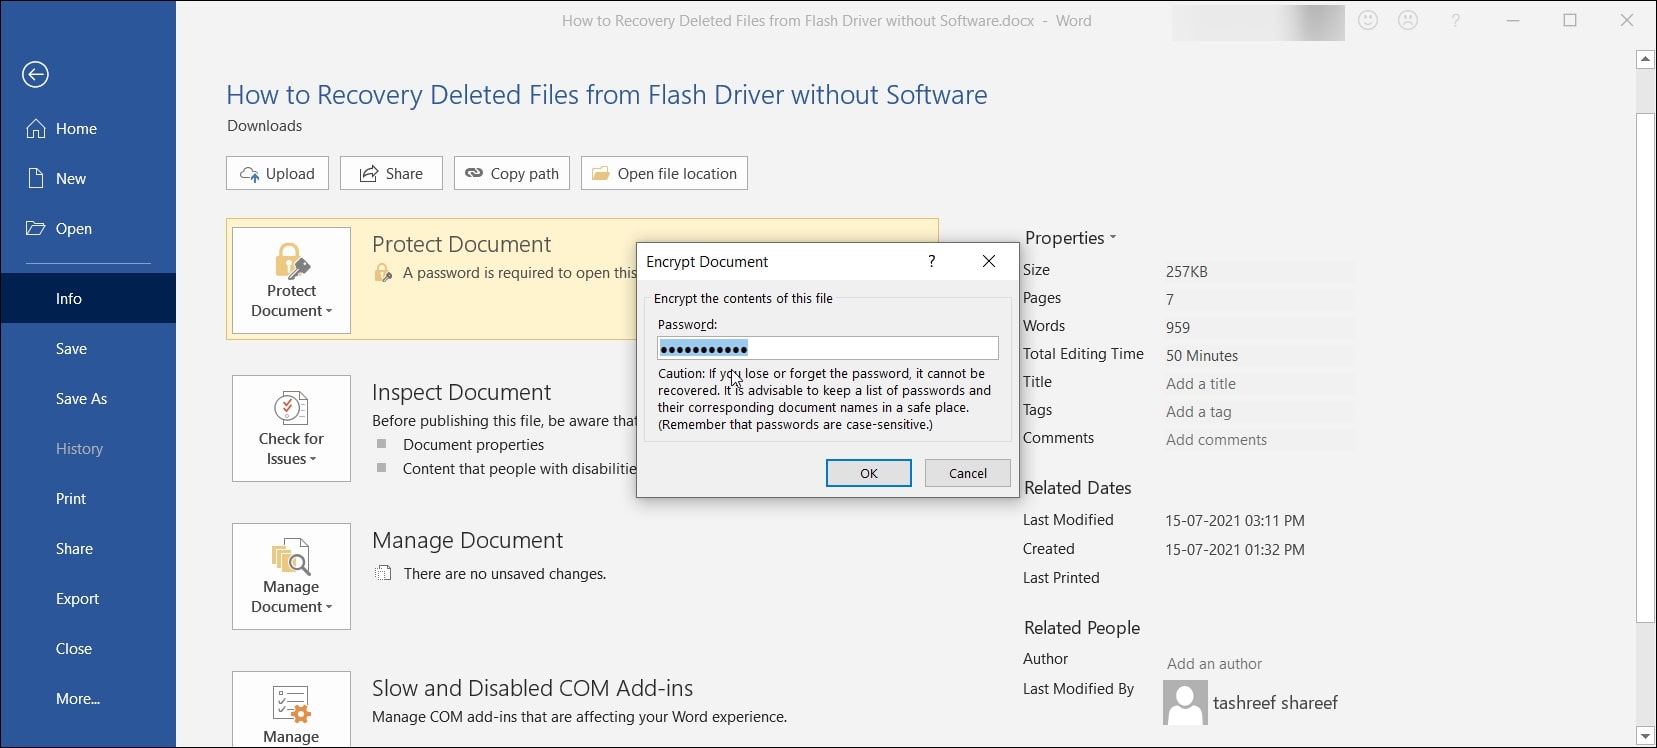
Step 4. In the Encrypt Document window that appears, enter the password. Make sure to enter a strong password that includes upper case, lower case, numbers and special characters. You can use online password generators to create a strong password.
Step 5. After entering your password, click OK. You will be asked to reenter the password to confirm and click OK.
That’s it. You have successfully password protected a Word document. In the Info tab for the protected document, Microsoft will indicate that a password is required to open this document.
So, next time you want to open this document, you will be prompted to enter your password to access the content.
Steps to Remove Password from Word Document
Adding a password to a Word document is easy enough. However, encrypting a document means the user will have to enter the password each time they access the file’s content.
Fortunately, Microsoft makes it easy to unlock your Word document using Word. Here’s how to unlock your Word document in a few easy steps.
Step 1. Open the Word document you want to lock in Microsoft Word.
Step 2. Click on File and then open the Info tab.
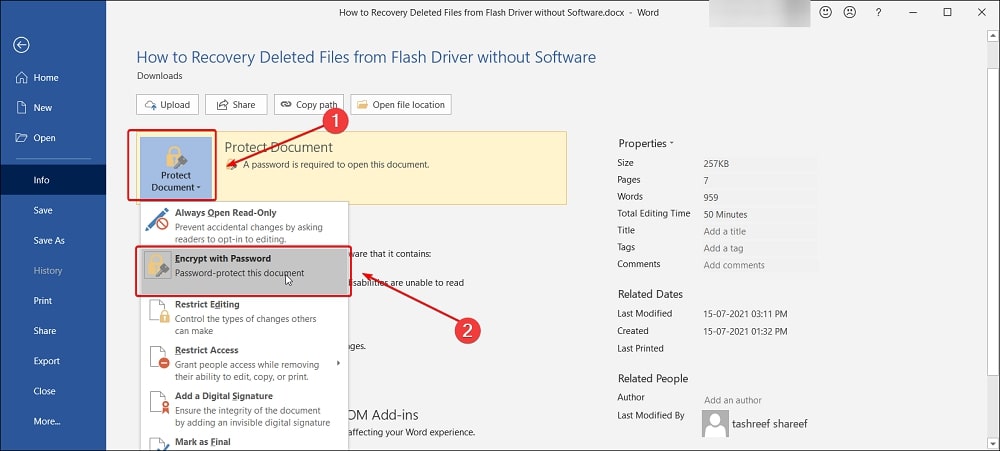
Step 3. Click the Protect Document option and select Encrypt with Password.
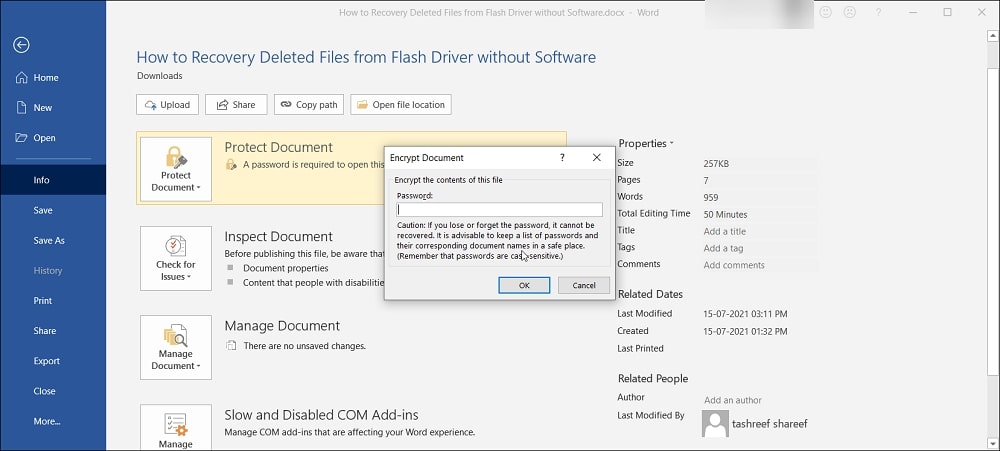
Step 4. When the Encrypt Document window appears, simply clear the password field. Once the password field is empty, click OK.
That’s it. Now the password is required message will disappear from the Info tab, and you will be able to access your Word file without the password.
Bonus Tip: How to Open A Locked Word Document without Password
To remove a password from a Word document from within, you need to know the password to unlock the document. But what if you have forgotten your Word document password?
This is where Word password recovery tools like PassFab for Word come in handy. PassFab for Word is a professional tool designed to unlock Word documents without a password.
It supports almost all the versions of Office, including 2019, 2017, 2016, 2013, 2010, 2007, 2003, XP, 2000 and 97 and both the *.doc and *.docx formats.
Here’s how you can open a locked Word document without a password in a few steps.
Step 1. Download PassFab for Word on your computer. Run the installer and follow on-screen instructions to complete the installation.
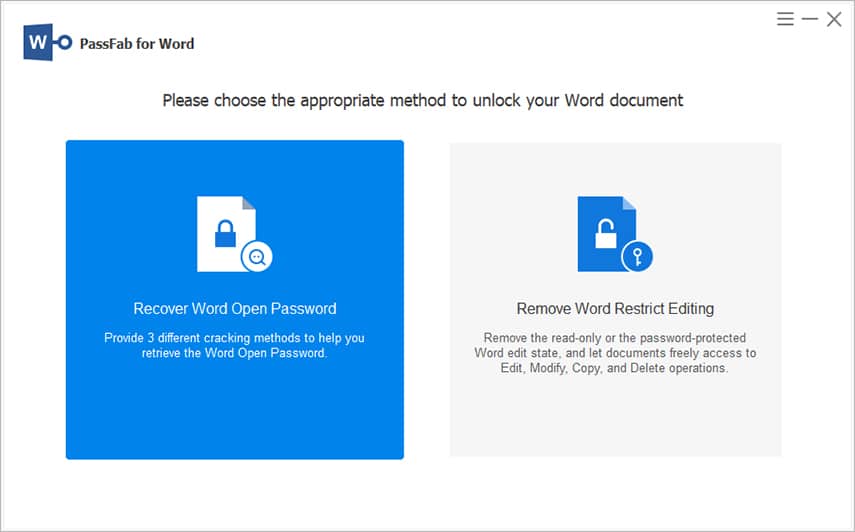
Step 2. Launch PassFab for Word and click on the Recover Word Open Password option. It offers another option — Remove Word Restrict Editing — but we will go with the recovery option for now.
Step 3. Click the Add button and select your password-protected Word document. Then, click Open to add it to the tool. PassFab for Word will show the current encryption status on your document.

Step 4. Select one of the Password Attack Mode. Three attack modes — Dictionary Attack, Brute Force with Mask and Brute Force Attack — offer different types of attack combinations.
Step 5. Click Start and wait for the process to complete. Depending on the complexity of the password, it may take anywhere from a few minutes to hours.
Once complete, it shows you the retrieved password. Now, you can use the password to unlock the Word document.
Frequently Asked Questions
How do I password protect a Word document on Mac?
To password protect a Word document on Mac:
- Launch the Word app and open the Review tab.
- Click on Protect Document.
- In the Security section, enter the password and repeat it to confirm.
- Click OK, encrypt the Word document in Mac.
How to make a Word document read-only?
You can make the Word document read-only before sending it to the viewer. To do this, open the Word document and then click on the Review tab. In the top-right corner, click on Restrict Editing in the Protect section.
Check the Allow only this type of editing in the comment box and select No changes (Read-only) from the drop-down under Editing restrictions. Next, click on Yes, Start Enforcing Protection and then enter a password.
Conclusion
Microsoft Office makes it easy to password protect Word documents without having to use a third-party tool. You can also use the Restrict Editing feature to make your document read-only. If you have forgotten your password, use the PassFab for Word tool to recover the password and gain access to your document.