Automatic login in Windows 10 is a great time-saver, but it makes your computer, its contents, and all the other connected networks vulnerable by anyone who can physically reach it.
If you favor security over convenience — it is more beneficial to disable the auto-login in Windows 10.
Read More: How to Automatically Sign in to Windows 10
Read on to learn how to remove the auto login in Windows 10.
Method 1. Disable Automatic Login on Windows 10 Using Netplwiz
Netplwiz.exe is an advanced User Accounts control panel that lets you perform any and all actions related to Users on the Network;
Follow these simple instructions to learn how to remove auto-login in Windows 10:
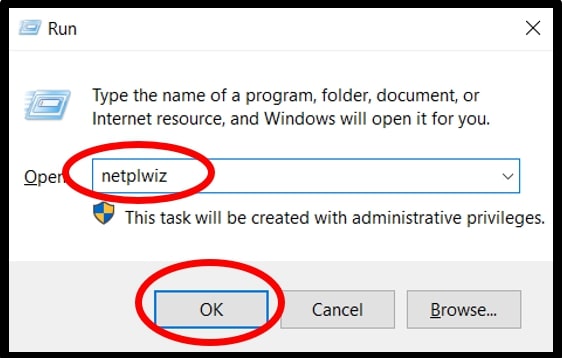
Step 1. Press Win +R (Windows logo plus R hotkeys) together to open the run command window.
In the run box, type in netplwiz and press Enter.
Step 2. Under the Users tab, select the preferred User Accounts.
Step 3. Check the box assigned to the “Users must enter a user name and password to use this computer” option.
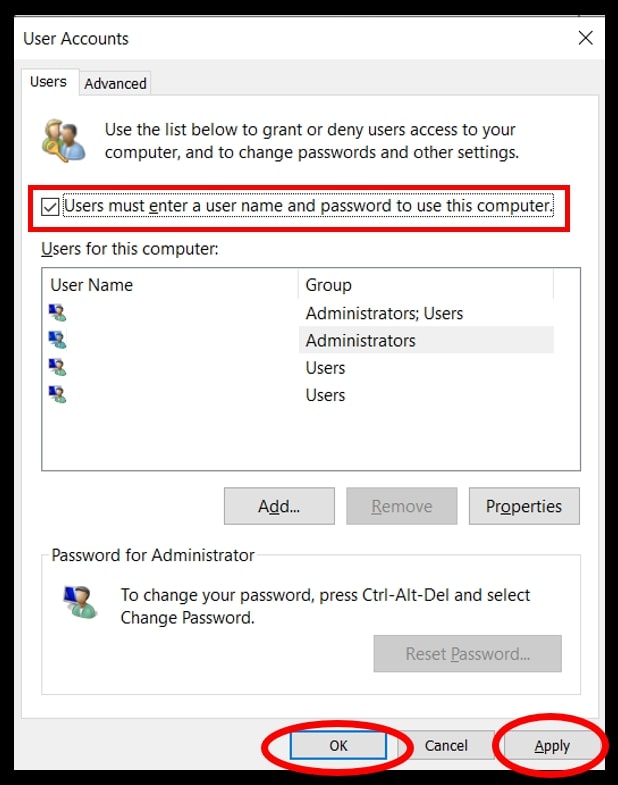
Click on Apply. Then click on OK to exit the User Accounts menu.
From now on, Windows 10 will ask you to enter the password every time you try to sign in to the computer.
Method 2. Remove Auto Login on Windows 10 Using Registry Editor
Registry Editor is a component of Windows holding a database of information and values concerning the hardware and software of the operating system. That is to say — it is a low-level system setting that lets you perform modifications to the kernel, Security Manager, device drivers, Users, services, etc., by changing the subkey.
Note: Be careful while entering and modifying the values, subkeys in the Registry Editor as it can cause irretrievable damage to the computer if misemployed. It is best to export or Backup the entire or specific registry key before you proceed to disable auto login in Windows 10 using it.
Follow these simple steps to learn how to disable automatic login in Windows 10 using the Registry Editor:
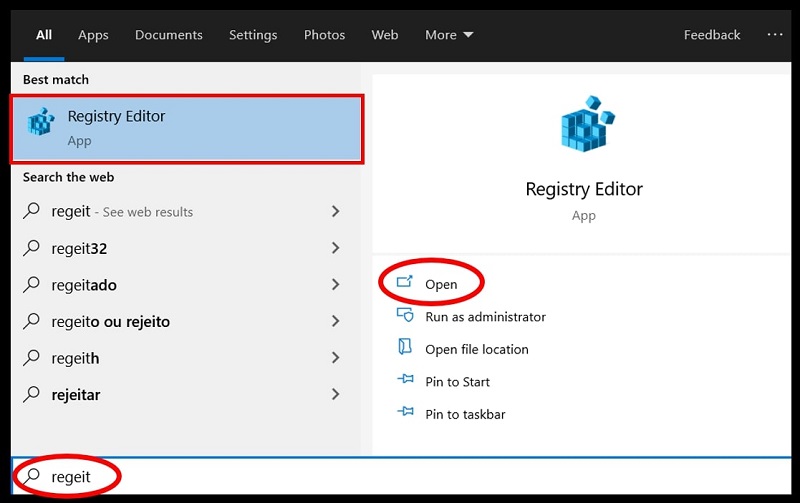
Step 1. In the Search bar, type in Registry Editor (or regedit) and click on Open.
Step 2. In the address bar, copy and paste to locate the following string:
HKEY_LOCAL_MACHINE\SOFTWARE\Microsoft\Windows NT\CurrentVersion\Winlogon
Step 3. Double click on the AutoAdminLogon option; initially, the value data will be 1.
Change the value data to 0. Then click on OK.
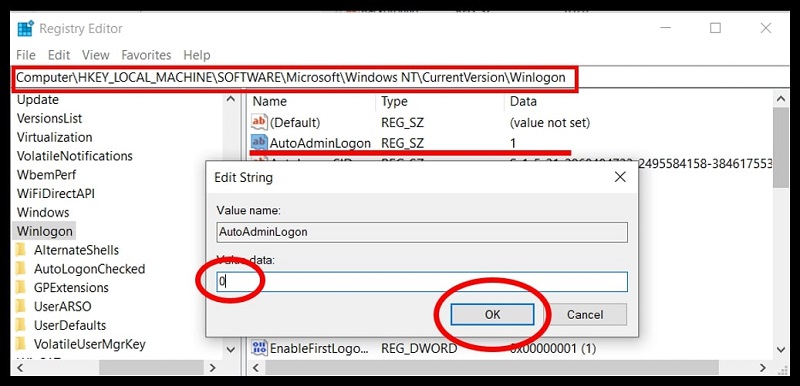
After modifying the value data, close the Registry Editor and Restart the computer. At the time of Restart, Windows will prompt you to enter the password at the sign-in screen from now on.
Method 3. Disable Auto Login on Windows 10 without Password
The above modifications work if you have a pre-set password.
Users looking — how to disable automatic login in Windows 10 accounts without a password, there isn’t a solution yet. Yes, several users are looking for a viable fix to counter this issue (in Windows 10), but Microsoft has not acknowledged any requests. This notable concern does not only persists in Windows 10 but also in the earlier versions of Windows.
Nonetheless, for now, you will have to set a password (and follow the above steps) to disable auto login in Windows 10.
Note: Hacks like Closing all the applications before shutting off and shutting down from the lock screen do not work.
Moreover, do not rely on third-party apps that promise to solve auto-login by using ready-to-use scripts — these do not work (for everyone) and could even harm the OS.
Follow these simple instructions to learn how to remove auto login in Windows 10, i.e., adding a password to disable the automatic login:
Step 1. Press Win+I (Windows logo plus I hotkeys) to open the Settings.
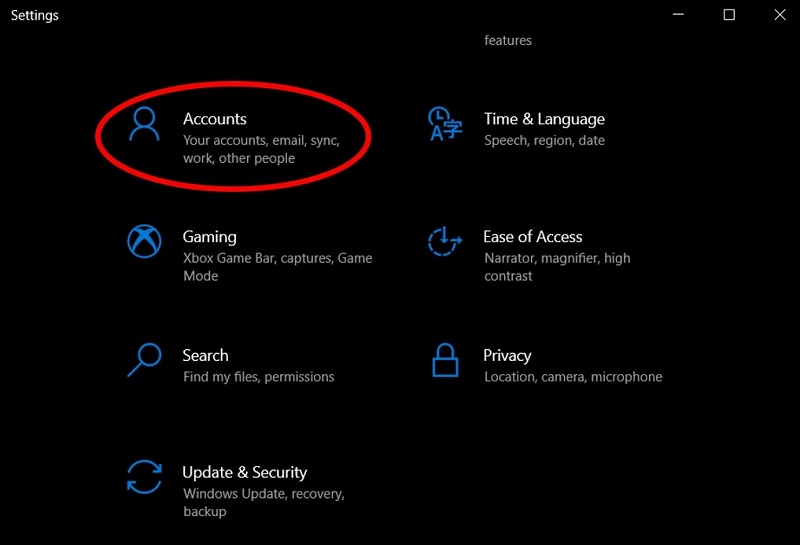
Step 2. Select Accounts.
Step 3. On the left pane, select the Sign-in options.
Step 4. On the right pane, select the Password option and click on Add button.

Note: On the newer versions of Windows 10 — if you want to go password less and only use the Windows Hello {options}:
- Enable the Passwordless toggle.
- Set up the Windows Hello password of your choice.
And Skip Step 5; however, it is critical that you follow Step 6 and Step 7 mentioned below.
Step 5. On the new tab, enter a password of your choice in the first box. In the second, type in the same password to confirm, and in the third box — enter a password hint.
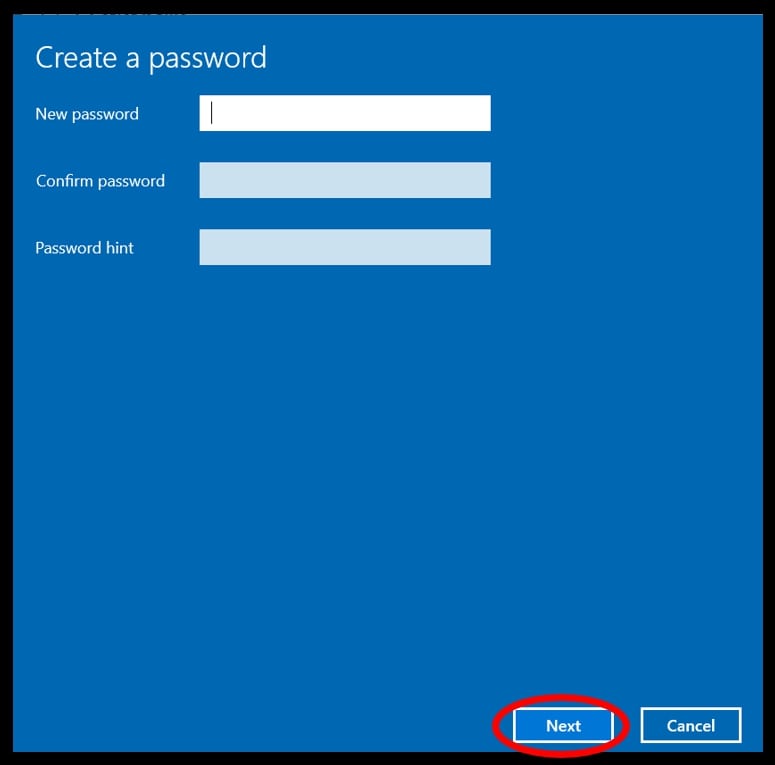
Click on Next.
On the next screen, click on Finish.
Wait! There is more to do.
Follow the subsequent steps on Windows 10 to disable auto-login without a password.
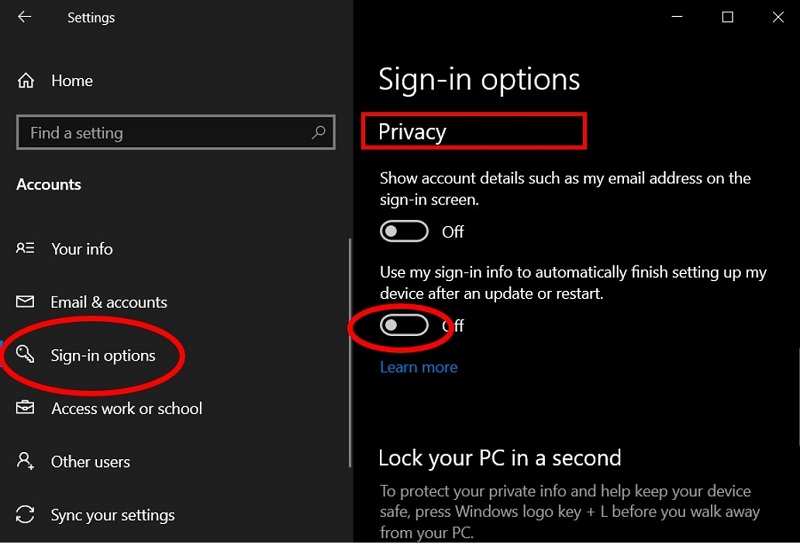
Step 6. Navigate back to the Sign-in option in the Account under the Settings tab.
Step 7. Scroll down to the Privacy options and turn off the toggle next to the second option, i.e., Use my sign-in info to automatically finish setting up after update or restart.
Alternatively, you can also use the above methods to remove the auto-login on Windows 10.
Note: Settings is a convenient way to set (or modify) an individual account, but there are also other ways to change the Windows 10 password. If there are multiple users on the PC, it is more beneficial to use Control Panel (from the admin account) and set up the password from one place.
Conclusion
Follow any of the above methods and remove the auto-login on Windows 10 successfully.
Again, the most straightforward method to disable the auto-login on Windows 10 is attainable via the netplwiz.
Still, if you need an alternative, this guide also servers that request and shows you how to disable auto login in Windows 10 using the registry editor (in Method 2). But do not forget to back up the registry editor before you proceed with the steps mentioned.
You might have felt deceived discerning Method 3, i.e., disable auto-login without a password, but for now, it is the only solution to that obstacle.