A user profile is necessary to sign in to a Windows computer. It’s created when you install the operating system and log in to the administrator account on your PC for the first time. Settings that are stored in a user profile are unique to that particular user. This means that any change in settings will not impact other user accounts on the computer. So, you can use user profiles to access your PC without risking your data stored on the primary administrator account.
Many Windows 10 users tend to use multiple user profiles on their computers just for the same purpose. If you have multiple user profiles stored on your system or you created one temporarily for someone else, you may want to delete the user profile once it has served its purpose. Well, in that case, we’re glad to let you know that it’s pretty easy to remove user profiles in Windows 10. Here, we’ll be looking at two different methods to get this done. So, without further ado, let’s learn how to delete a user profile in Windows 10.
Method 1. Delete User Profile in Windows 10 from Advanced System Properties
This might be the easiest and most preferred way to delete a user profile in Windows 10 since it doesn’t require you to mess with your system’s registry files. The Advanced System Properties in Windows 10 allows you to manage your user profiles and configure settings for system startup, system failure, and performance. Here’s what you need to do to remove a user profile on Windows 10:
Step 1. You’ll need to first head over to the About section of your System Settings. This can be done by using the Windows search bar. Type “About Your PC” and click on the first result that you see.

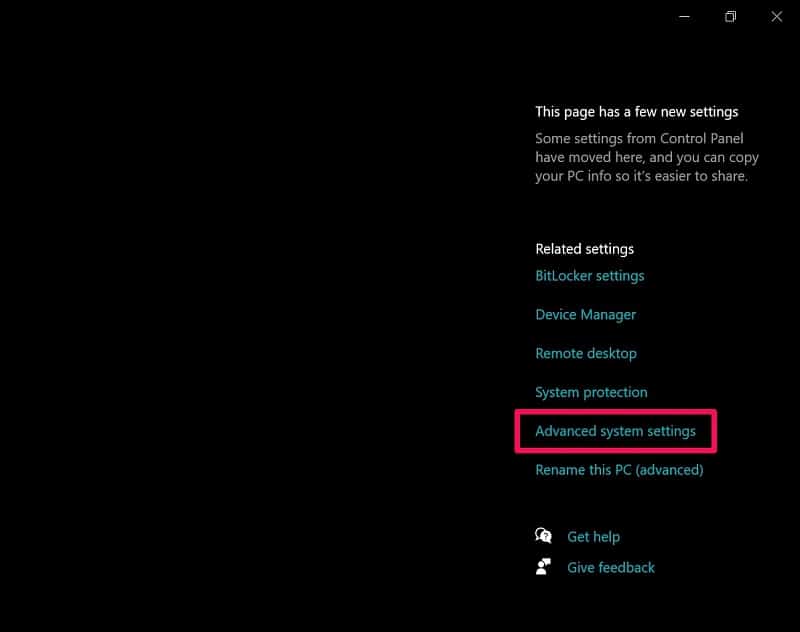
Step 2. When you’re in the About section, you’ll see the ‘Advanced System Settings’ option below Related Settings on the right side of the menu. Click on it to proceed.
Step 3. Doing this will open a new properties window on your screen. You’ll be in the Advanced section of the System Properties. Here, click on ‘Settings’ for User Profiles.

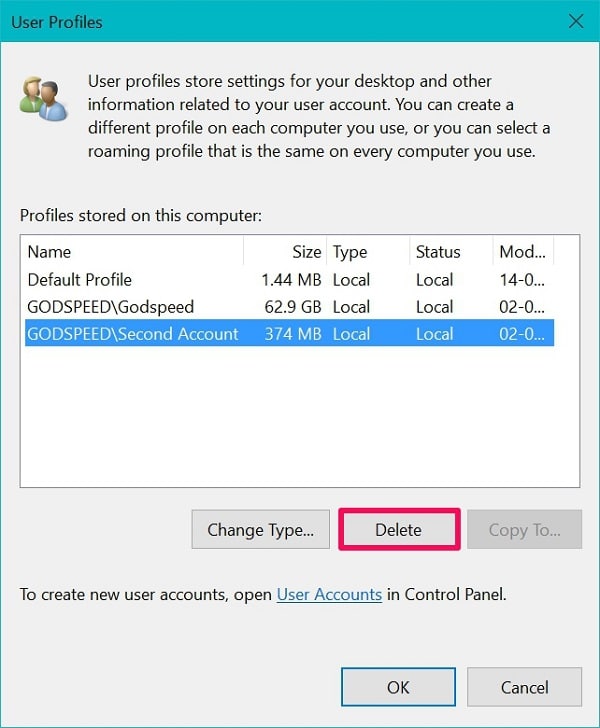
Step 4. Now, you’ll be able to see a list of all the user profiles that are stored on your Windows 10 computer. Select the user profile that you want to remove and click on ‘Delete’ to continue.
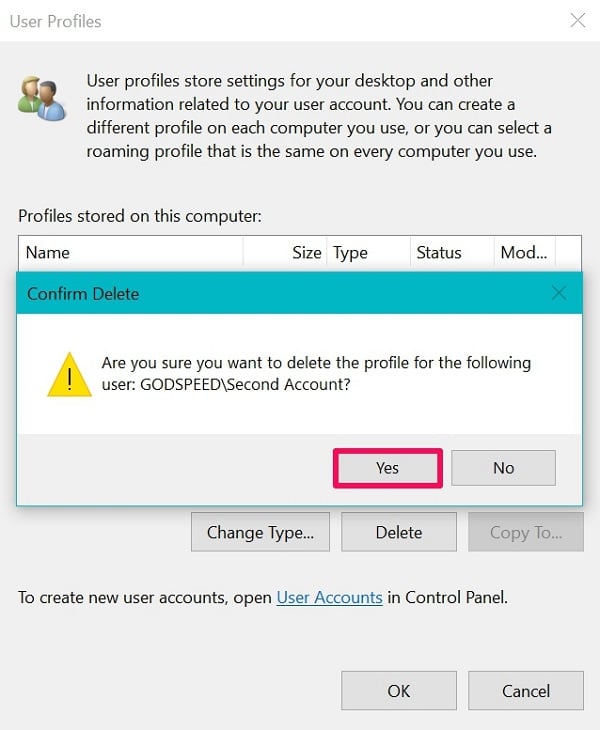
Step 5. You’ll now be prompted for confirmation. Just click on ‘Yes’ to confirm the deletion of the user profile, and you’re good to go.
That’s all you have to do. You will no longer find this user profile for selection when you’re on the Windows login screen again.
In some cases, the Delete option may be grayed out. If this is something you’re currently facing, you may be currently logged into the user profile you’re trying to remove. To complete these steps, you’ll need to log in to another administrator account on your computer.
Method 2. Remove User Profile in Windows 10 Using Registry Editor
Moving on to the slightly more complicated method, we’ll take a look at how you can use the Registry Editor to delete user profile in Windows 10. Of course, we’ll be messing with your system’s registry files here, but we’ll keep it as simple as we possibly can. So, without further ado, let’s check out the necessary steps:
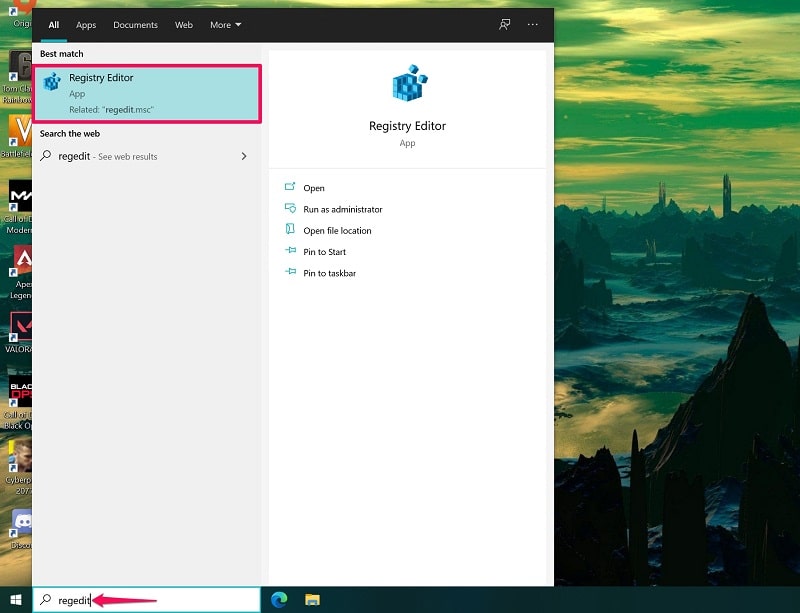
Step 1. First, type ‘Regedit’ in the search field located in your Windows taskbar. You’ll find Registry Editor in the results. Click on it to continue.
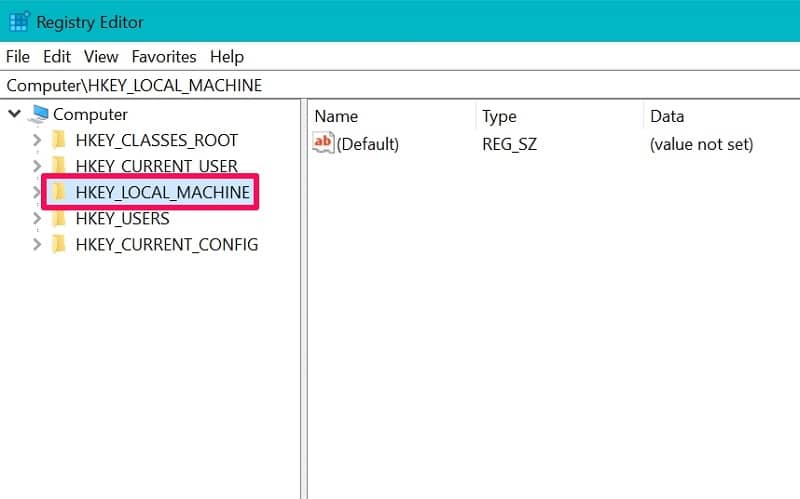
Step 2. Once you launch Registry Editor, take a close look at the left pane and double-click on the HKEY_LOCAL_MACHINE folder to expand it.
Step 3. Now, you can repeat these steps to expand subsequent folders from the left pane until you head over to the following directory. Or, copy-paste it in the directory field as shown in the screenshot below.
HKEY_LOCAL_MACHINE\SOFTWARE\Microsoft\Windows NT\CurrentVersion\ProfileList
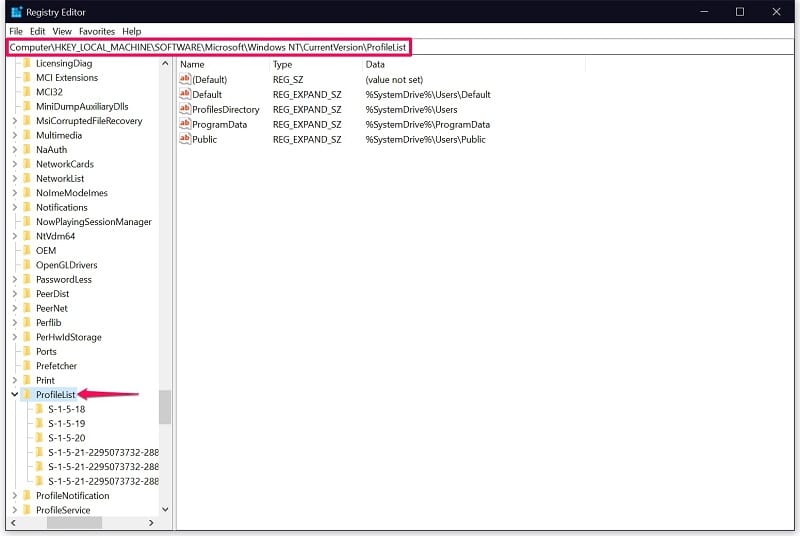
Step 4. Here, you’ll find all the user profiles stored on your computer indicated as random sub-folders under ProfileList. To find the actual name of the user profile that you wish to remove, you’ll need to select all these folders individually and look at the ‘ProfileImagePath’ from the right pane. Once you’ve found it, right-click on the respective folder under the ProfileList and choose ‘Delete’ from the context menu.
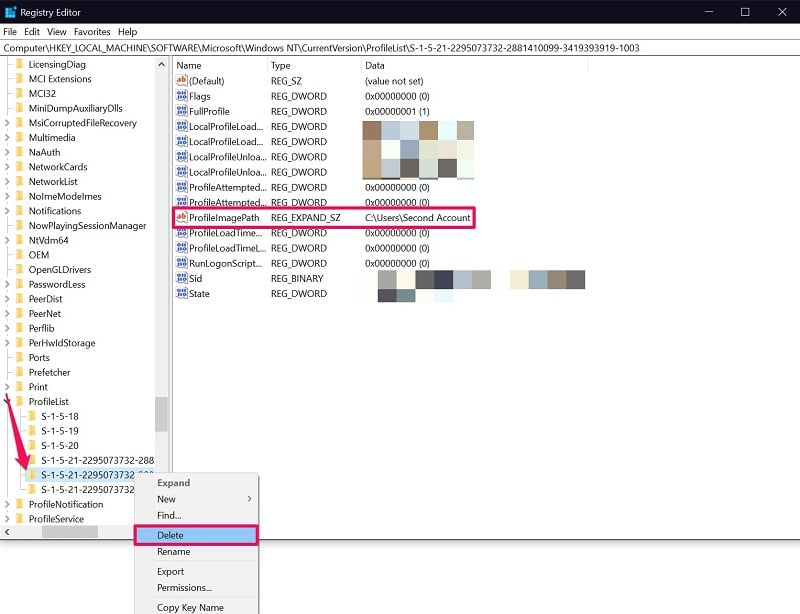
Step 5. Now, you’ll get a dialog box prompting for confirmation. Just click on ‘Yes’ to confirm and delete the user profile in Windows 10.

You’re pretty much done at this point. Now, you know not one but two different ways to remove user profiles in Windows 10.
Bottomline
Now that you know what you need to do to delete user profiles in Windows 10, it’s also important to educate yourself about what removing user profiles in a Windows PC exactly does. Well, it gets rid of all files associated with that user. To be more specific, everything stored in the C:\Users\”USERNAME” directory will be removed when you delete a user profile, including Desktop and Downloads, AppData, Temp, and other folders. Therefore, if you’d like to keep any important files stored in a user profile, we suggest you make a backup.
Although we’ve covered two methods here, most regular users would rather use the first method to remove user profiles in Windows 10 since the second technique is typically aimed towards advanced users. So, which of these two methods did you use to delete user profile on your computer? Do you know any quicker ways to remove Windows user profiles? If so, feel free to share your knowledge in the comments section down below.